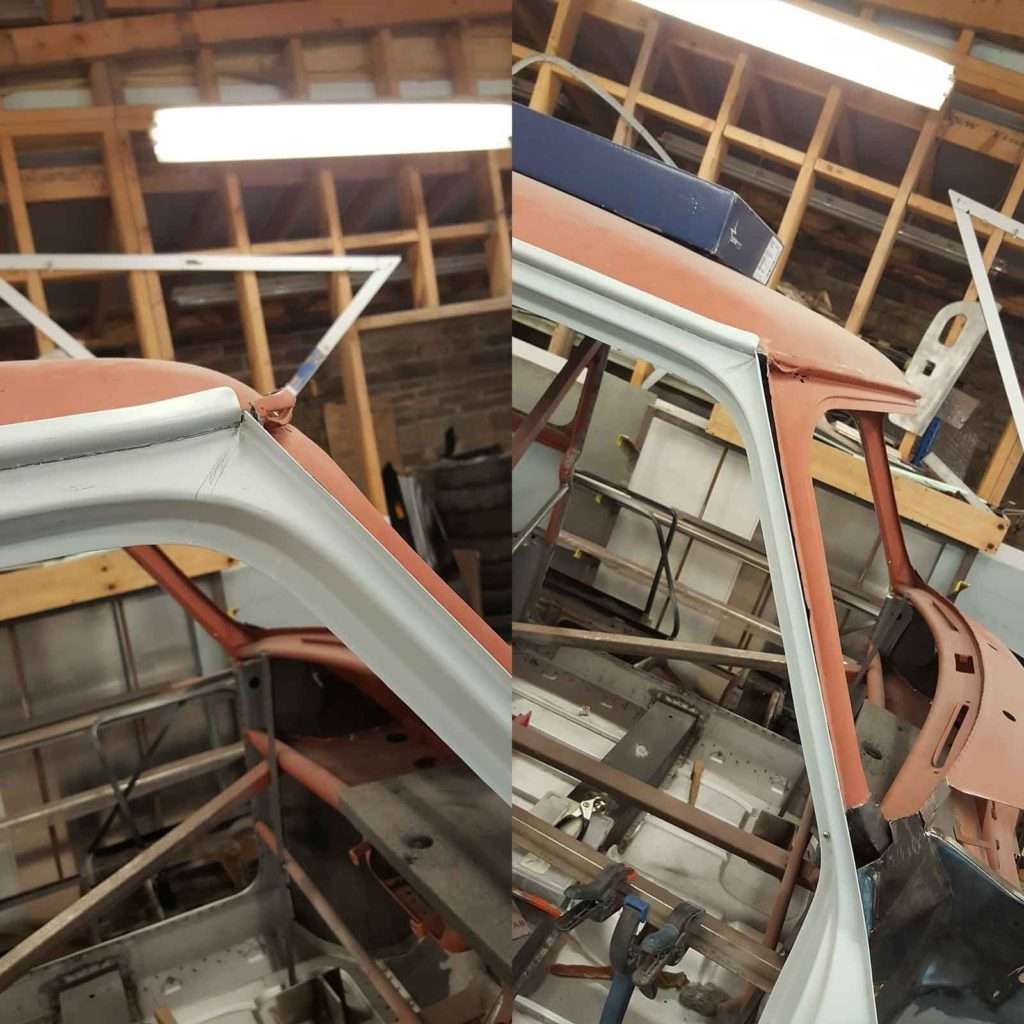
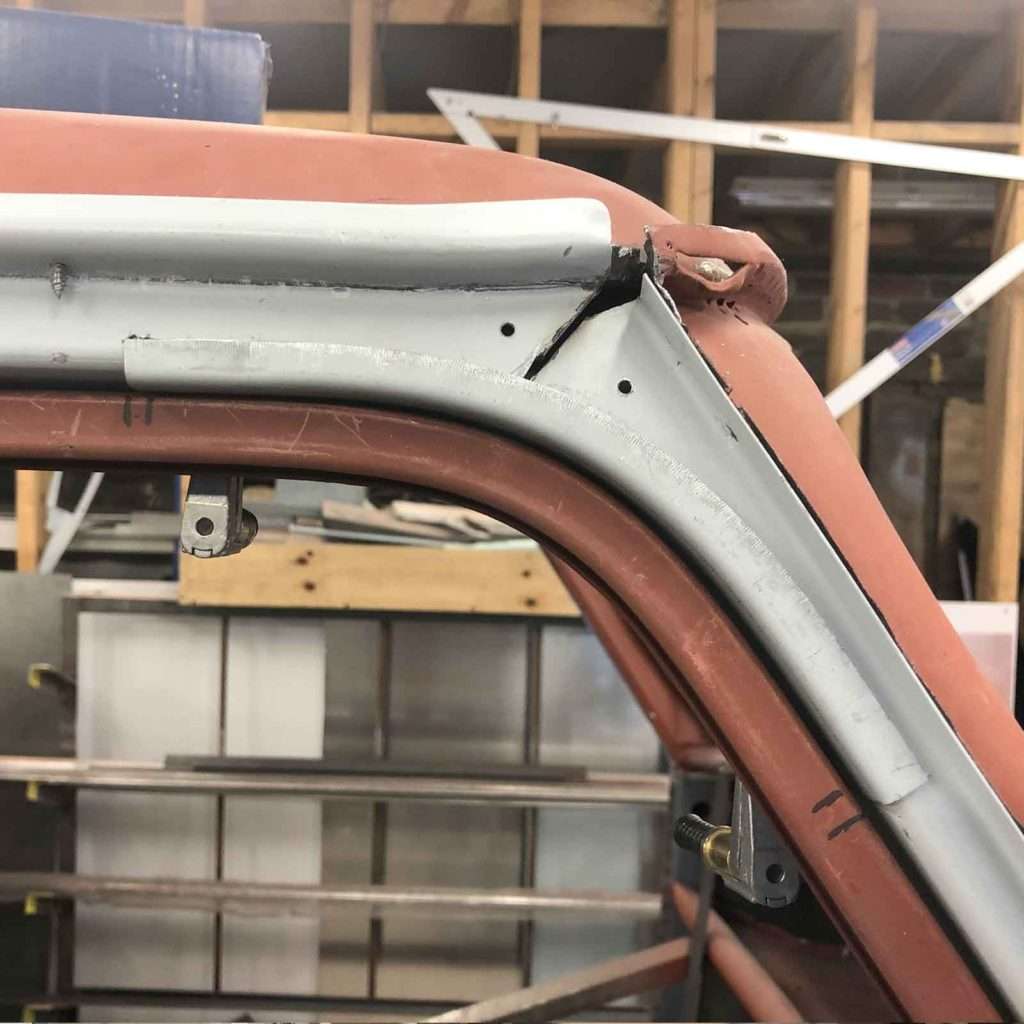
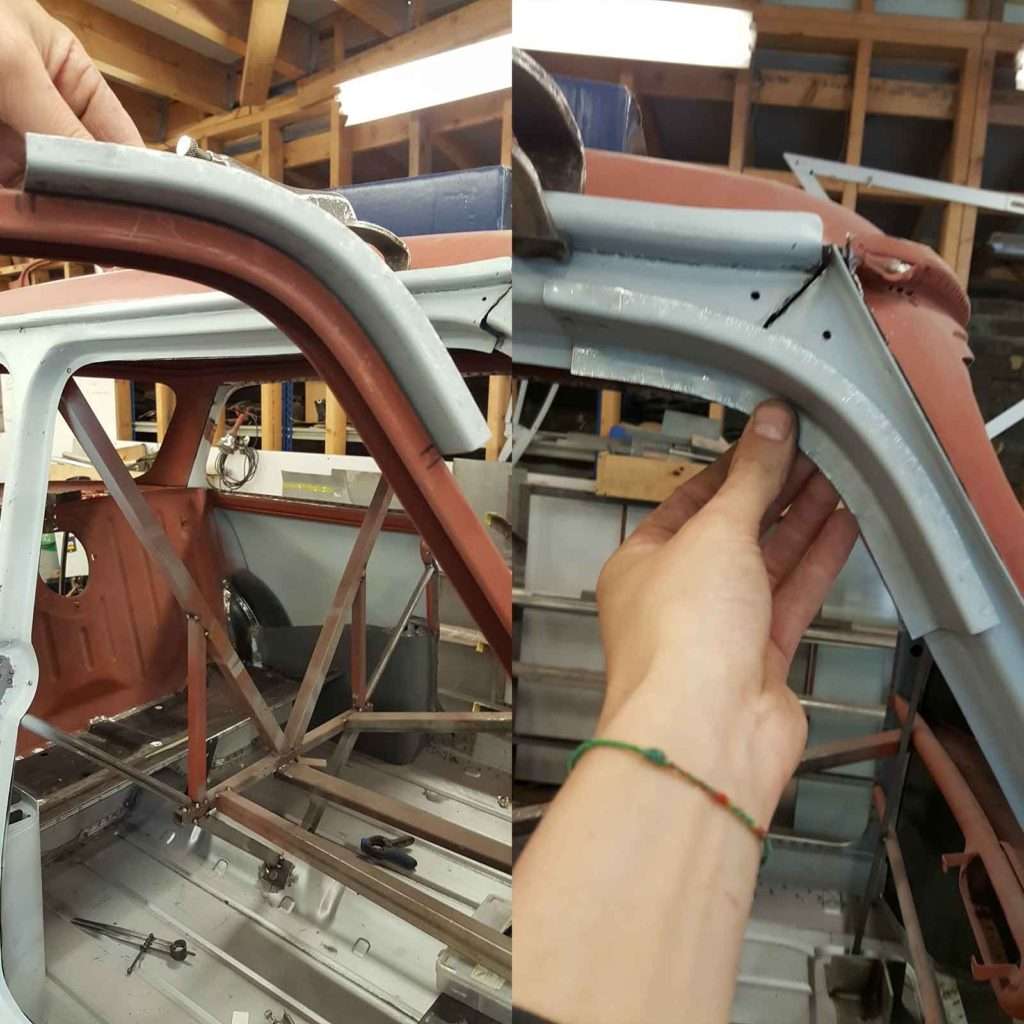
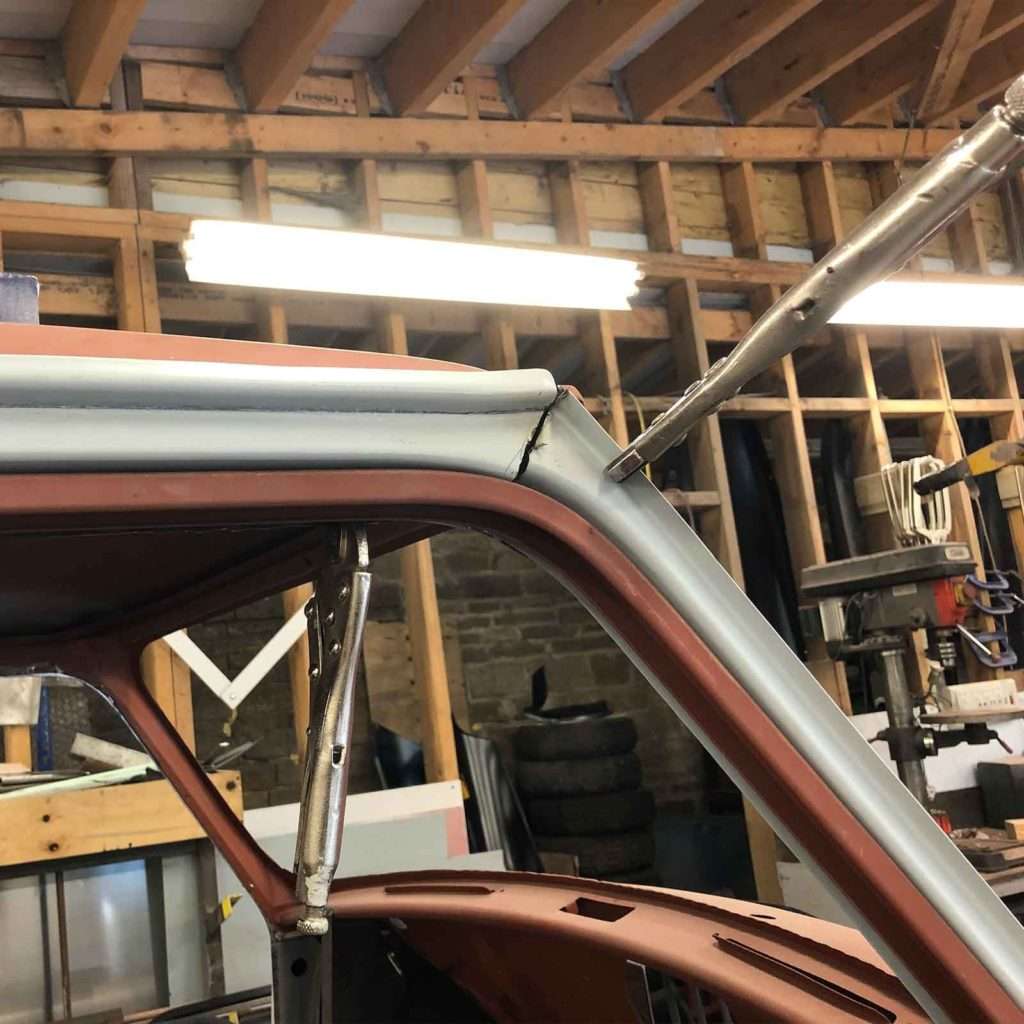
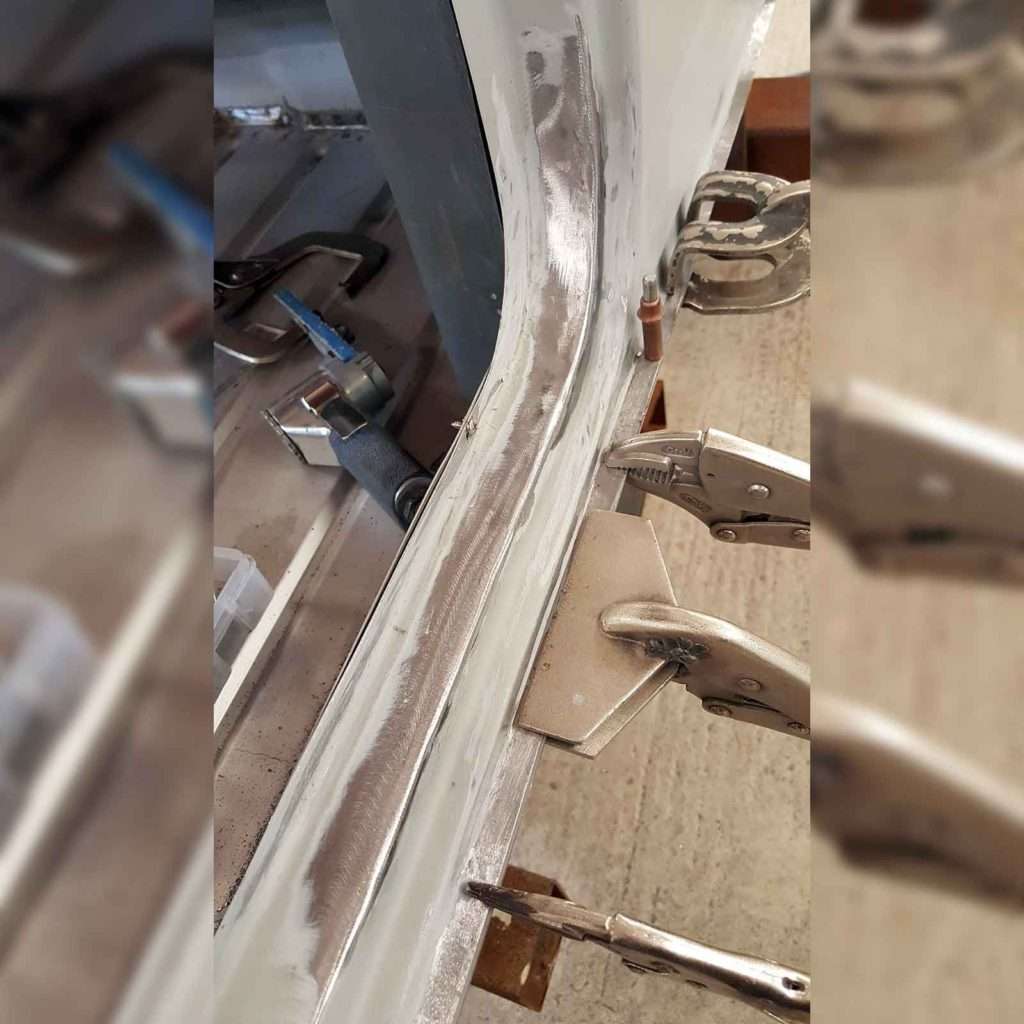
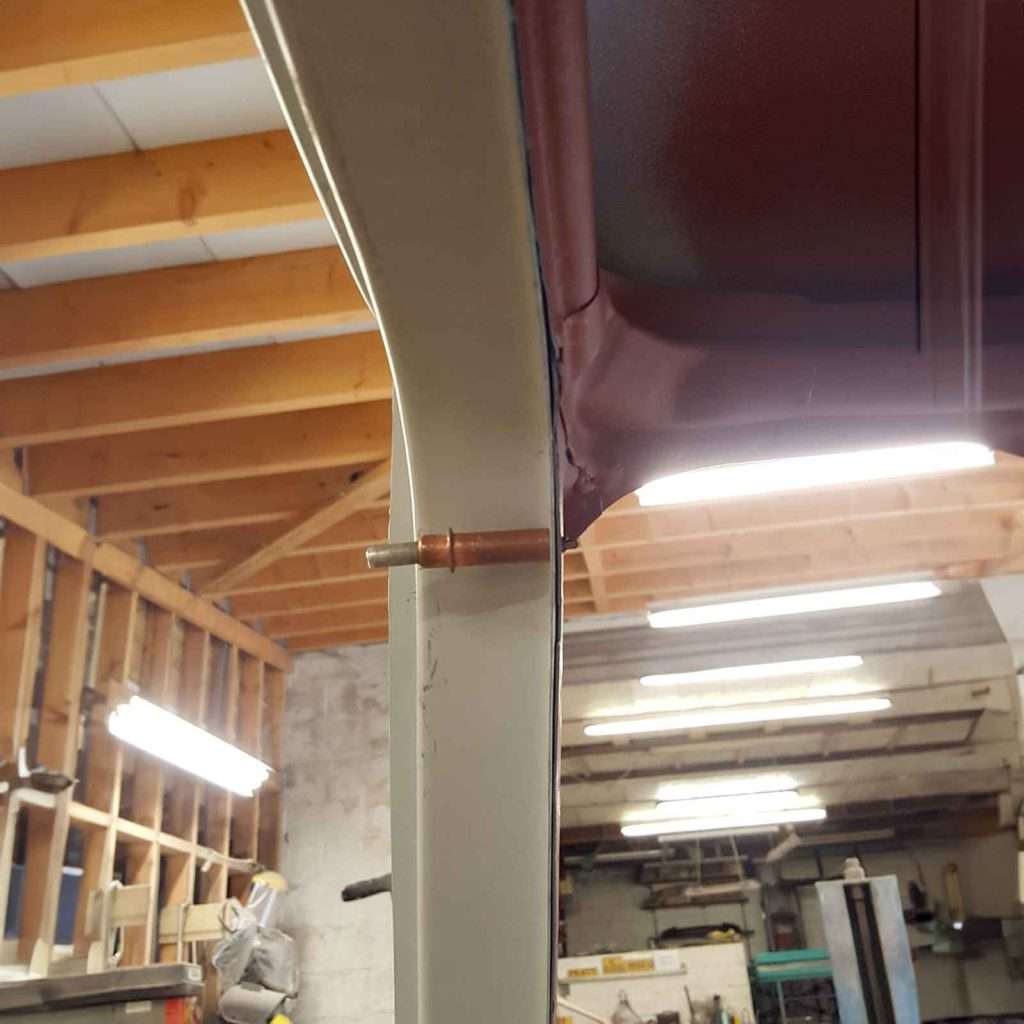
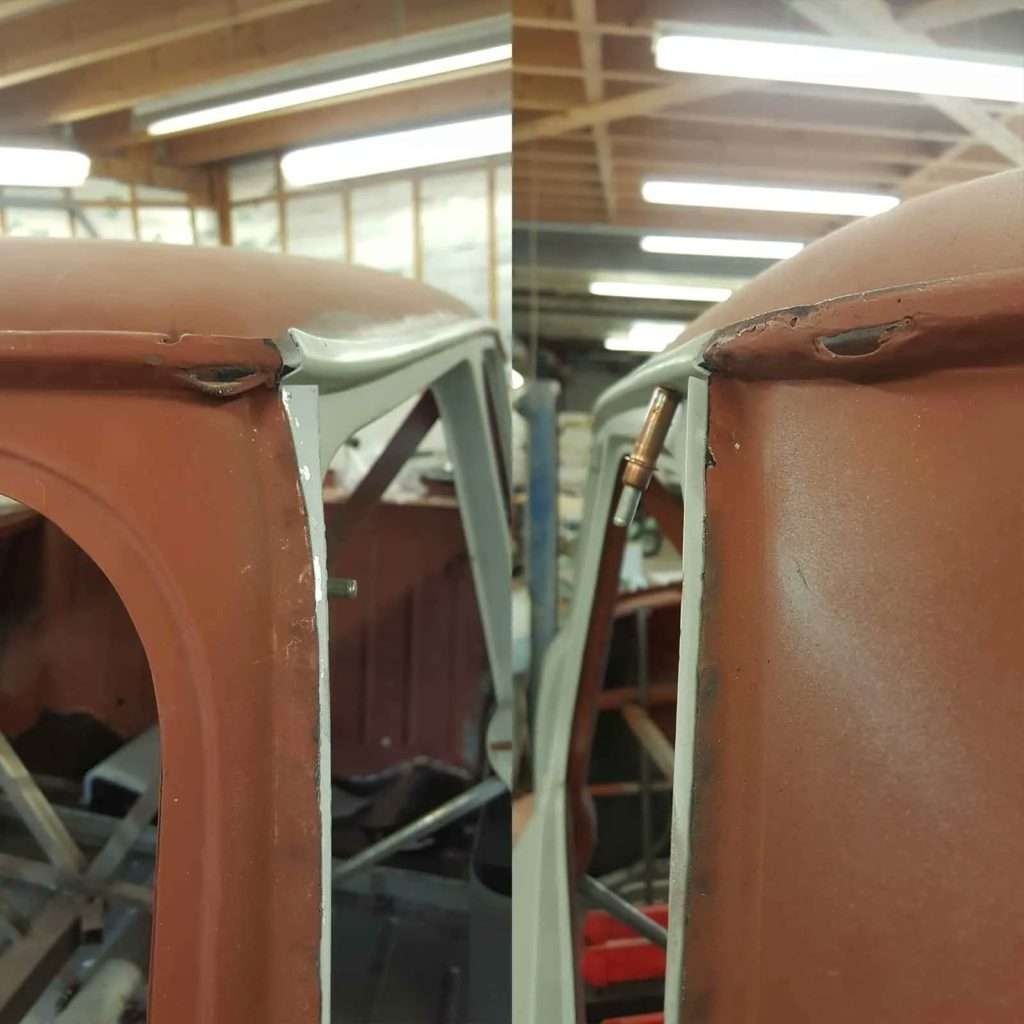
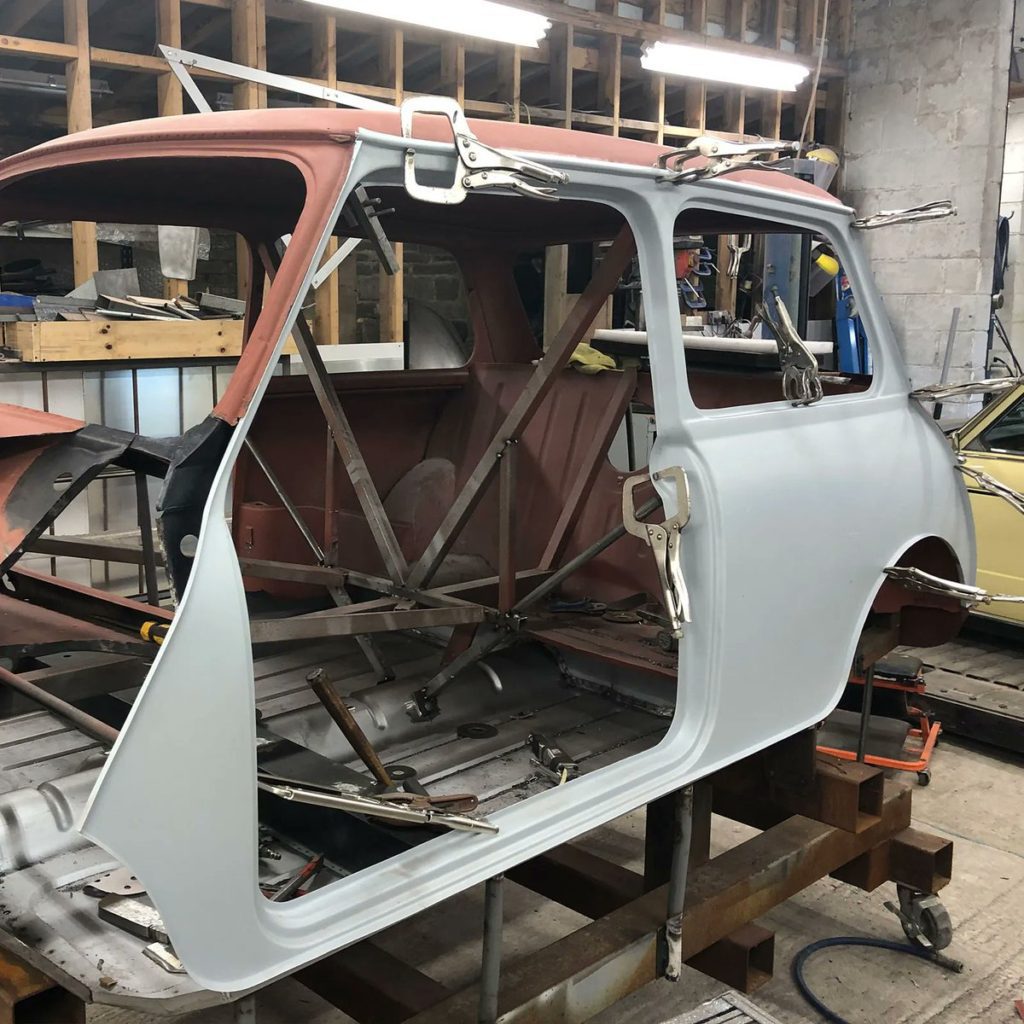
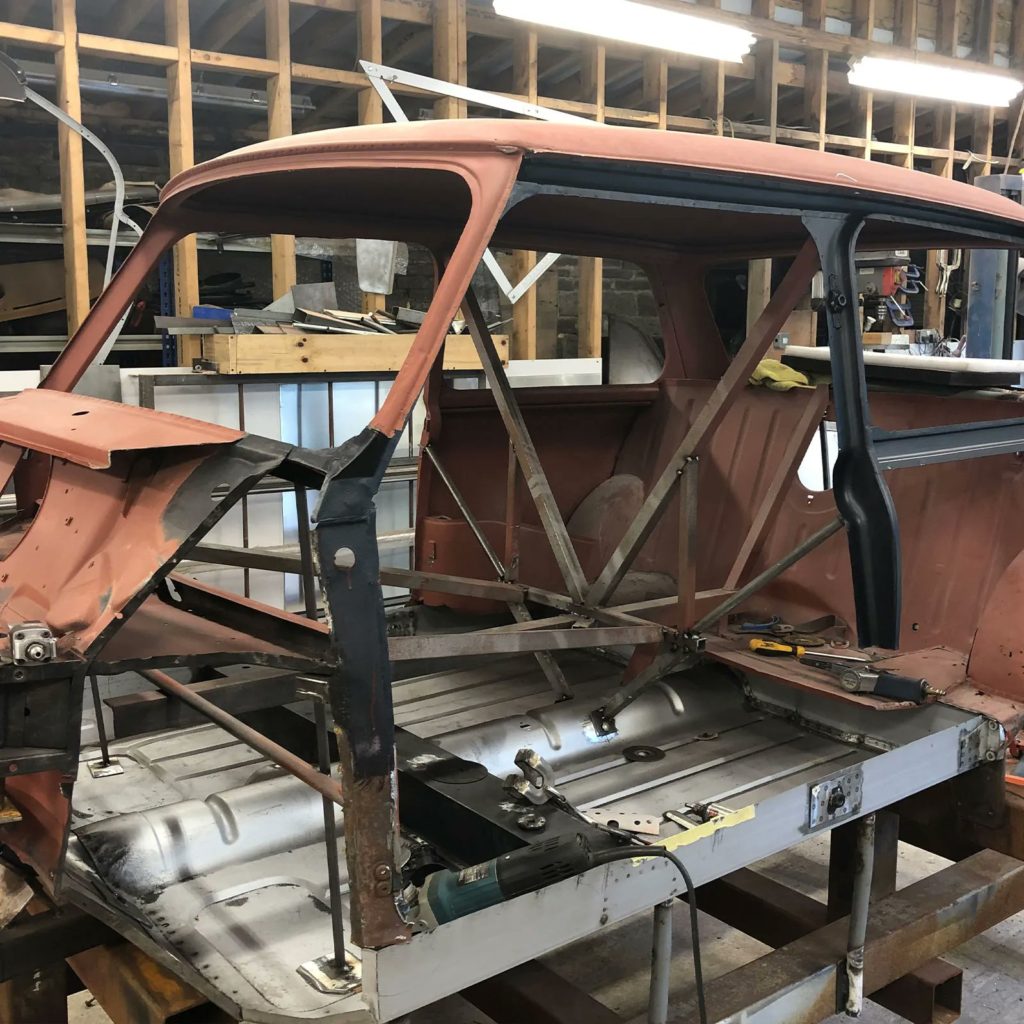
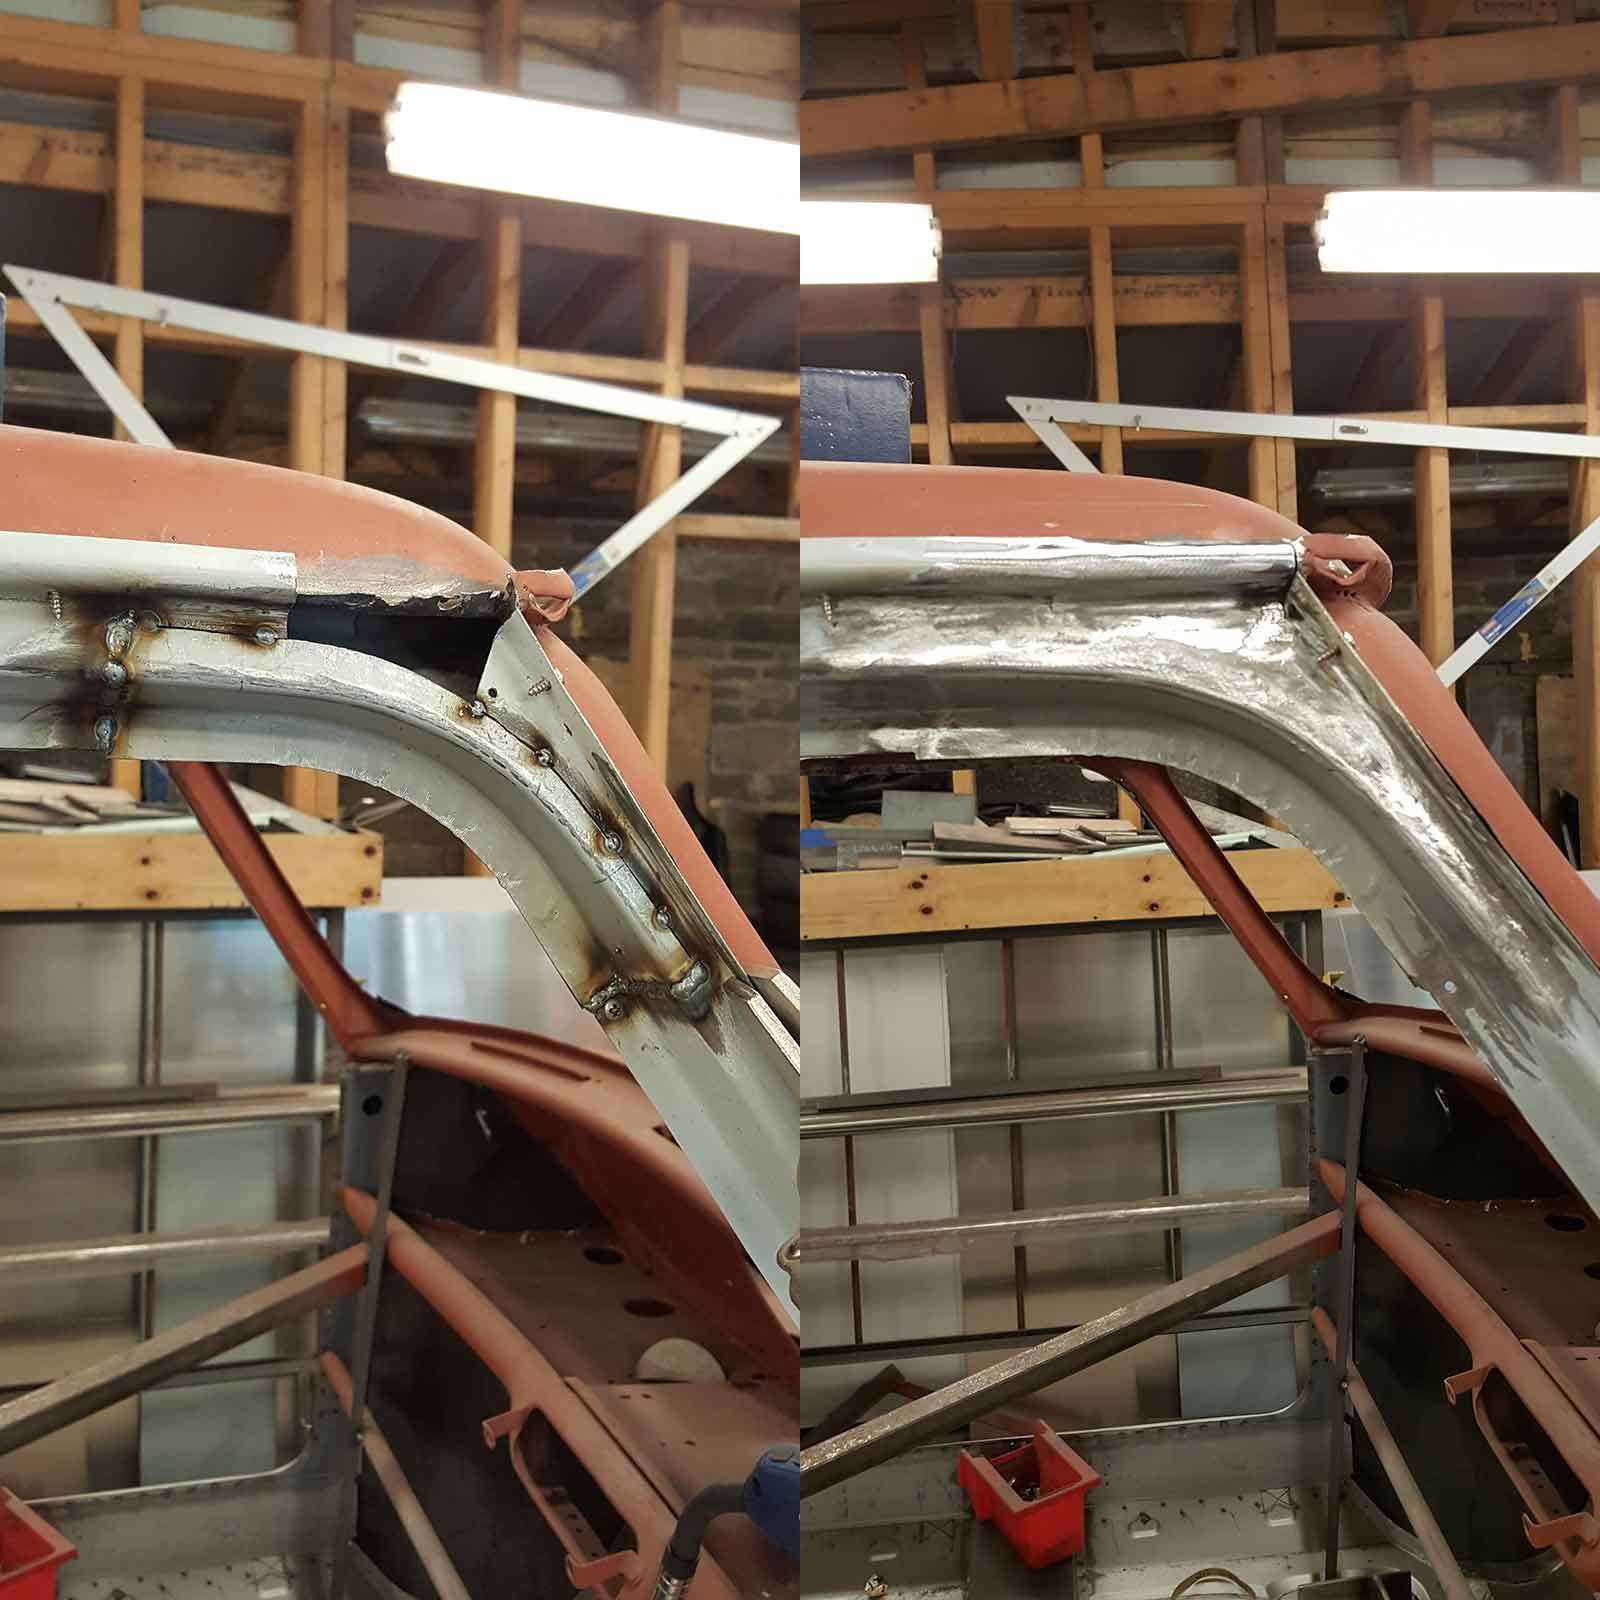
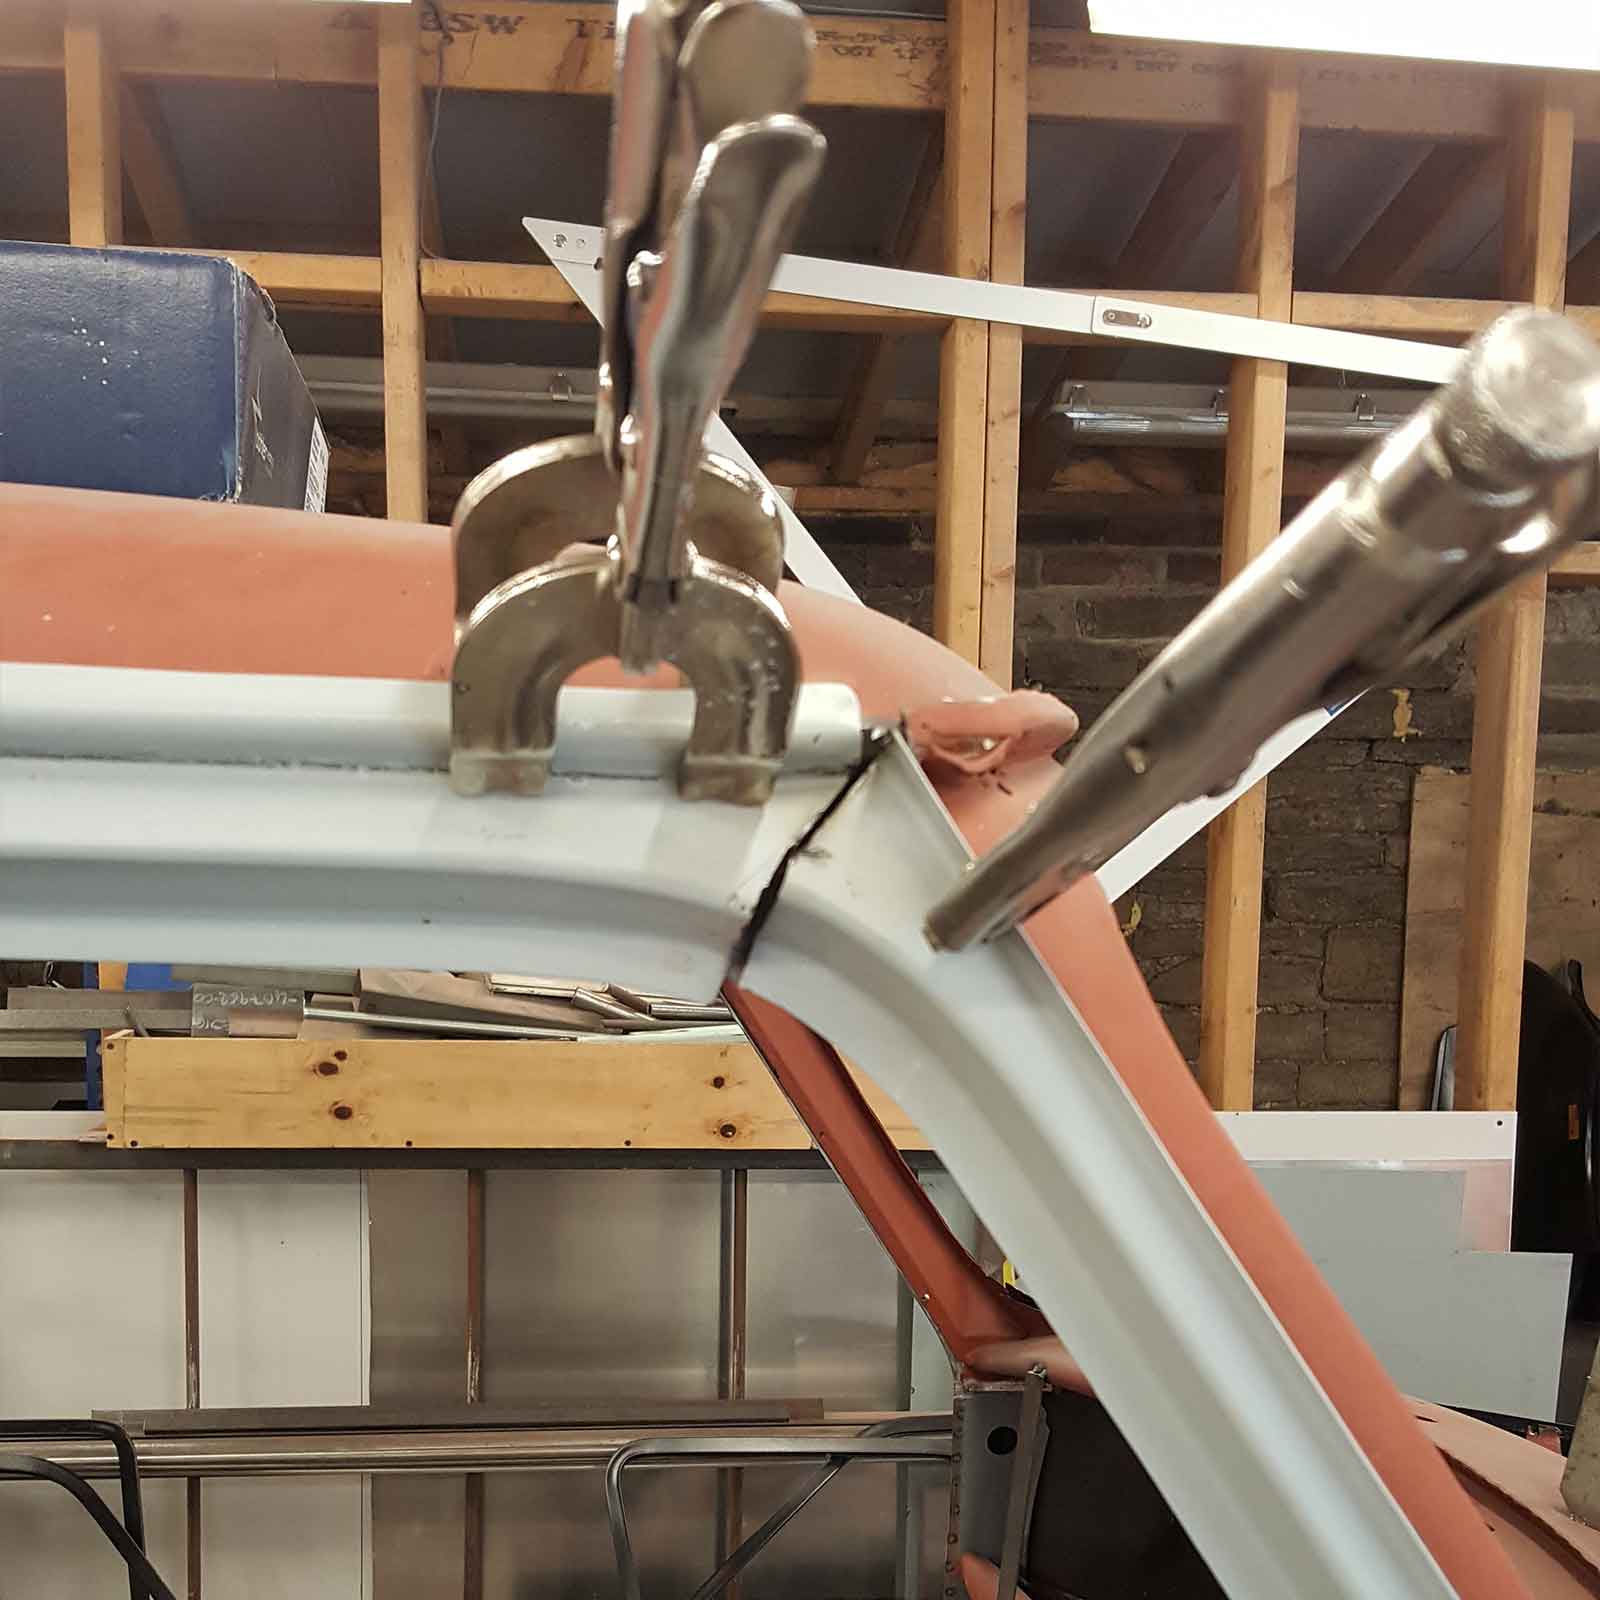
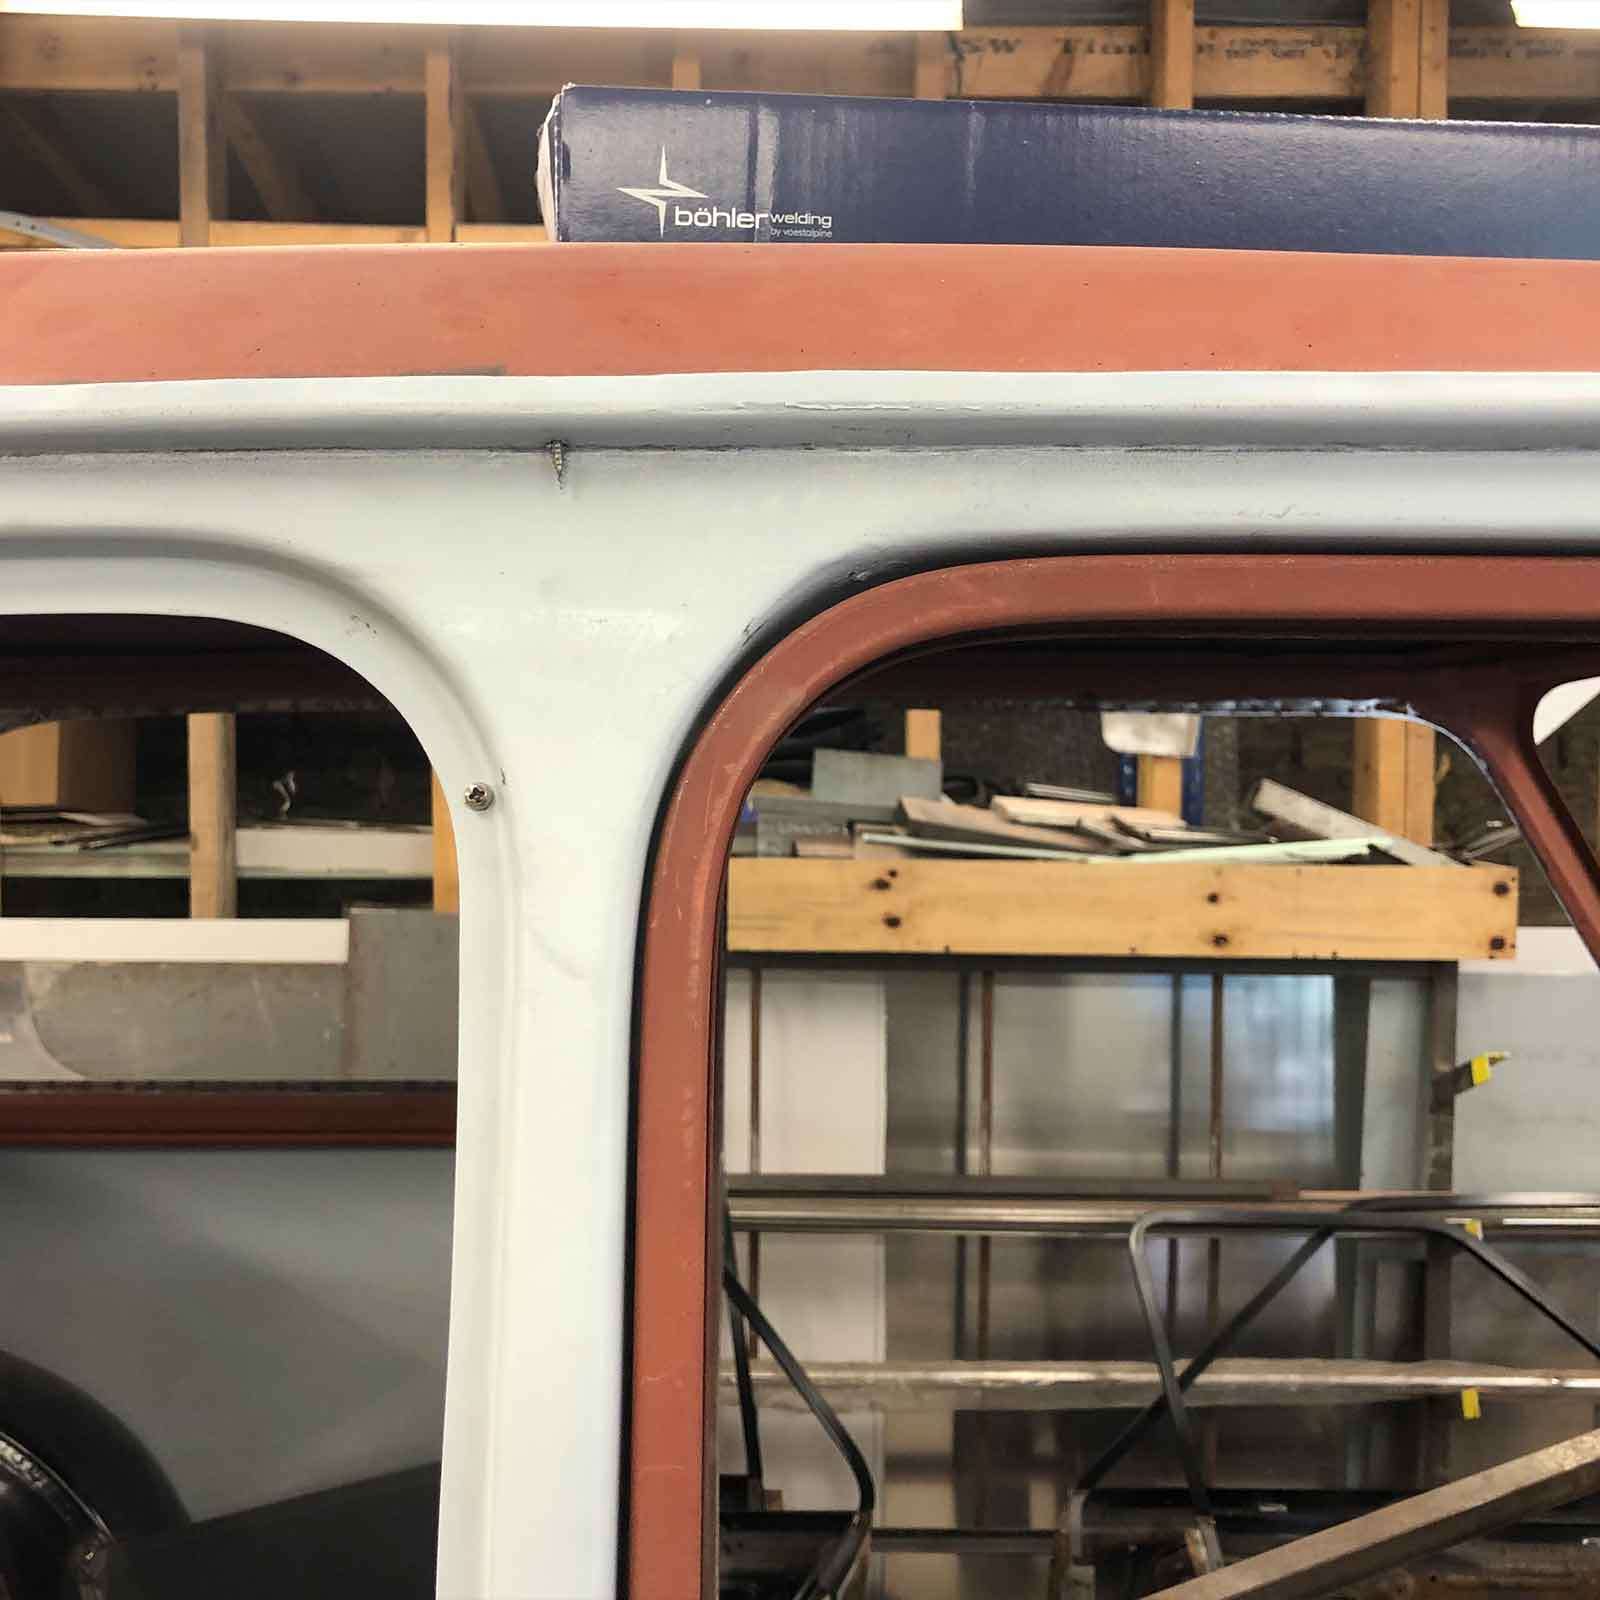
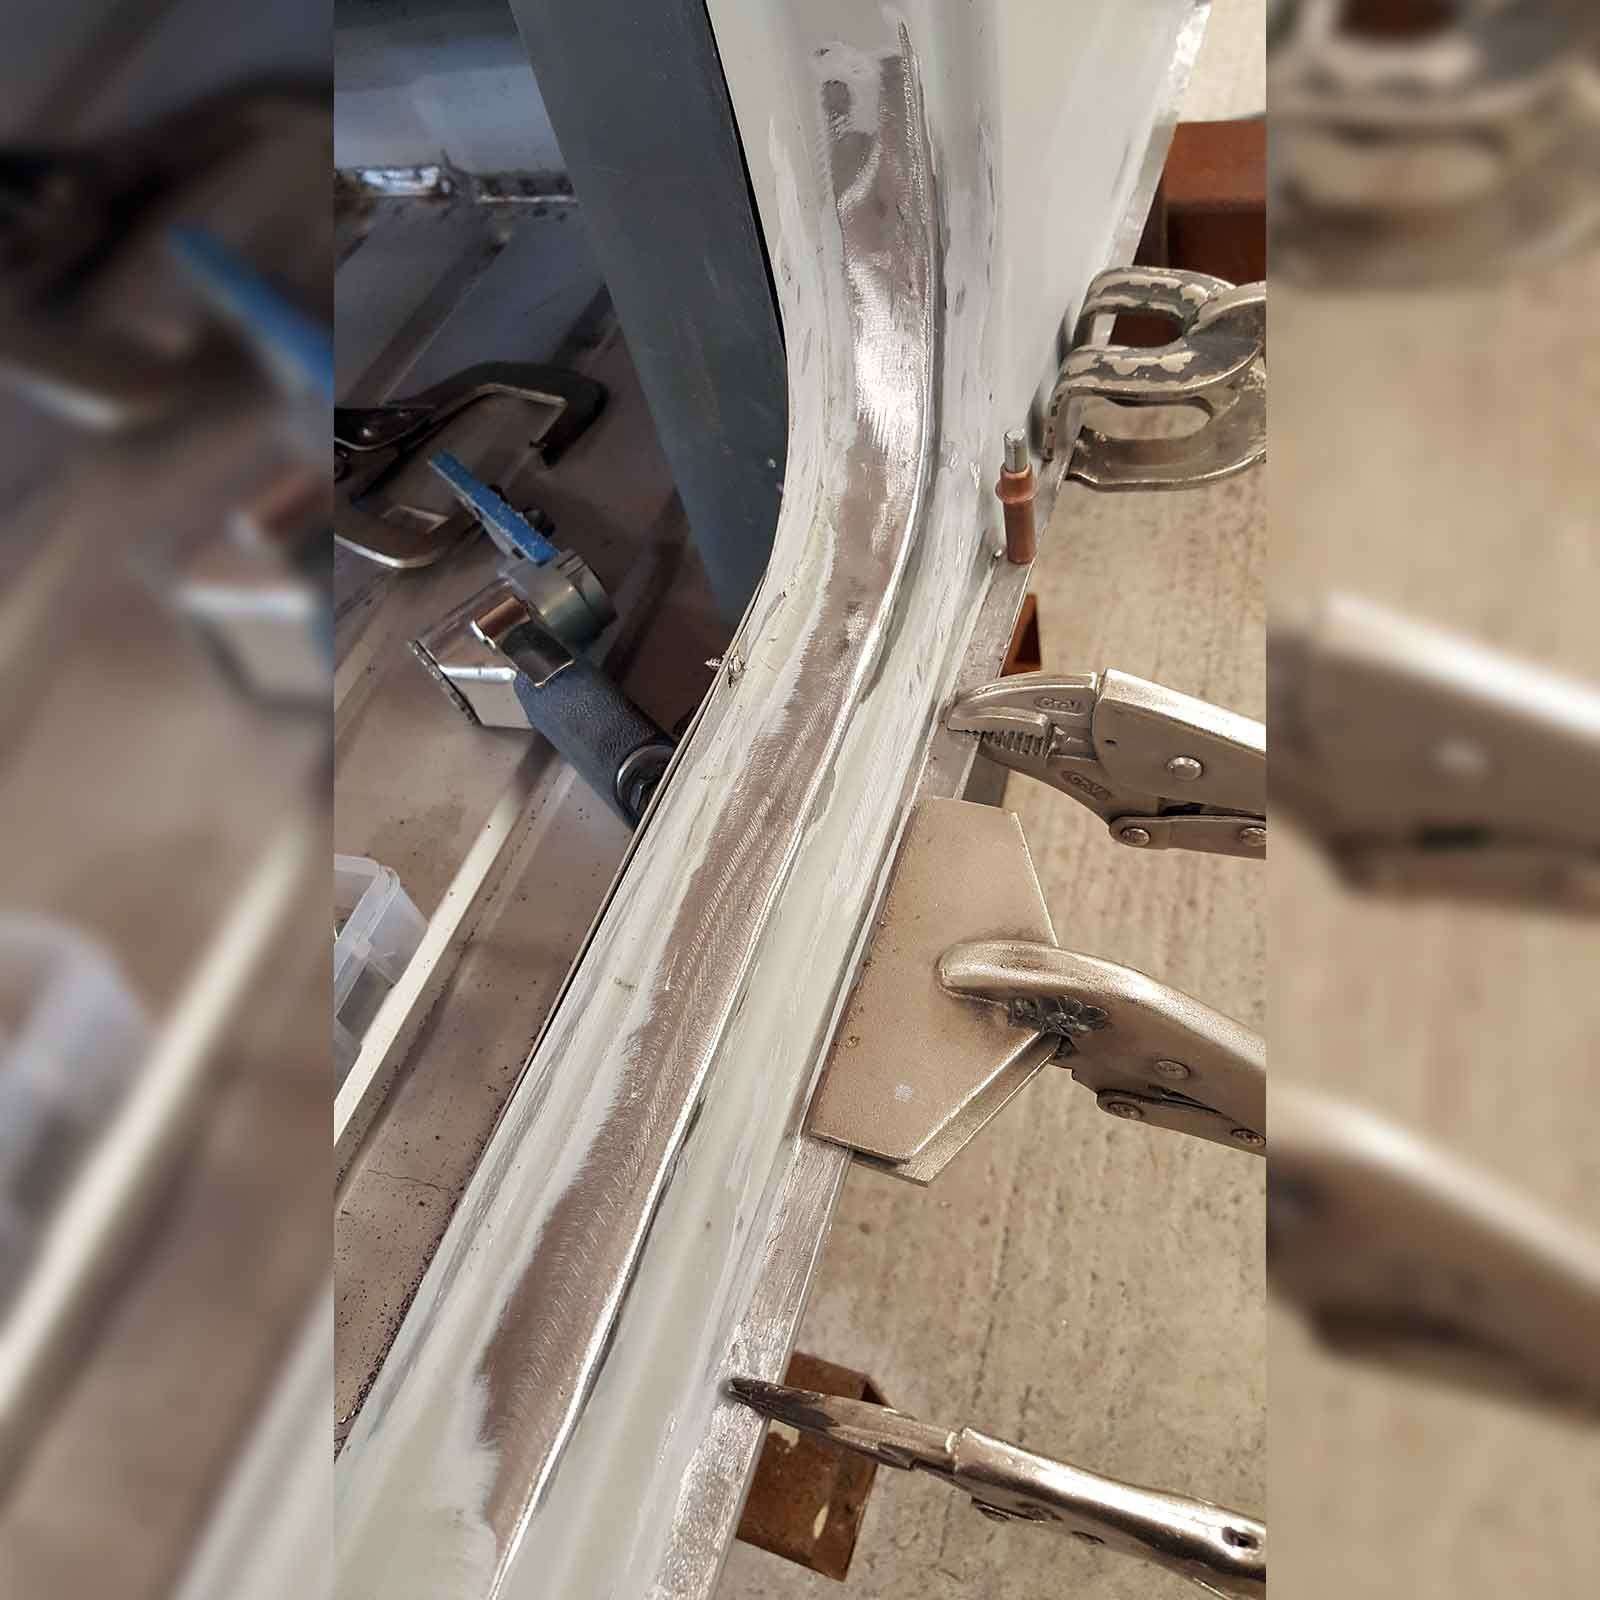
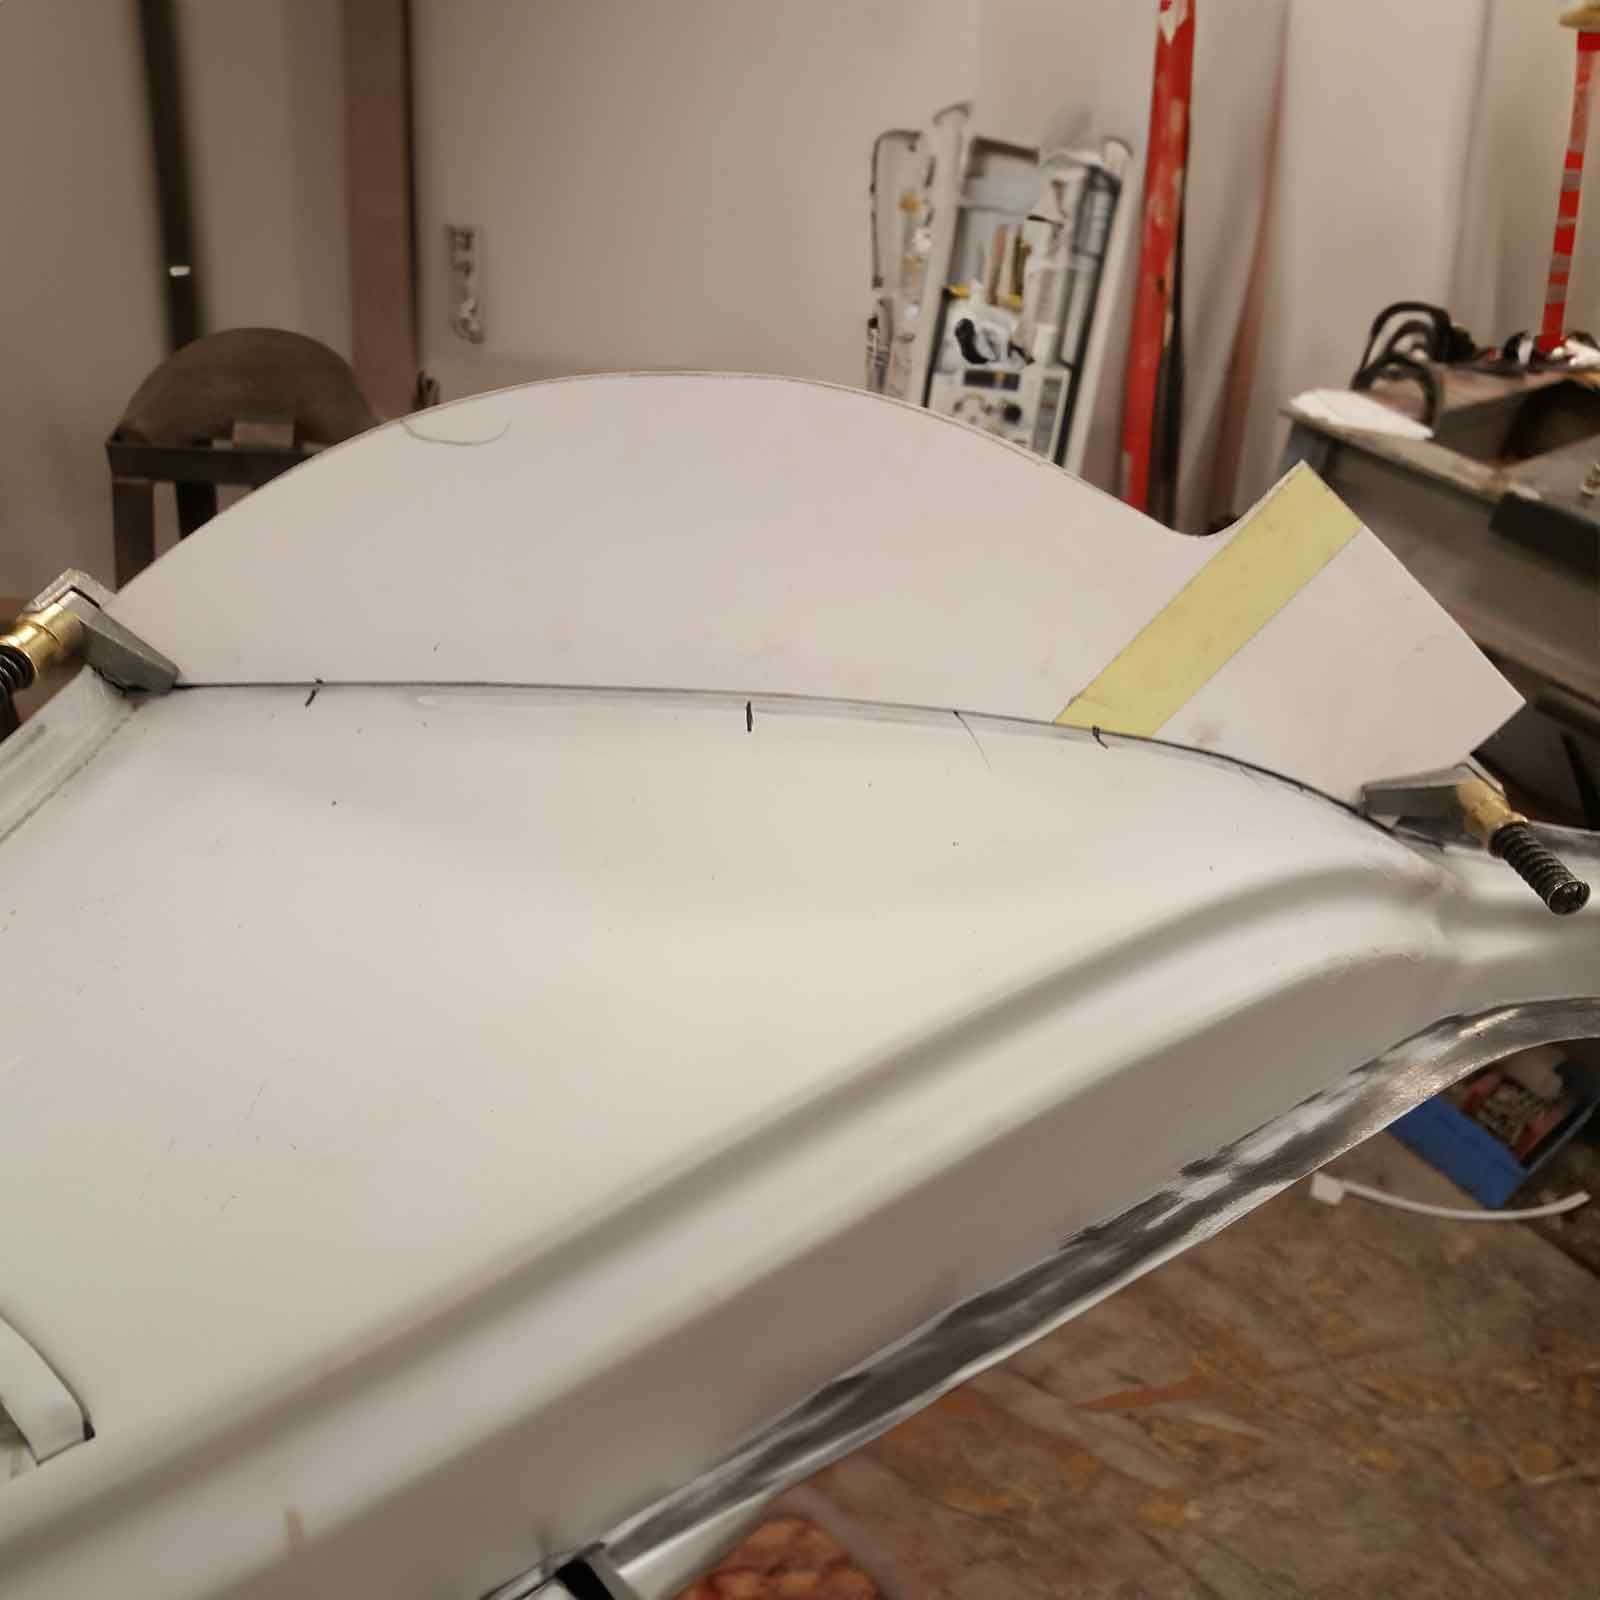
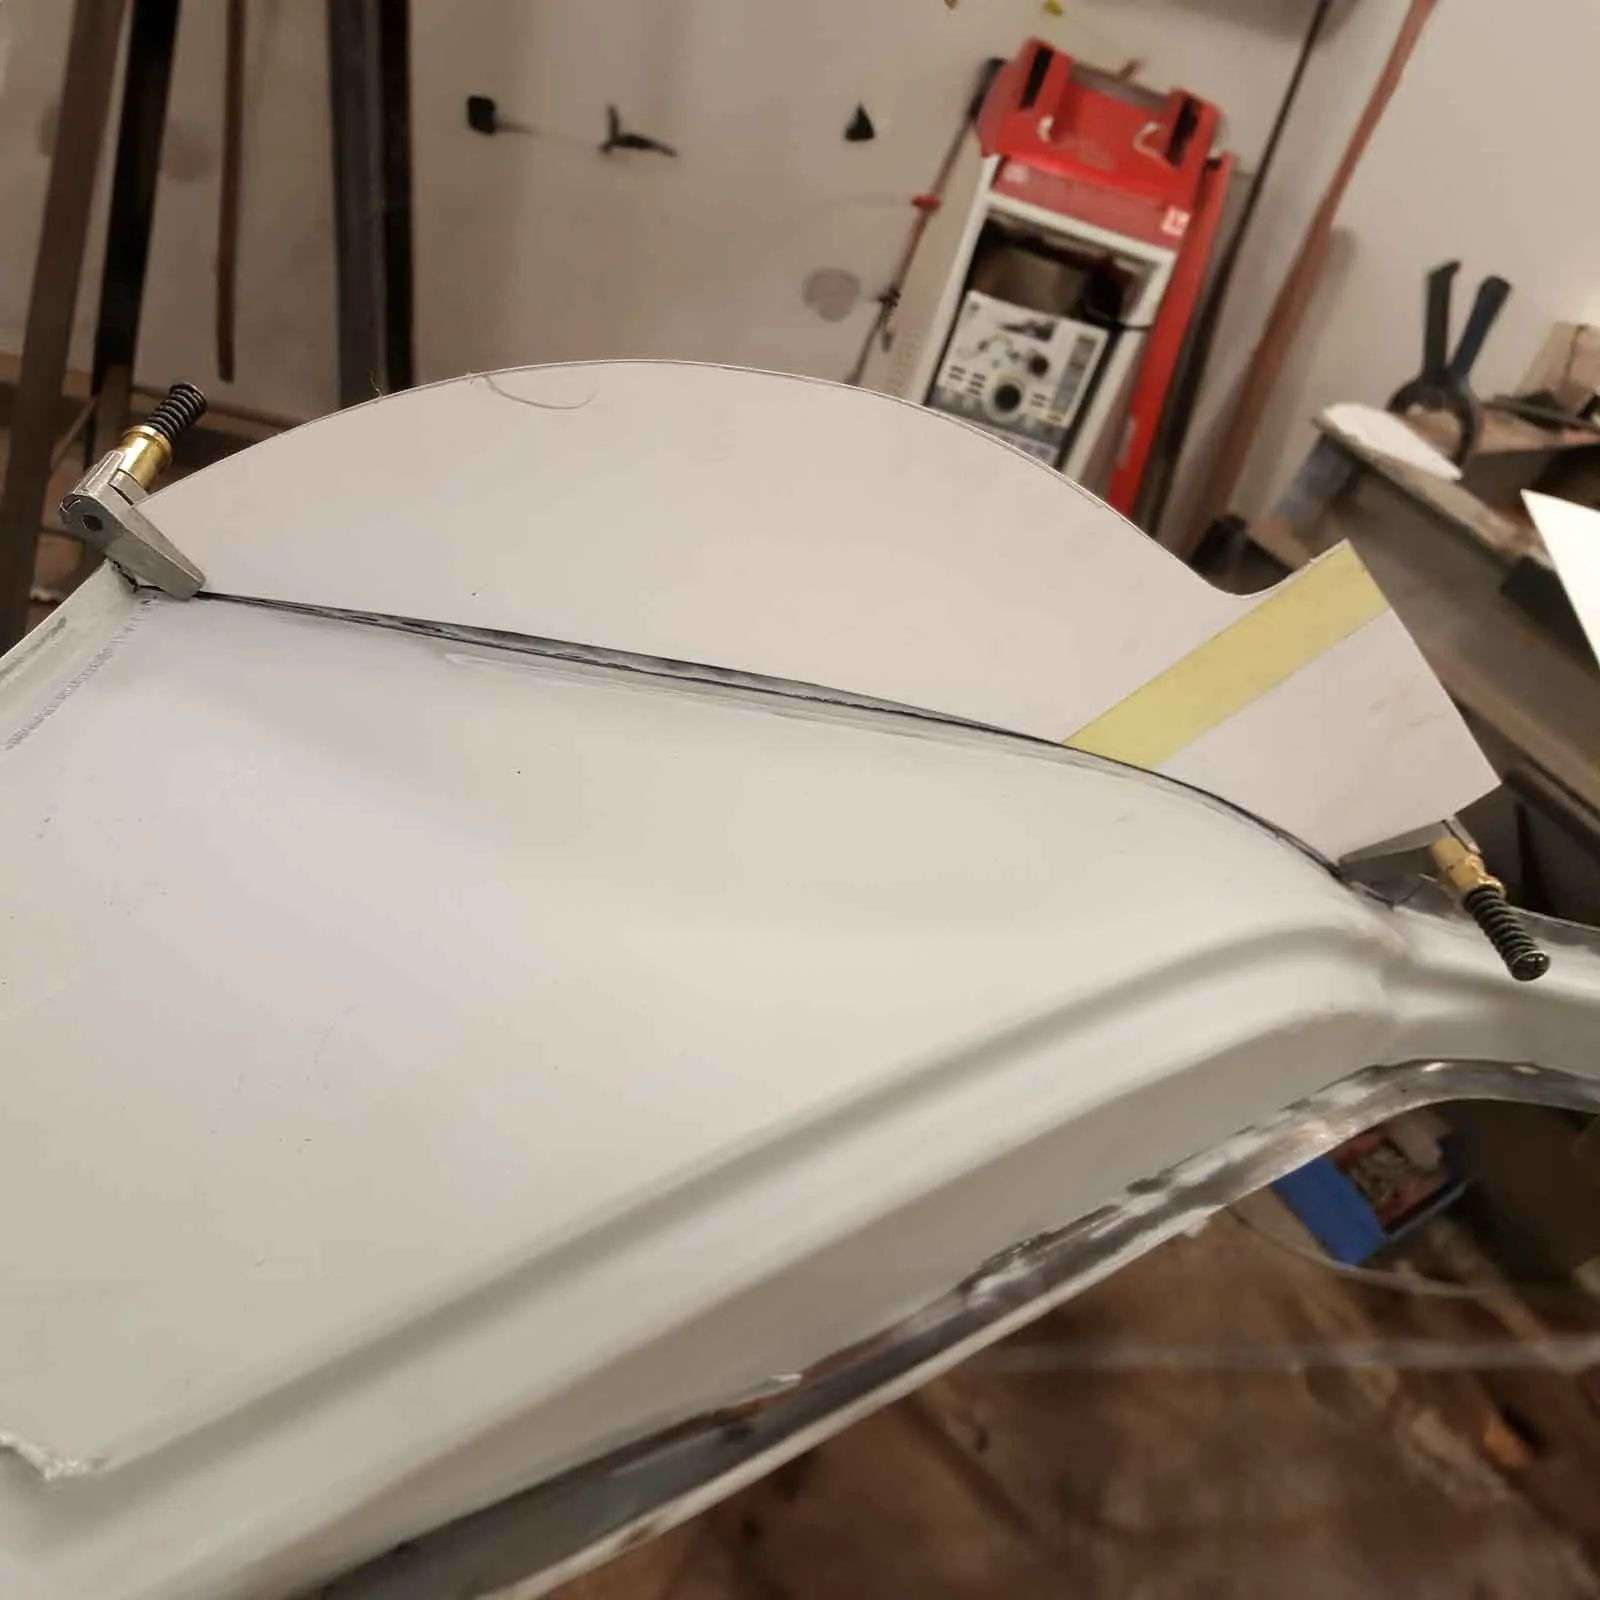
Witness the meticulous process behind aligning the top of the door frame on the A-pillar just right in the restoration of the 1969 Mini Cooper 998 MkII, owned by Paul Davenport of Plastics4Performance. Every step is guided by precision and attention to detail.
Witness the meticulous process behind aligning the top of the door frame on the A-pillar just right in the restoration of the 1969 Mini Cooper 998 MkII, owned by Paul Davenport of Plastics4Performance. Every step is guided by precision and attention to detail.
Our work with the 1969 Mini Cooper 998 MkII, owned by Paul Davenport of Plastics4Performance, is marked by ongoing efforts to rectify issues with the Mini Sport side panels. Ensuring every element aligns flawlessly for a picture-perfect finish.
Our work with the 1969 Mini Cooper 998 MkII, owned by Paul Davenport of Plastics4Performance, is marked by ongoing efforts to rectify issues with the Mini Sport side panels. Ensuring every element aligns flawlessly for a picture-perfect finish.
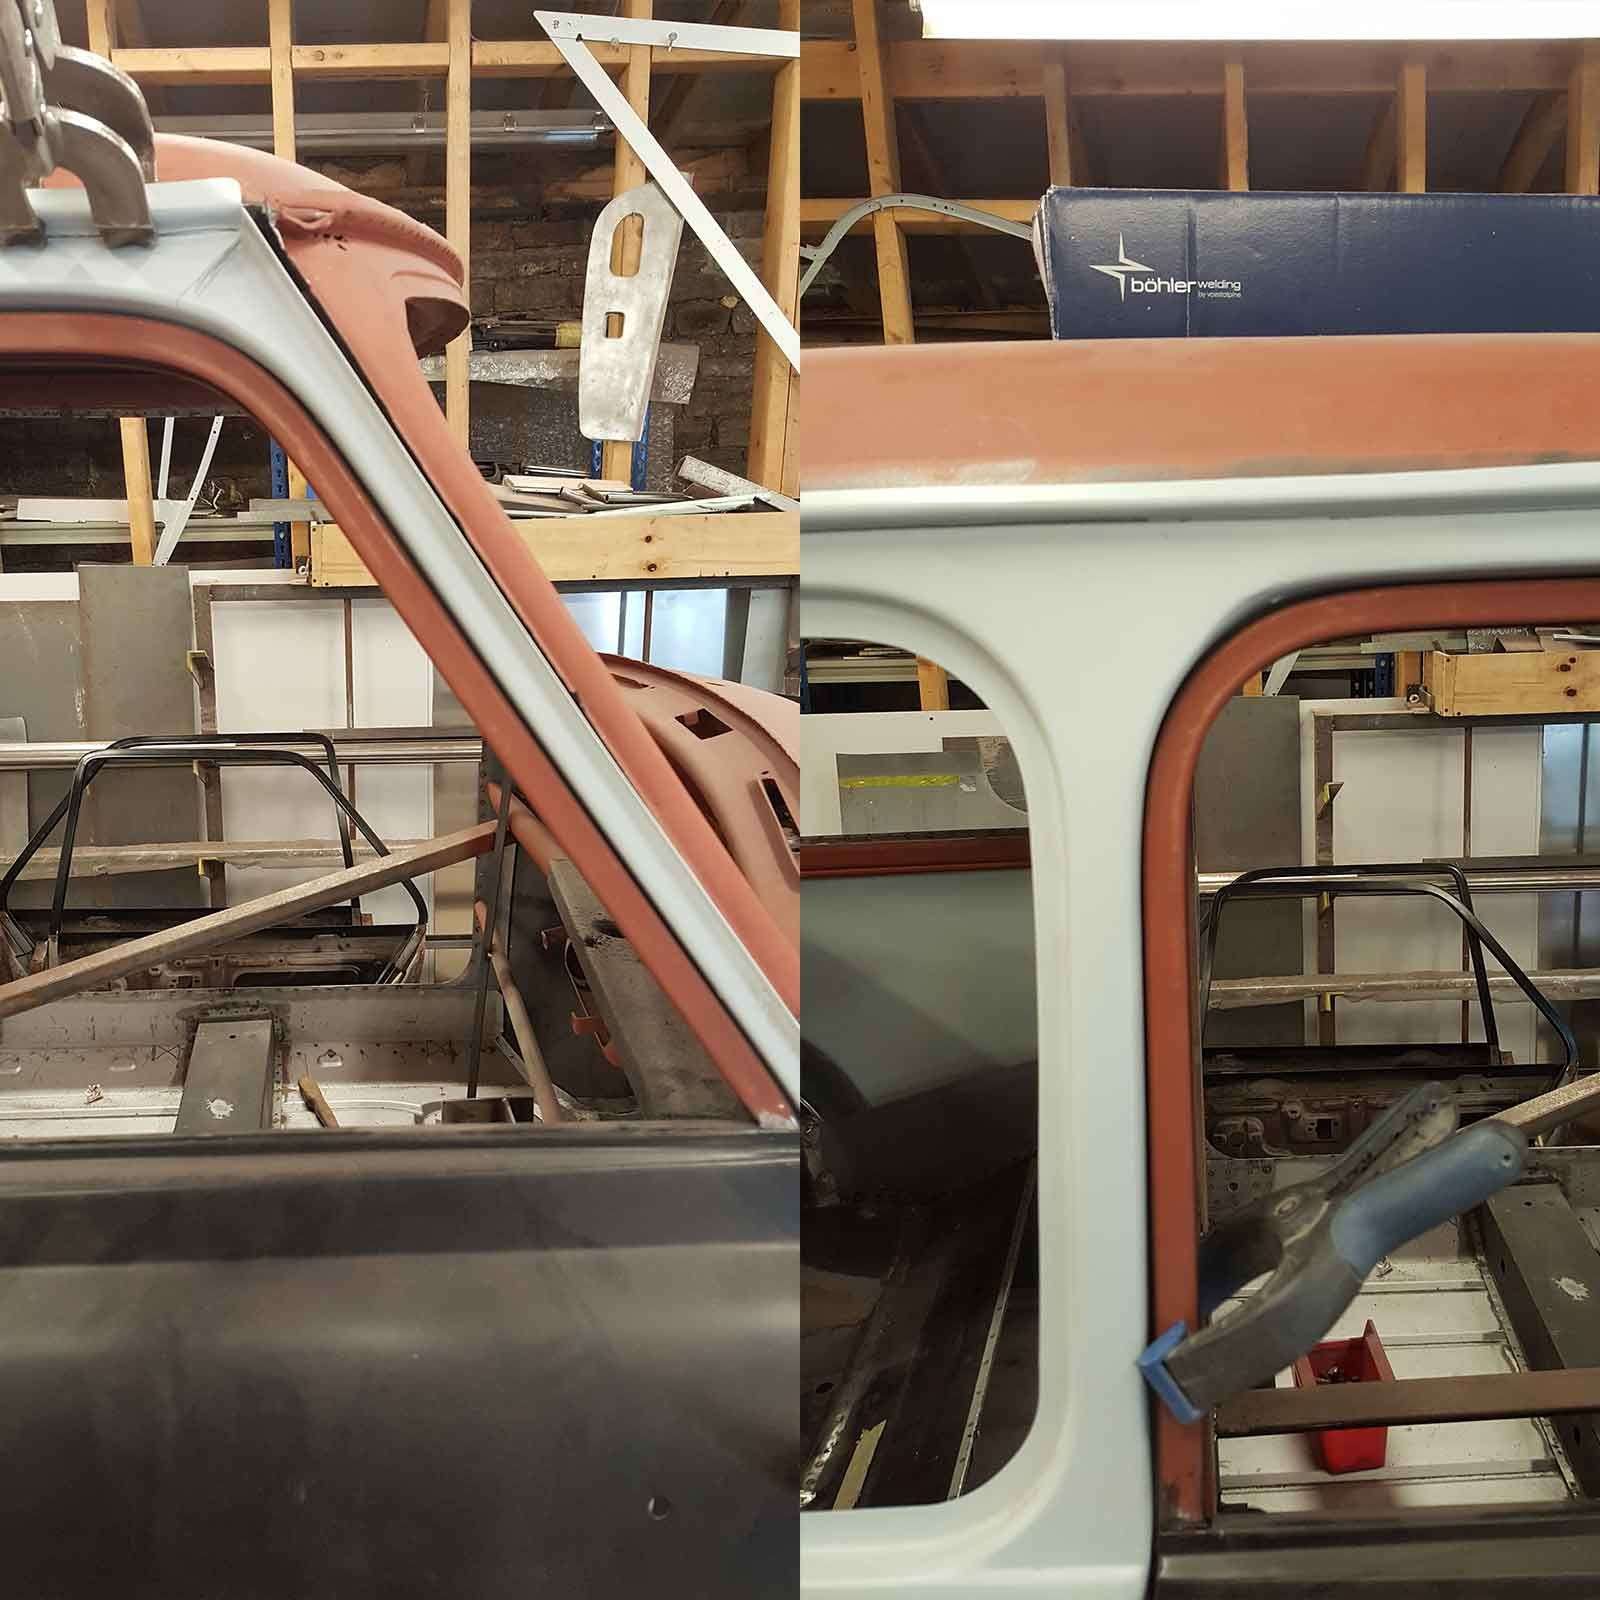
In our journey to restore the 1969 Mini Cooper 998 MkII owned by Paul Davenport of Plastics4Performance, we’re in the midst of continuous fit checks. Every detail is examined to ensure a seamless and precise outcome.
Our restoration journey with the 1969 Mini Cooper 998 MkII, owned by Paul Davenport of Plastics4Performance, marches forward. The Mini Sport side panels not only lack a proper fit but also bring along their fair share of problems. Undeterred, we’re diving in to address and overcome each obstacle.
Our restoration journey with the 1969 Mini Cooper 998 MkII, owned by Paul Davenport of Plastics4Performance, marches forward. The Mini Sport side panels not only lack a proper fit but also bring along their fair share of problems. Undeterred, we’re diving in to address and overcome each obstacle.
Our restoration journey with the 1969 Mini Cooper 998 MkII, owned by Paul Davenport of Plastics4Performance, marches forward. The Mini Sport side panels not only lack a proper fit but also bring along their fair share of problems. Undeterred, we’re diving in to address and overcome each obstacle.
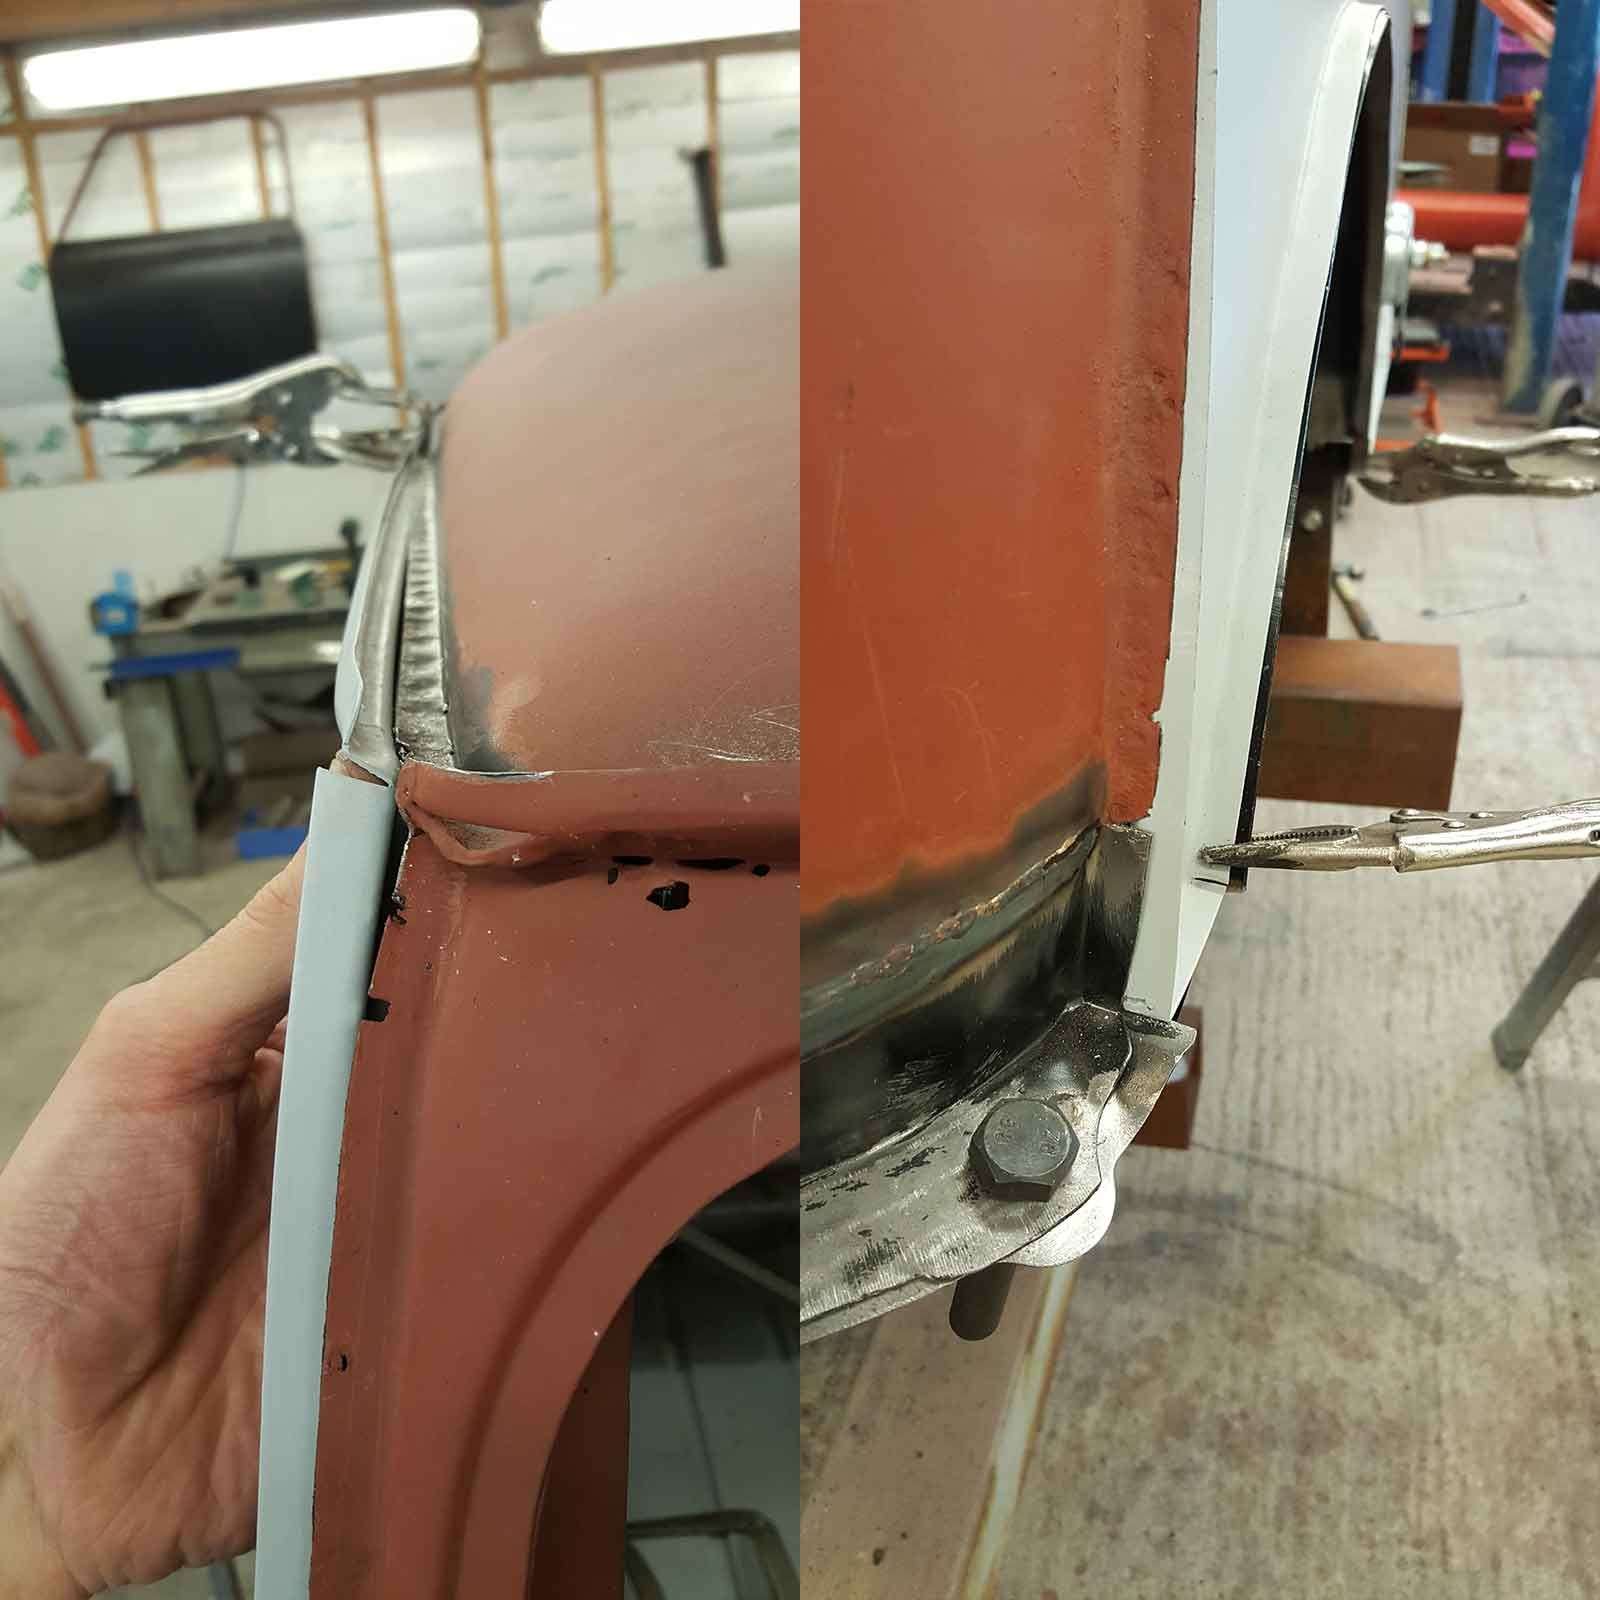
The journey with the 1969 Mini Cooper 998 MkII, owned by Paul Davenport of Plastics4Performance, uncovers further discrepancies in panel profiles. Our commitment to excellence means addressing these issues head-on.
Observing the corner radiuses on the side panel of the 1969 Mini Cooper 998 MkII, owned by Paul Davenport of Plastics4Performance, reveals an absence of quality control. But fret not, we’ve got it covered! Our team is dedicated to ensuring a flawless fit.
Observing the corner radiuses on the side panel of the 1969 Mini Cooper 998 MkII, owned by Paul Davenport of Plastics4Performance, reveals an absence of quality control. But fret not, we’ve got it covered! Our team is dedicated to ensuring a flawless fit.
Handling the restoration of the 1969 Mini Cooper 998 MkII owned by Paul Davenport of Plastics4Performance requires both expertise and a steady hand. Our team’s unwavering patience and exceptional skills shine through as we tackle this intricate project.
In the restoration of the 1969 Mini Cooper 998 MkII owned by Paul Davenport of Plastics4Performance, our process involves continuous checks, modifications, and refitting to ensure a precise fit. Our goal: achieving consistent door gaps all around. While we anticipated some extra work, those Mini Sport side panels have significantly extended the project timeline.
In the restoration of the 1969 Mini Cooper 998 MkII owned by Paul Davenport of Plastics4Performance, our process involves continuous checks, modifications, and refitting to ensure a precise fit. Our goal: achieving consistent door gaps all around. While we anticipated some extra work, those Mini Sport side panels have significantly extended the project timeline.
In our journey to restore the 1969 Mini Cooper 998 MkII owned by Paul Davenport of Plastics4Performance, we’re on a constant mission of impeccable panel correction without compromising Paul’s project vision.
That’s not a rear vent you’re seeing on the 1969 Mini Cooper 998 MkII, it’s actually the challenge posed by the Mini Sport side panels.
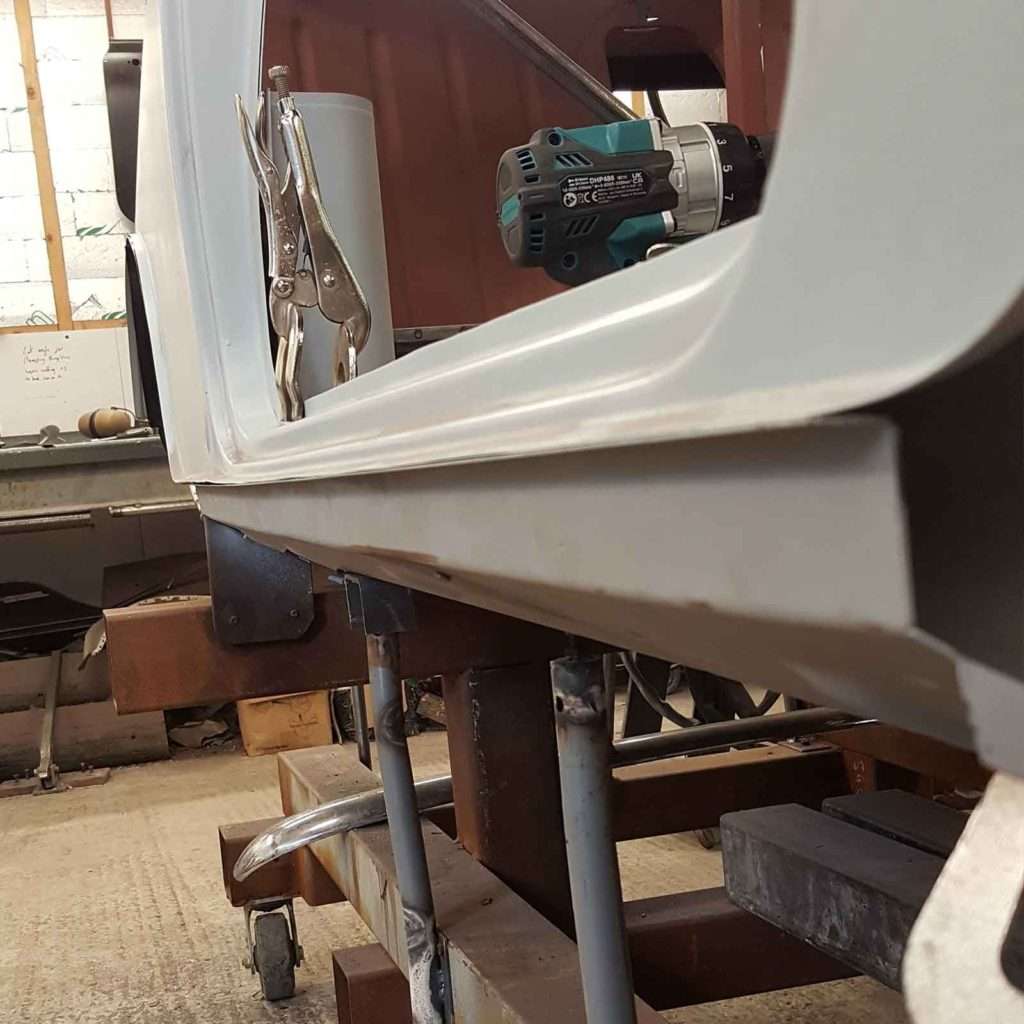
Our efforts to restore the 1969 Mini Cooper 998 MkII, owned by Paul Davenport of Plastics4Performance, extend to the side panels. Aiming for seamless integration with the sills, we’re having to diligently fine-tune every detail.
The restoration of the 1969 Mini Cooper 998 MkII, owned by Paul Davenport of Plastics4Performance, continues to uncover challenges. Those incorrect Mini Sport side panels have posed a hurdle, demanding attention and correction.
The restoration of the 1969 Mini Cooper 998 MkII, owned by Paul Davenport of Plastics4Performance, continues to uncover challenges. Those incorrect Mini Sport side panels have posed a hurdle, demanding attention and correction.
The restoration of the 1969 Mini Cooper 998 MkII, owned by Paul Davenport of Plastics4Performance, continues to uncover challenges. Those incorrect Mini Sport side panels have posed a hurdle, demanding attention and correction.
The Mini Cooper 998 MkII, owned by Paul Davenport of Plastics4Performance, has seen its fair share of adjustments with that Mini Sport side panel. It’s been off and on more times than a merry-go-round! But fear not, we’re committed to making it right.
The Mini Cooper 998 MkII, owned by Paul Davenport of Plastics4Performance, has seen its fair share of adjustments with that Mini Sport side panel. It’s been off and on more times than a merry-go-round! But fear not, we’re committed to making it right.
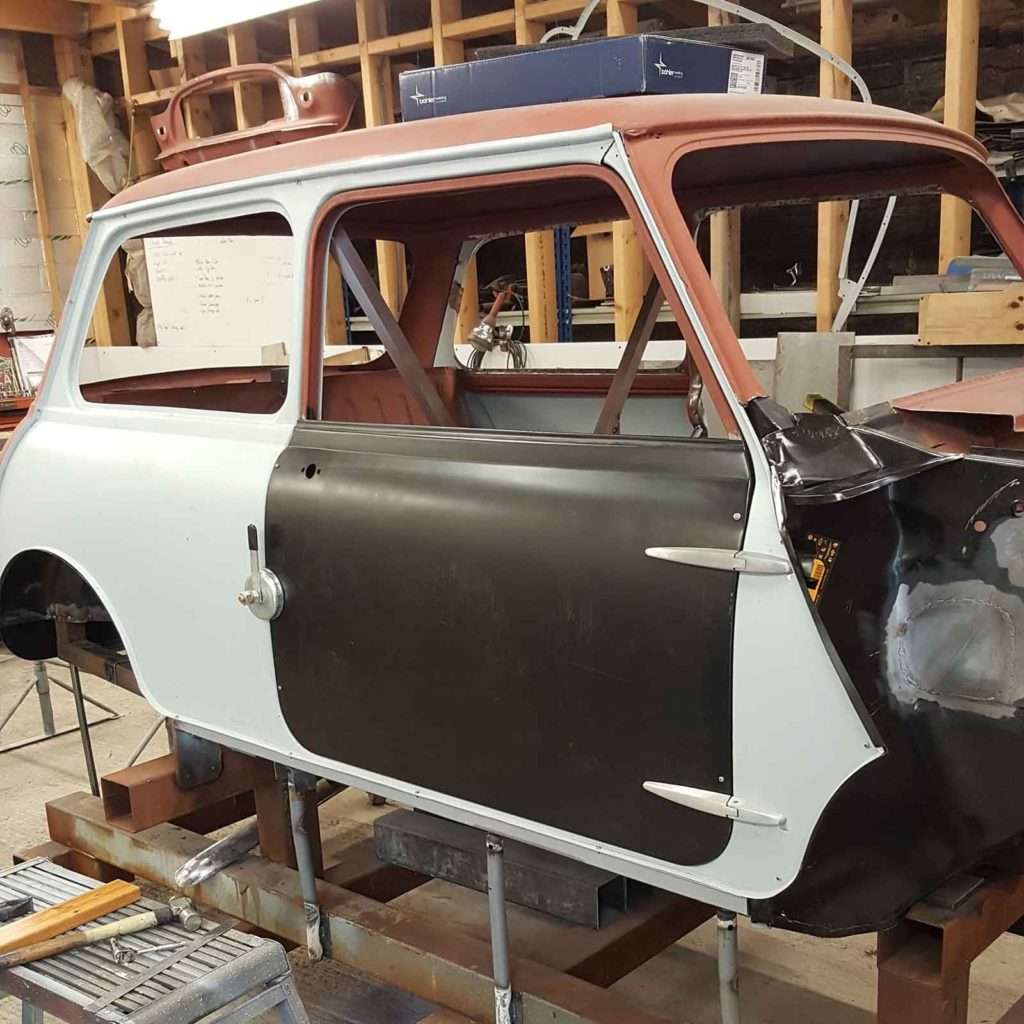
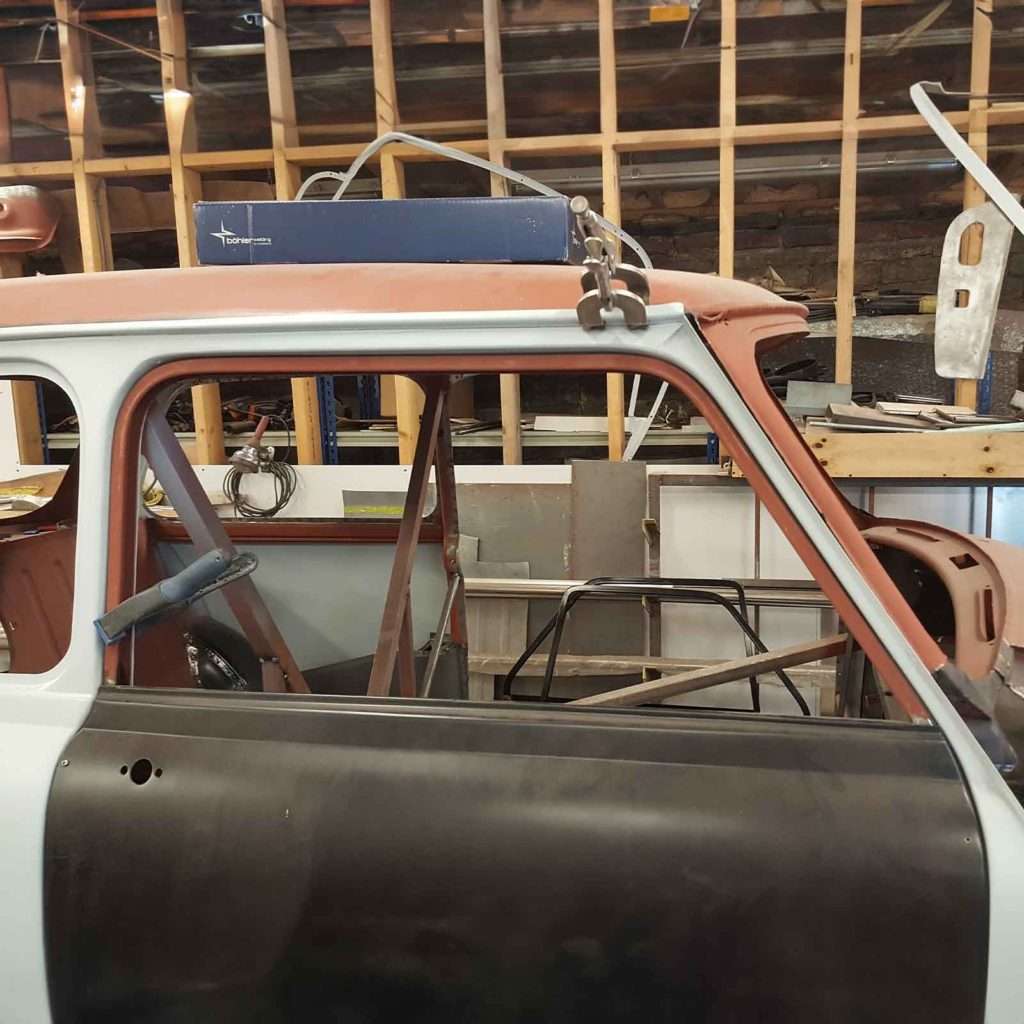
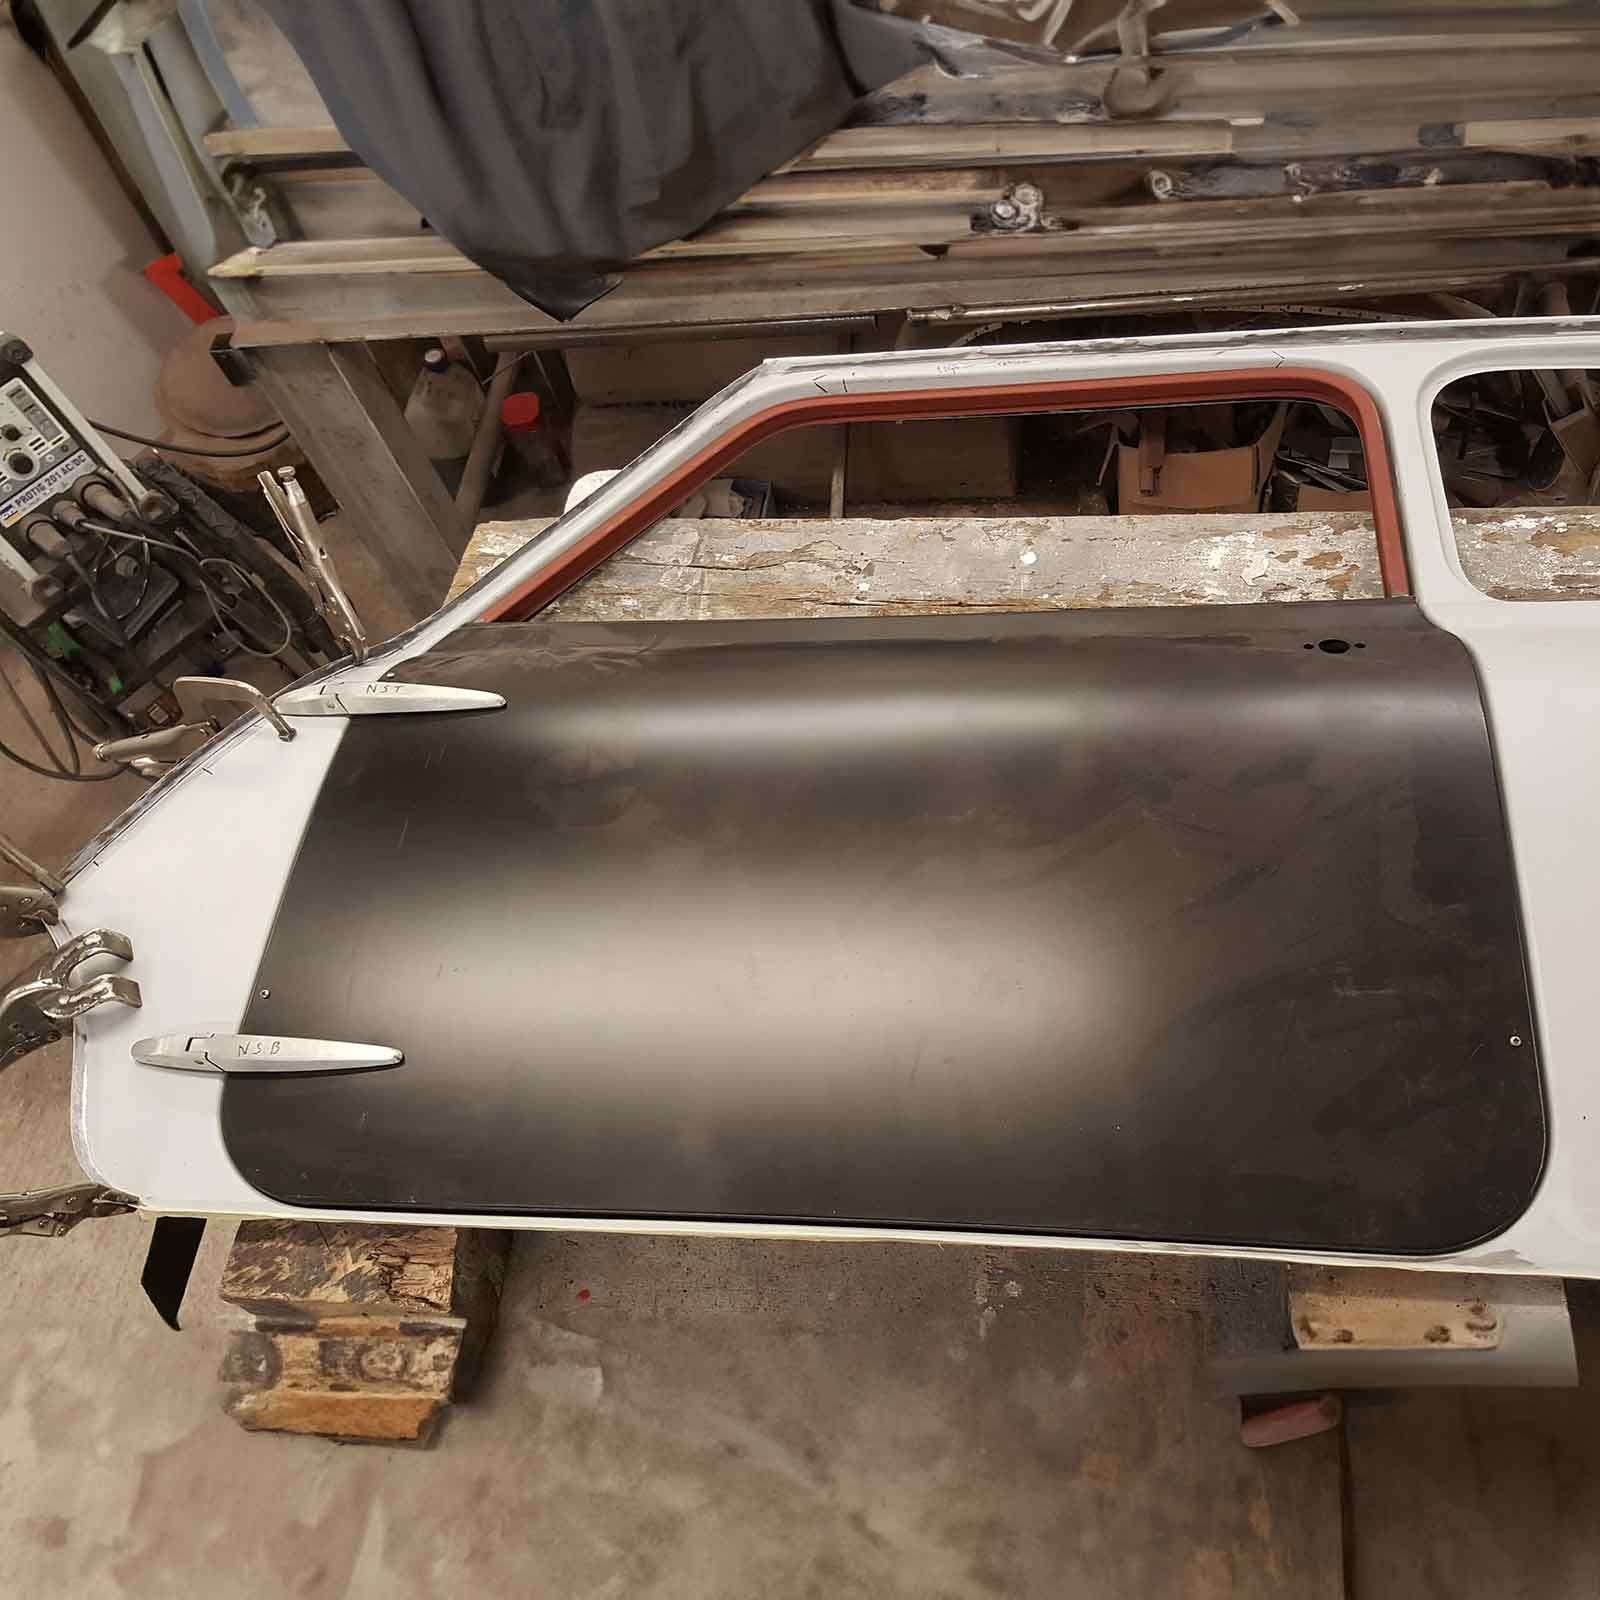
The 1969 Mini Cooper 998 MkII, owned by Paul Davenport of Plastics4Performance, is currently undergoing door fit assessment. Ensuring every detail aligns perfectly for a flawless finish and there’s some work to do here!
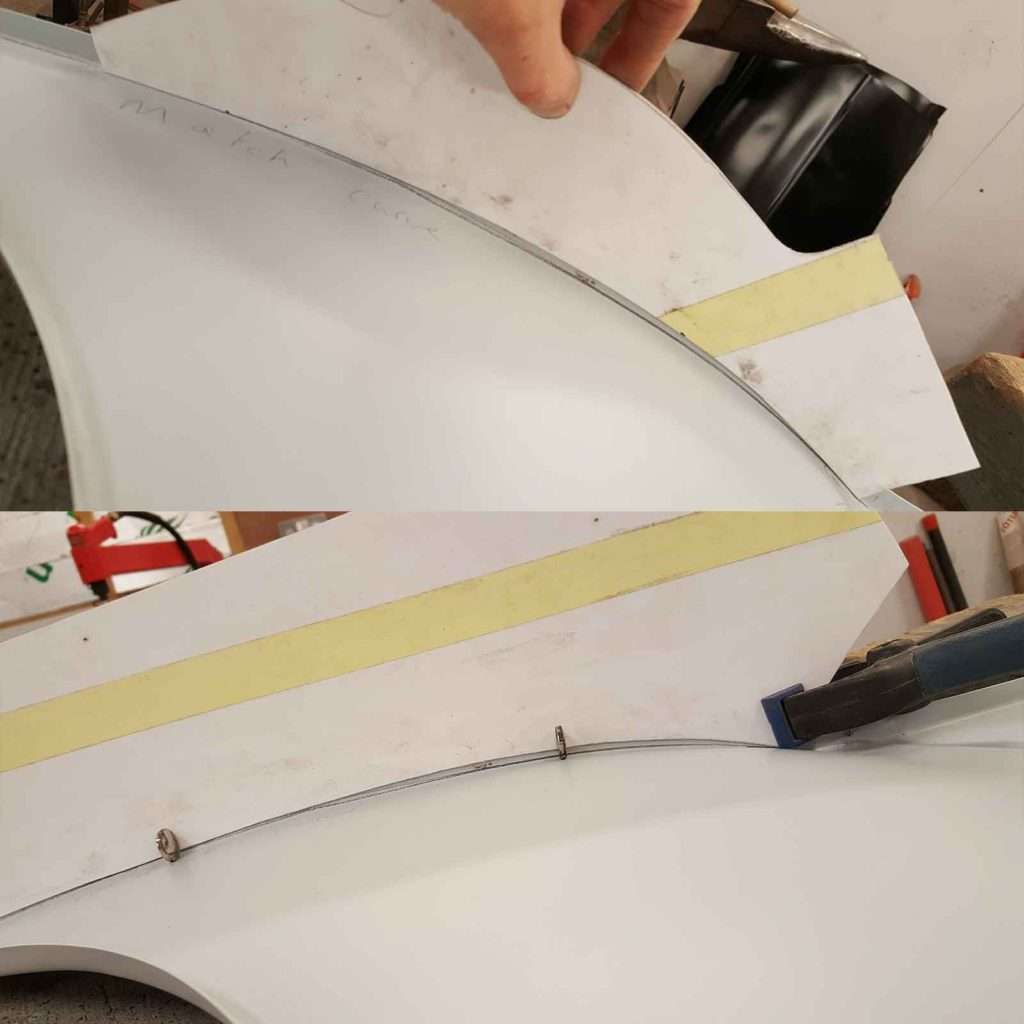
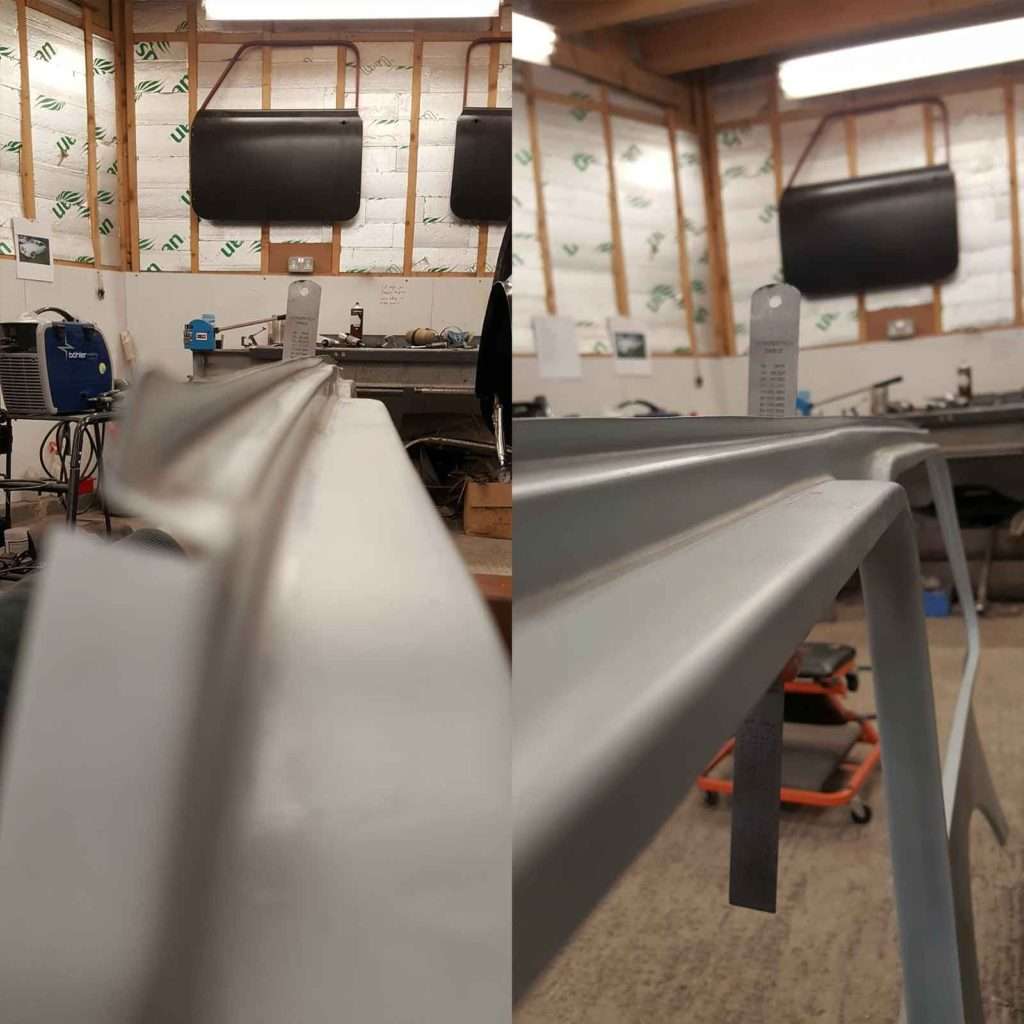
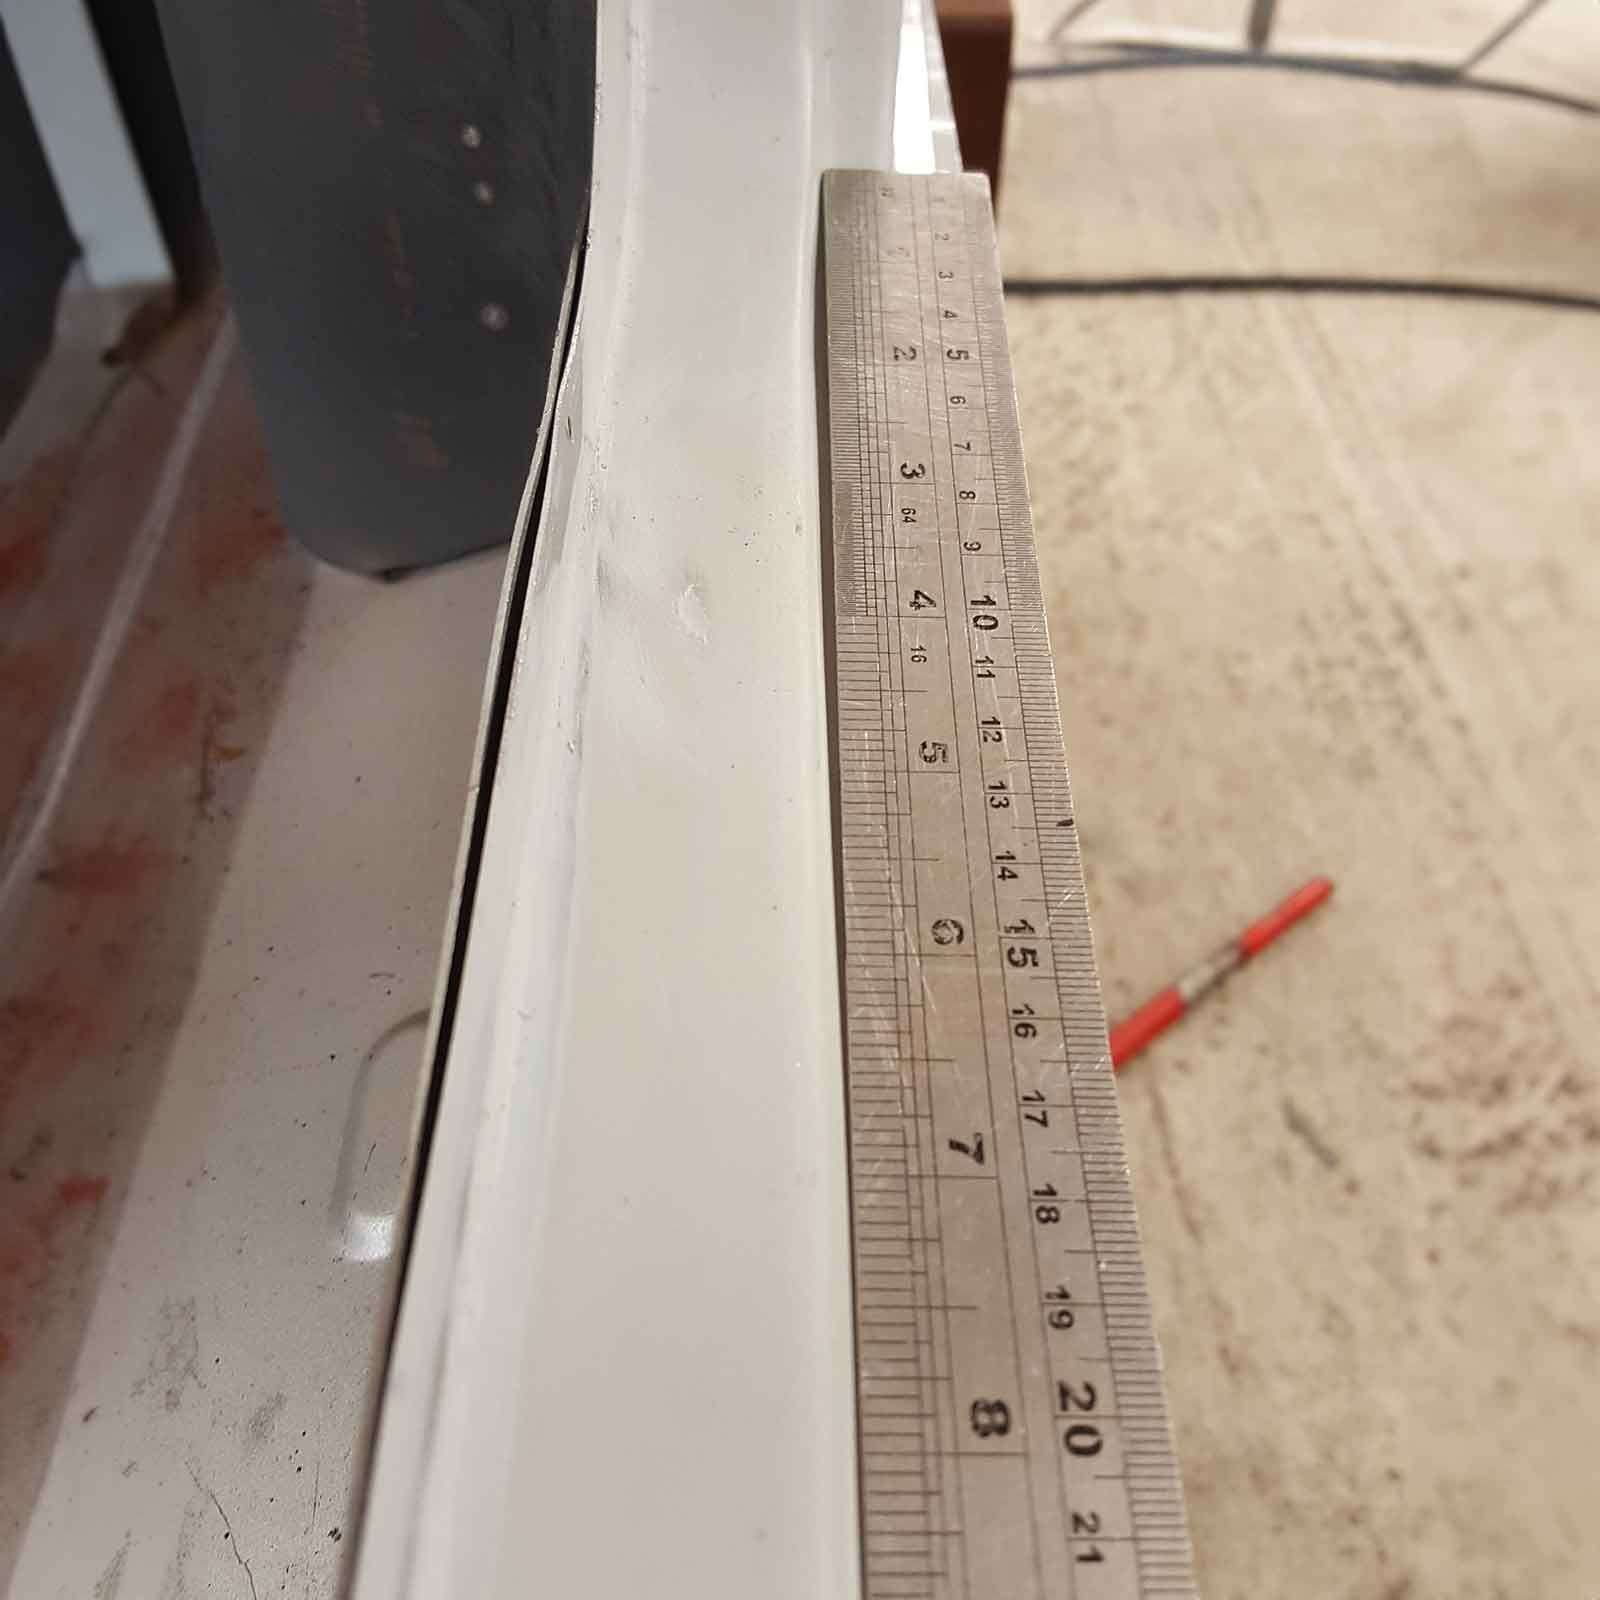
Restoring the 1969 Mini Cooper 998 MkII owned by Paul Davenport of Plastics4Performance. Our meticulous process has revealed an issue with the side panel profile, revealed using our templates. Rest assured, this can and will be rectified.
Restoring the 1969 Mini Cooper 998 MkII owned by Paul Davenport of Plastics4Performance. Our meticulous process has revealed an issue with the side panel profile, revealed using our templates. Rest assured, this can and will be rectified.
As we dive into the restoration of the 1969 Mini Cooper 998 MkII owned by Paul Davenport of Plastics4Performance, a curious observation has caught our attention. Is something amiss here?
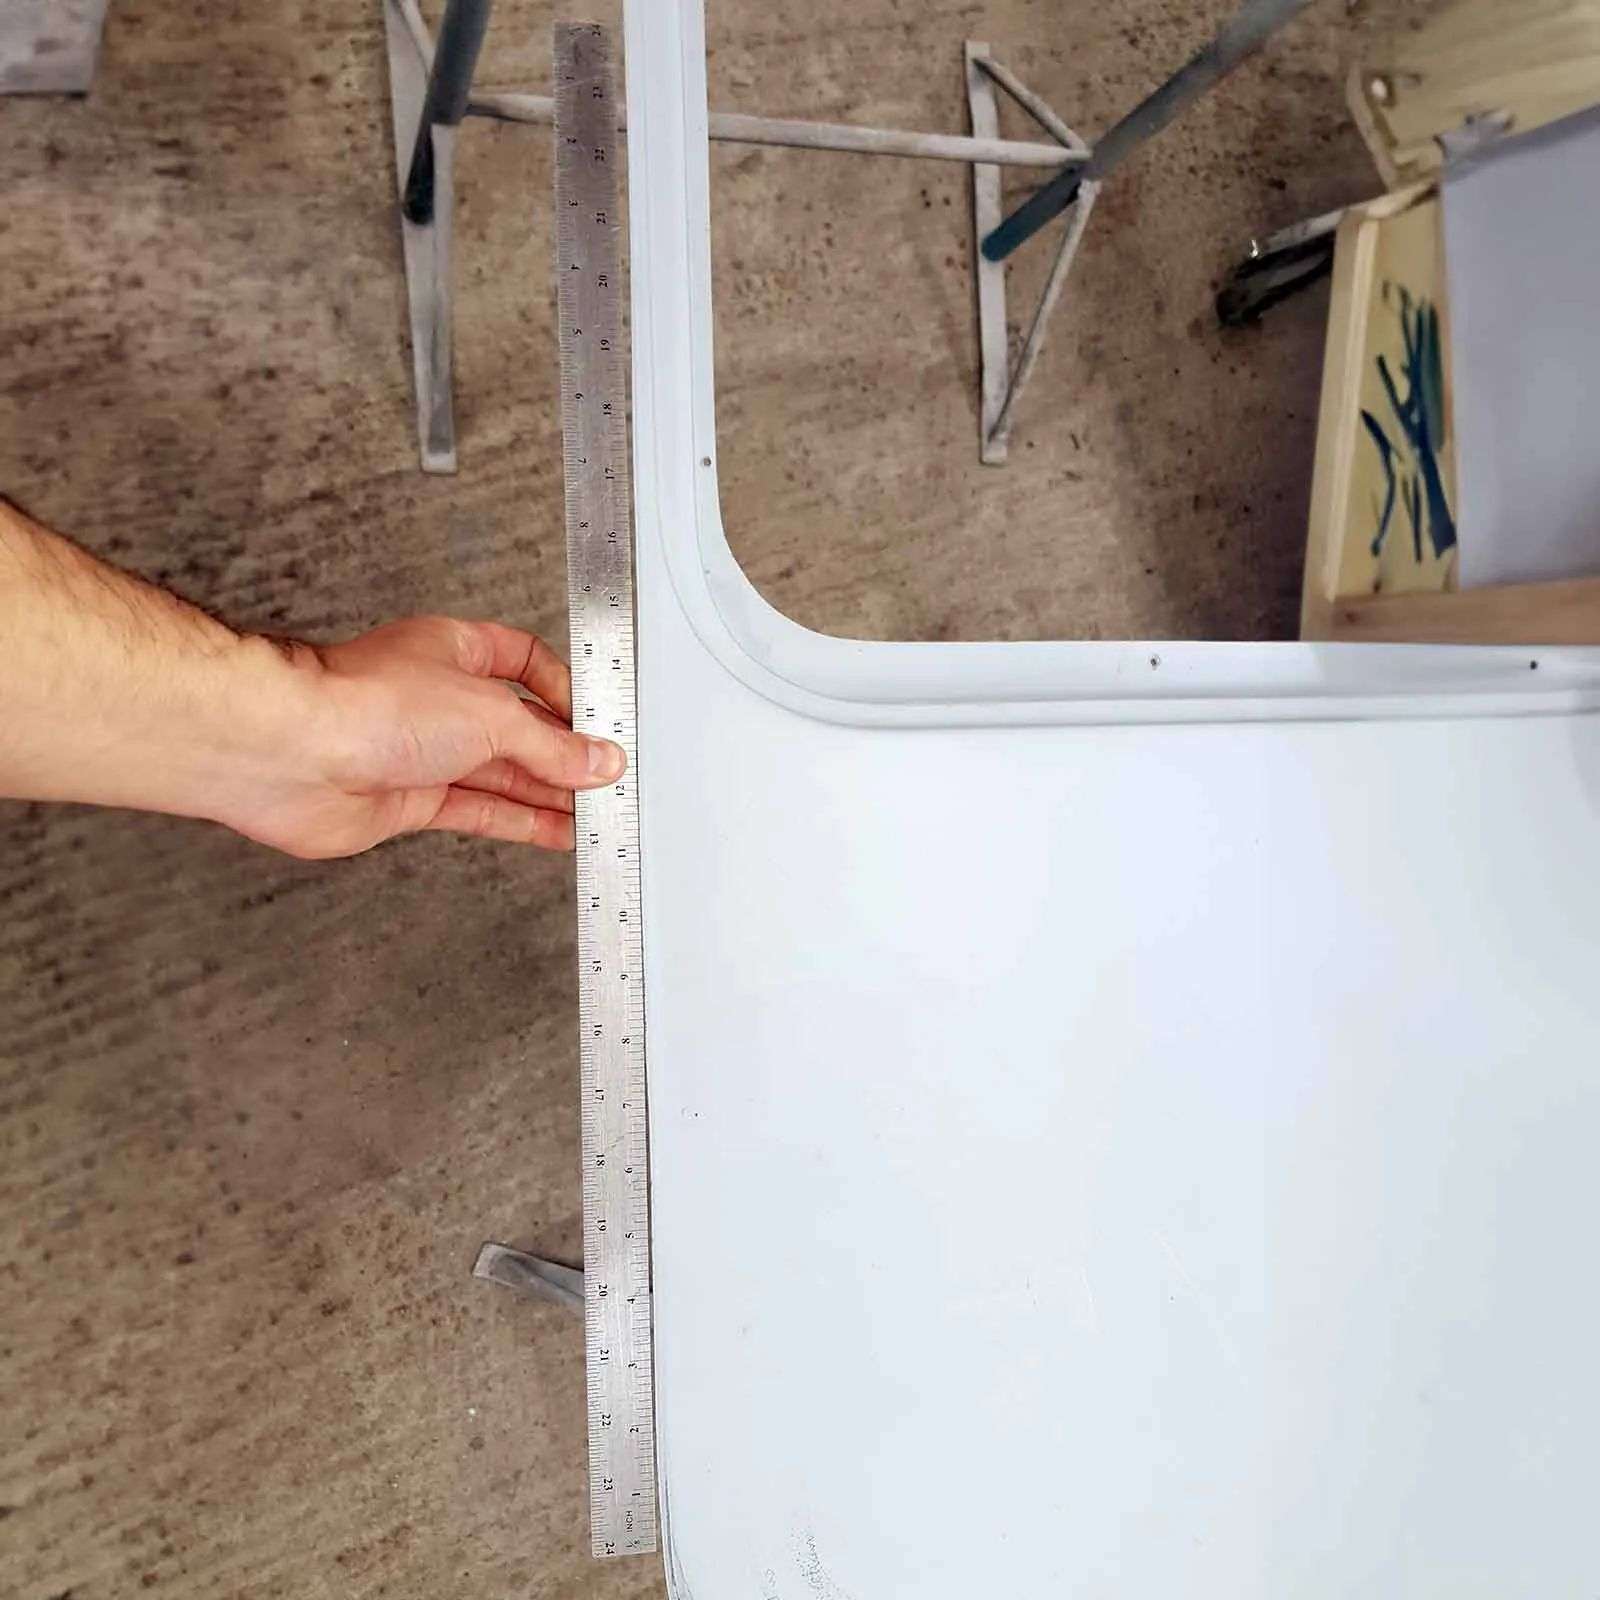
In restoring the Mini Cooper 998 MkII, a discovery was made. The two side panels, when measured from the top gutter, revealed a variation in length. Our commitment to precision means we’ll address this!
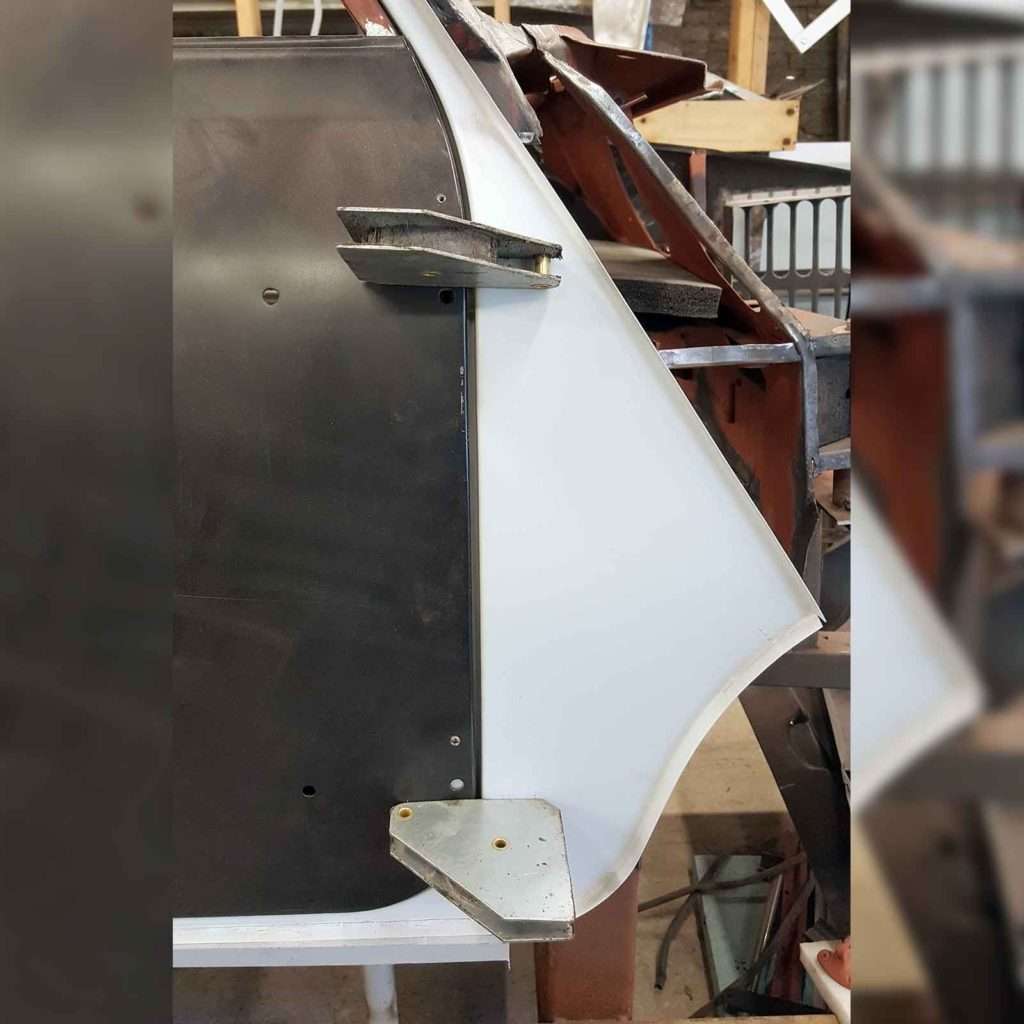
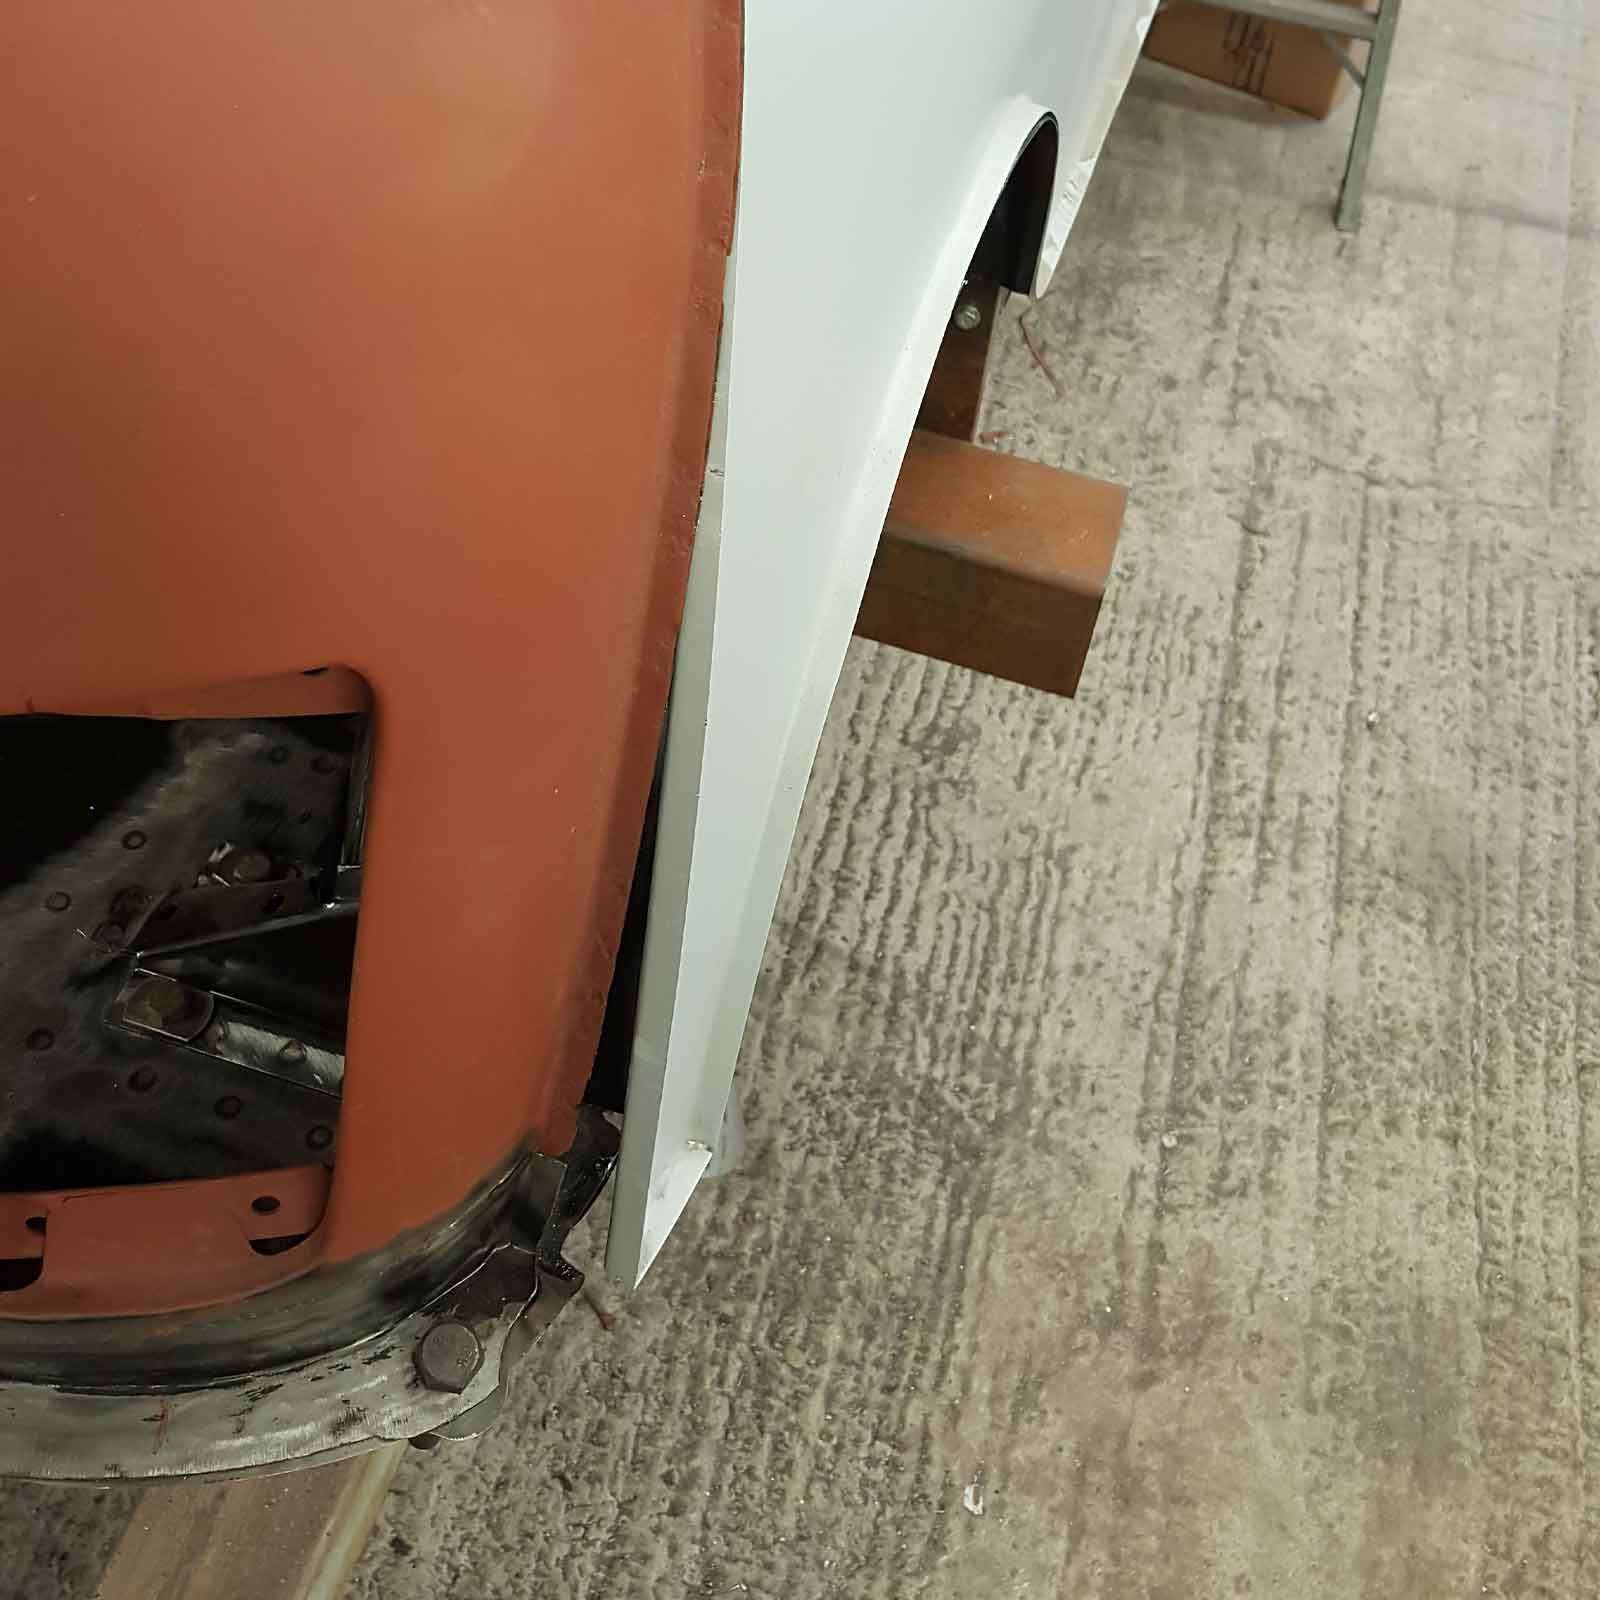
Restoring the 1969 Mini Cooper 998 MkII owned by Paul Davenport of Plastics4Performance. While the side panels from Mini Sport might not align perfectly with the front wing, fear not! We’re on it, ensuring a flawless fit.
Restoring the 1969 Mini Cooper 998 MkII owned by Paul Davenport of Plastics4Performance. While the side panels from Mini Sport might not align perfectly with the front wing, fear not! We’re on it, ensuring a flawless fit.
Restoring the 1969 Mini Cooper 998 MkII owned by Paul Davenport of Plastics4Performance. While the side panels from Mini Sport might not align perfectly with the front wing, fear not! We’re on it, ensuring a flawless fit.
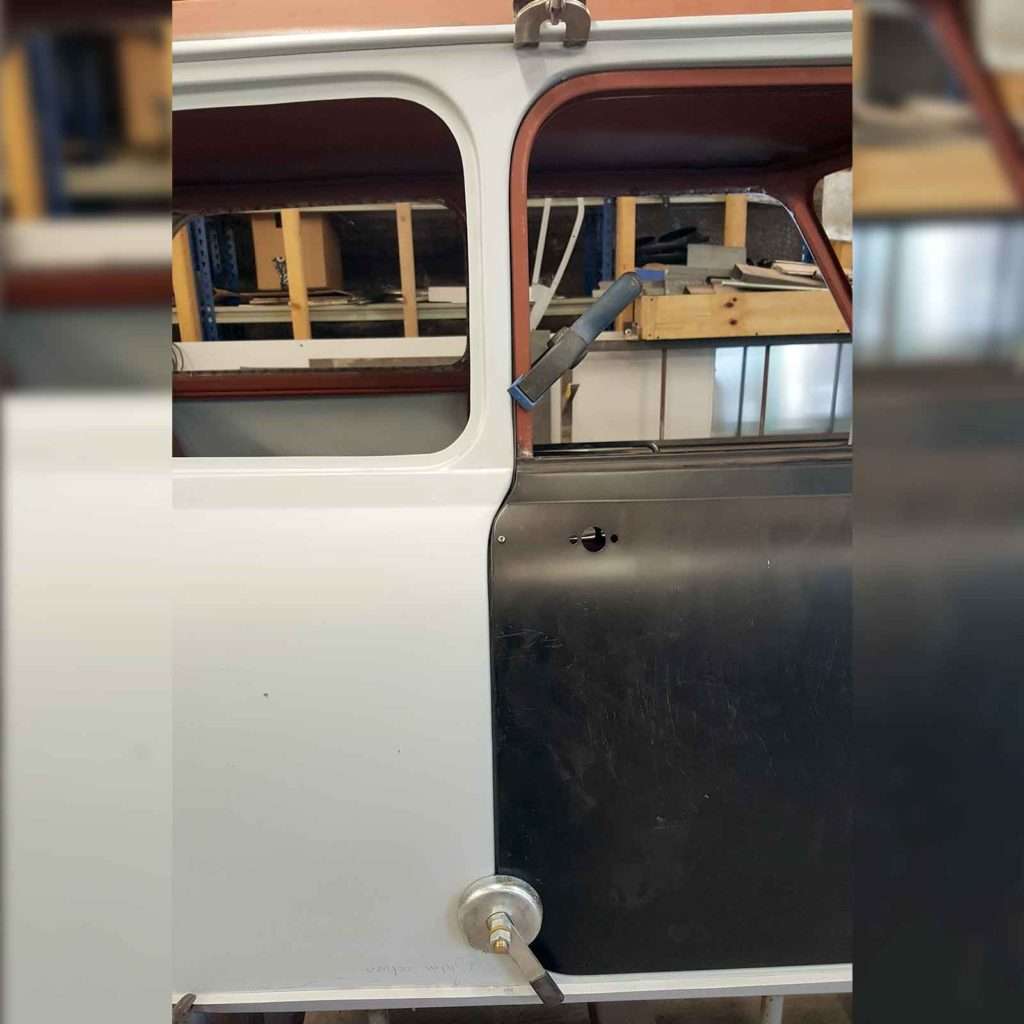
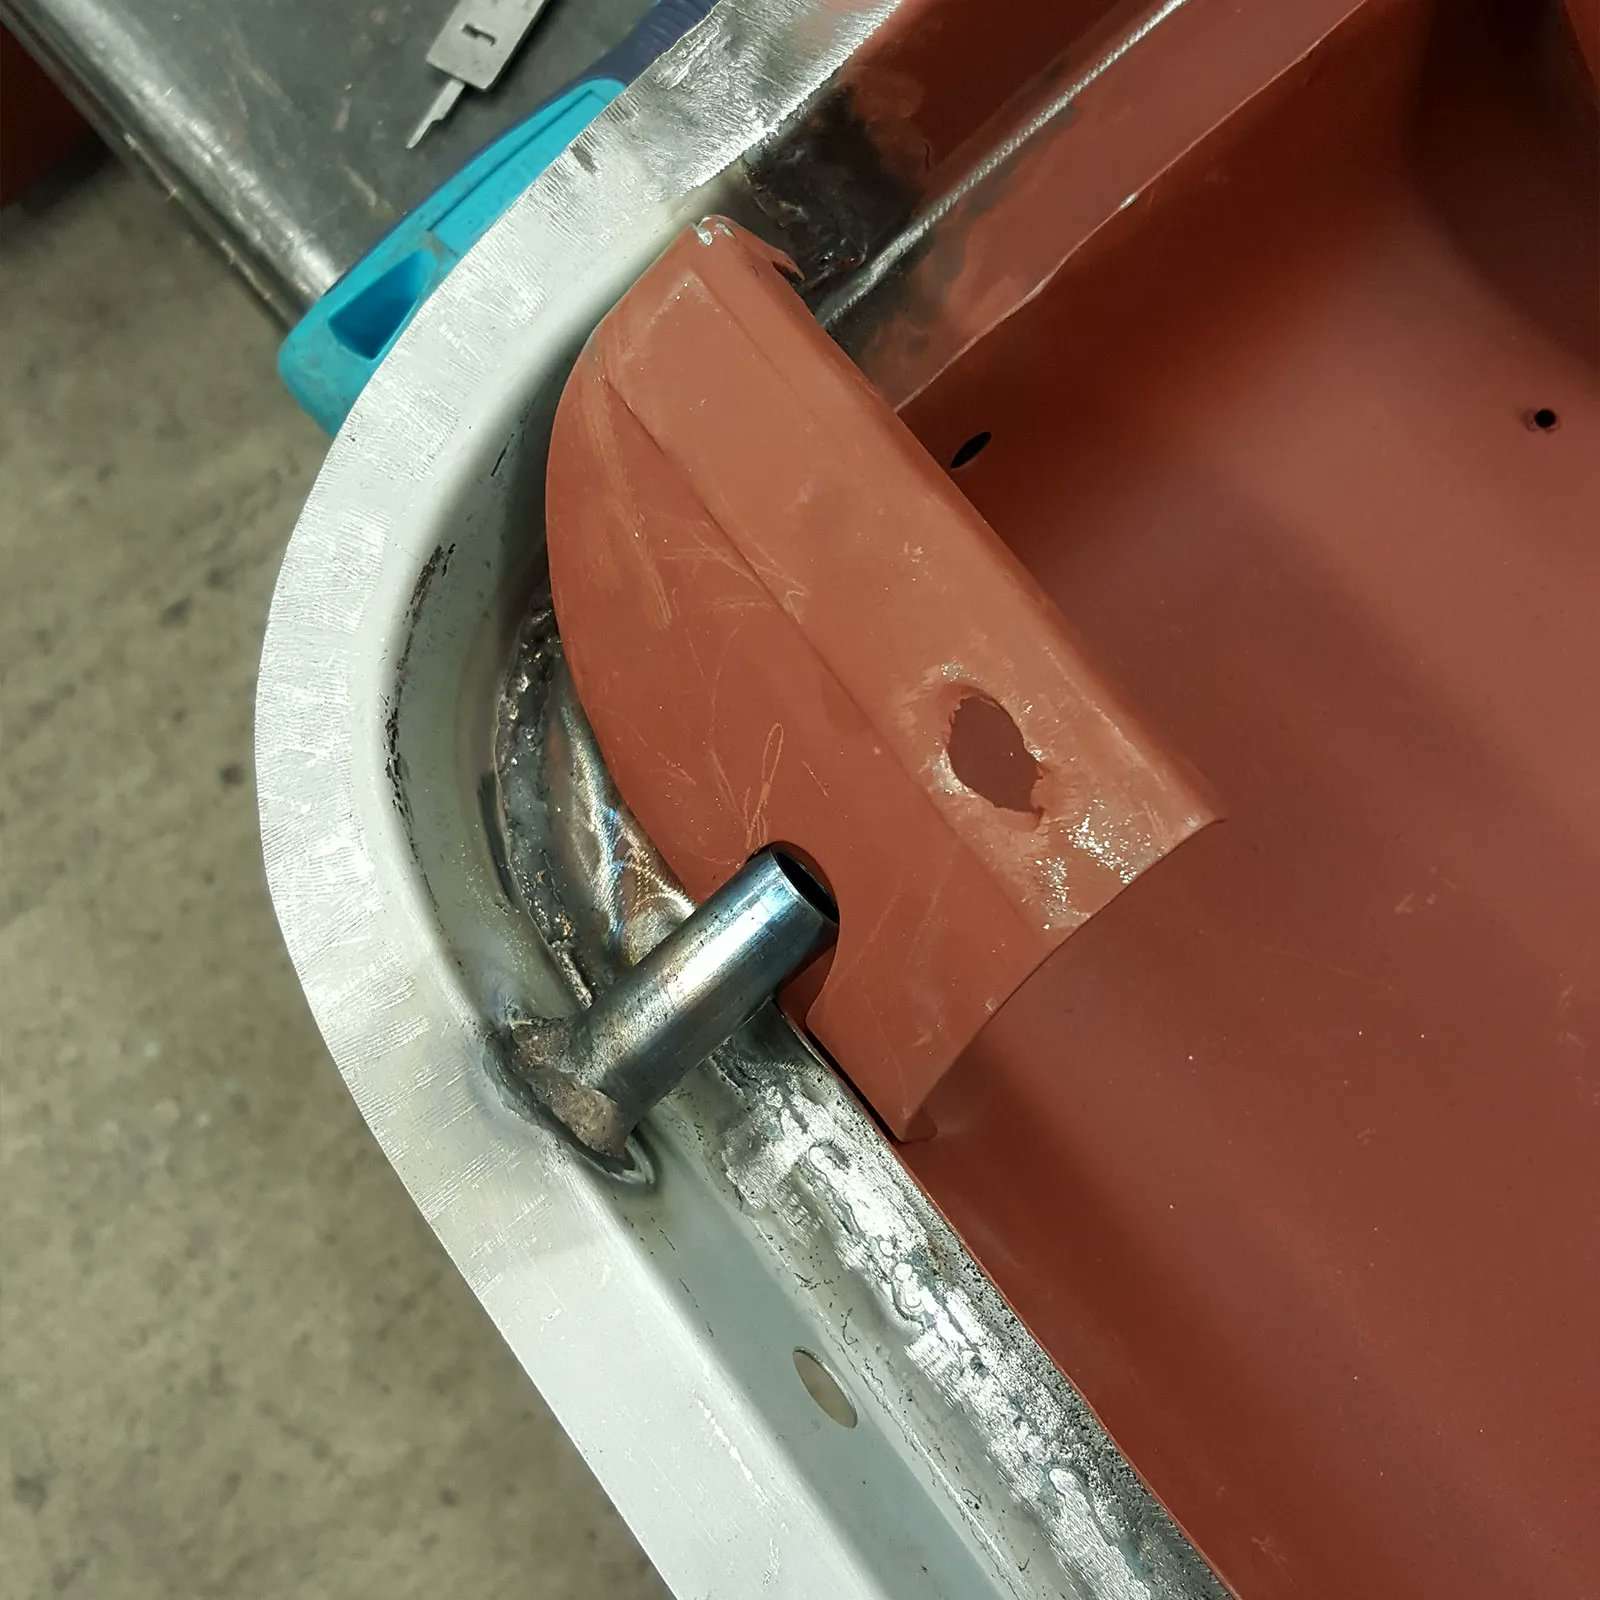
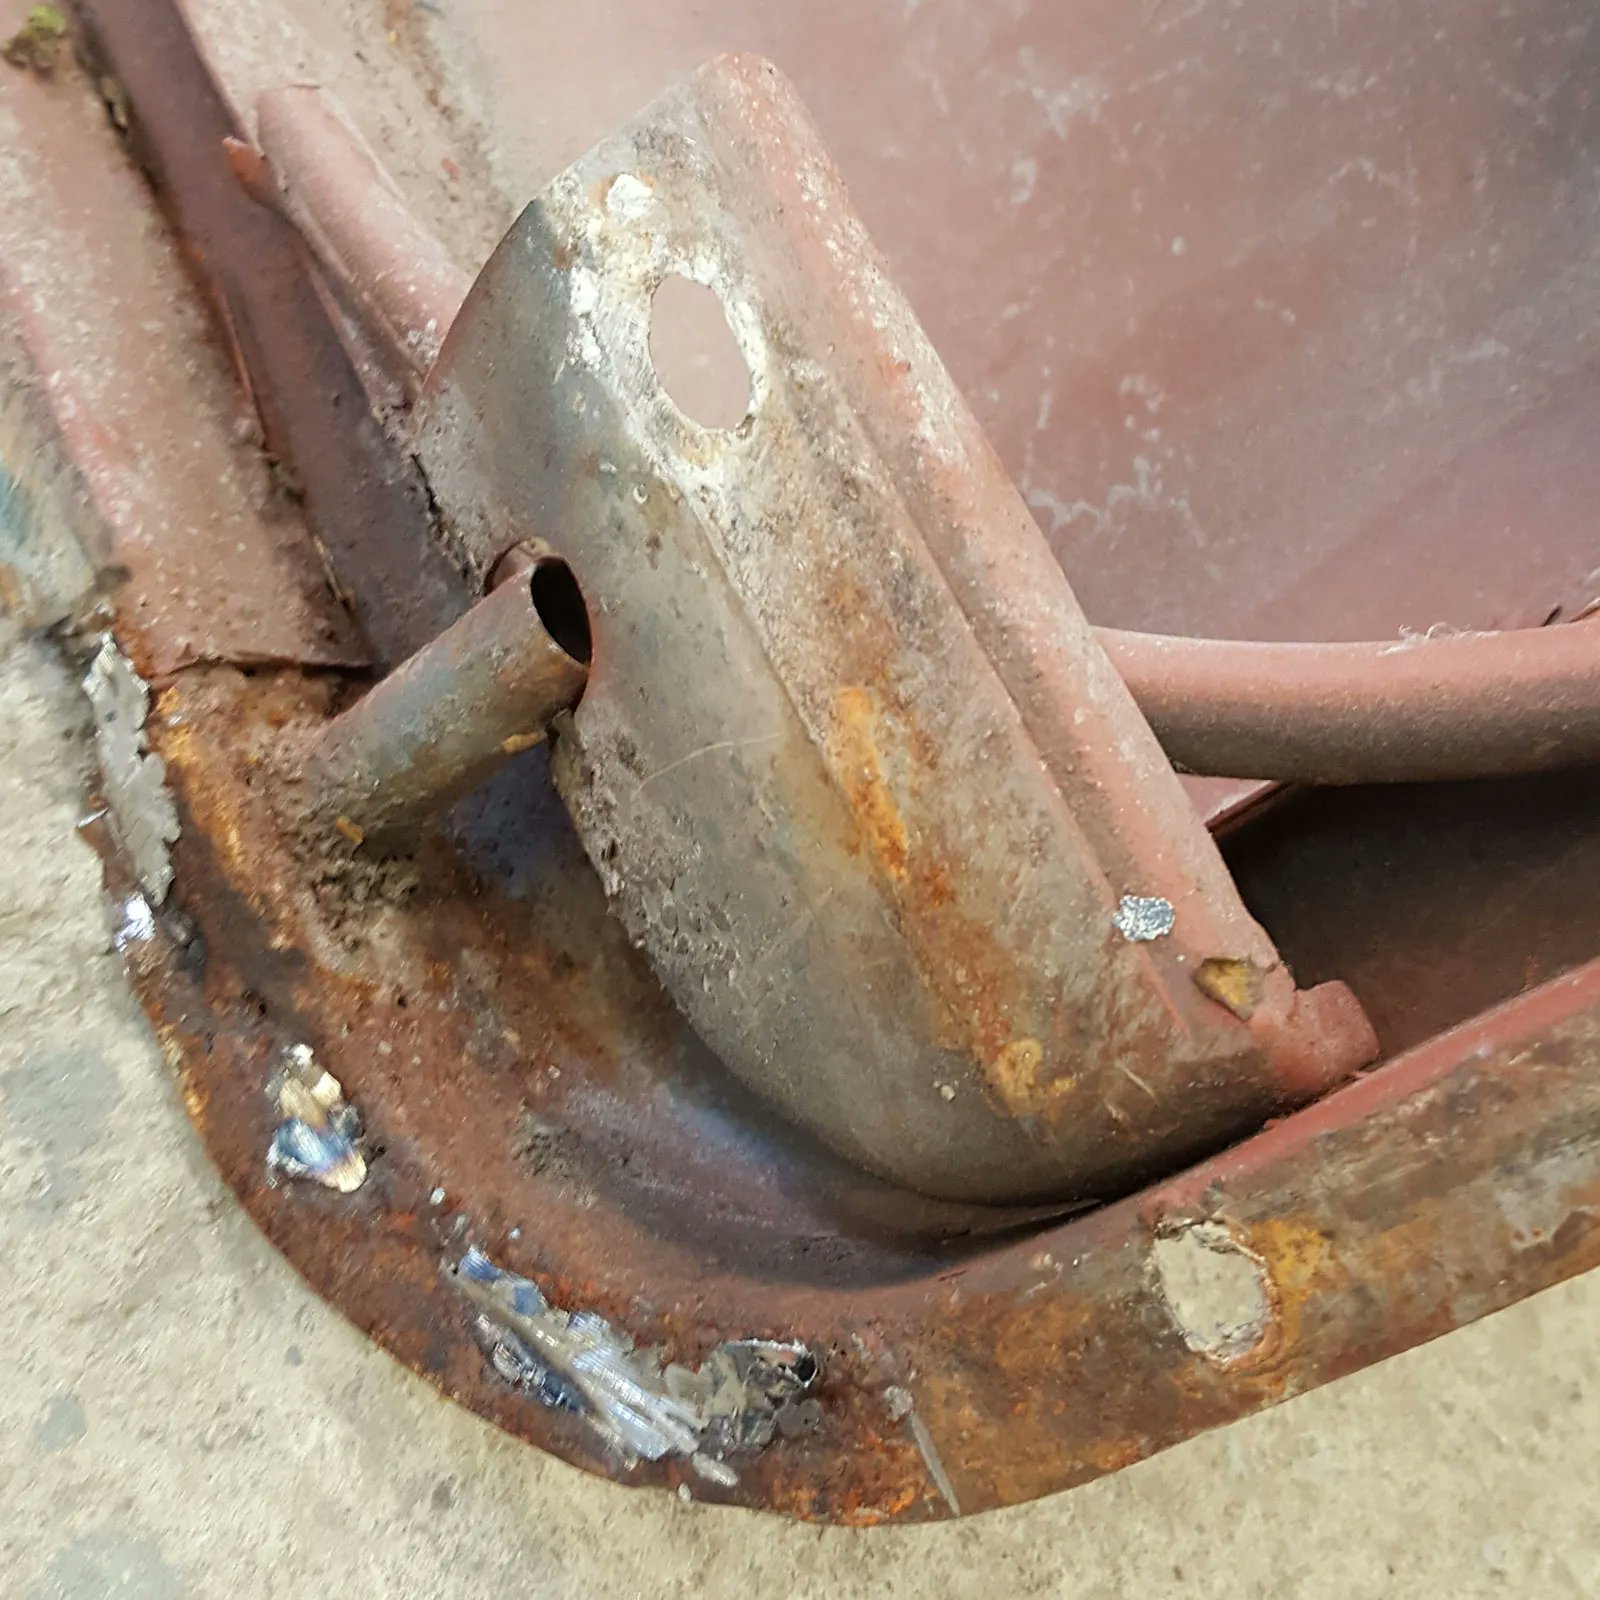
Our doors for the Plastics4Performance 1969 Mini Cooper 998 MkII featured a drain tube which we fabricated and fit.
Our doors for the Plastics4Performance 1969 Mini Cooper 998 MkII featured a drain tube which we fabricated and fit.
Our doors for the Plastics4Performance 1969 Mini Cooper 998 MkII featured a drain tube which we fabricated and fit.
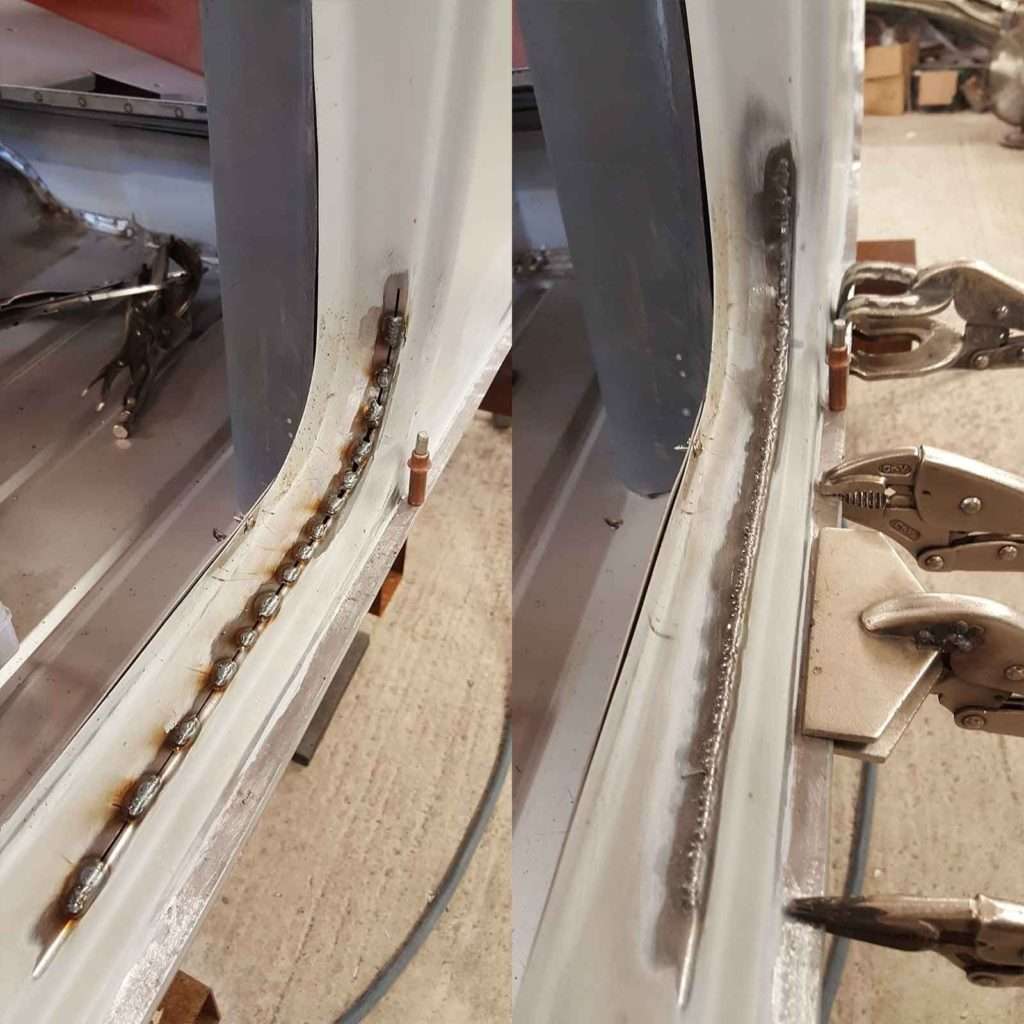
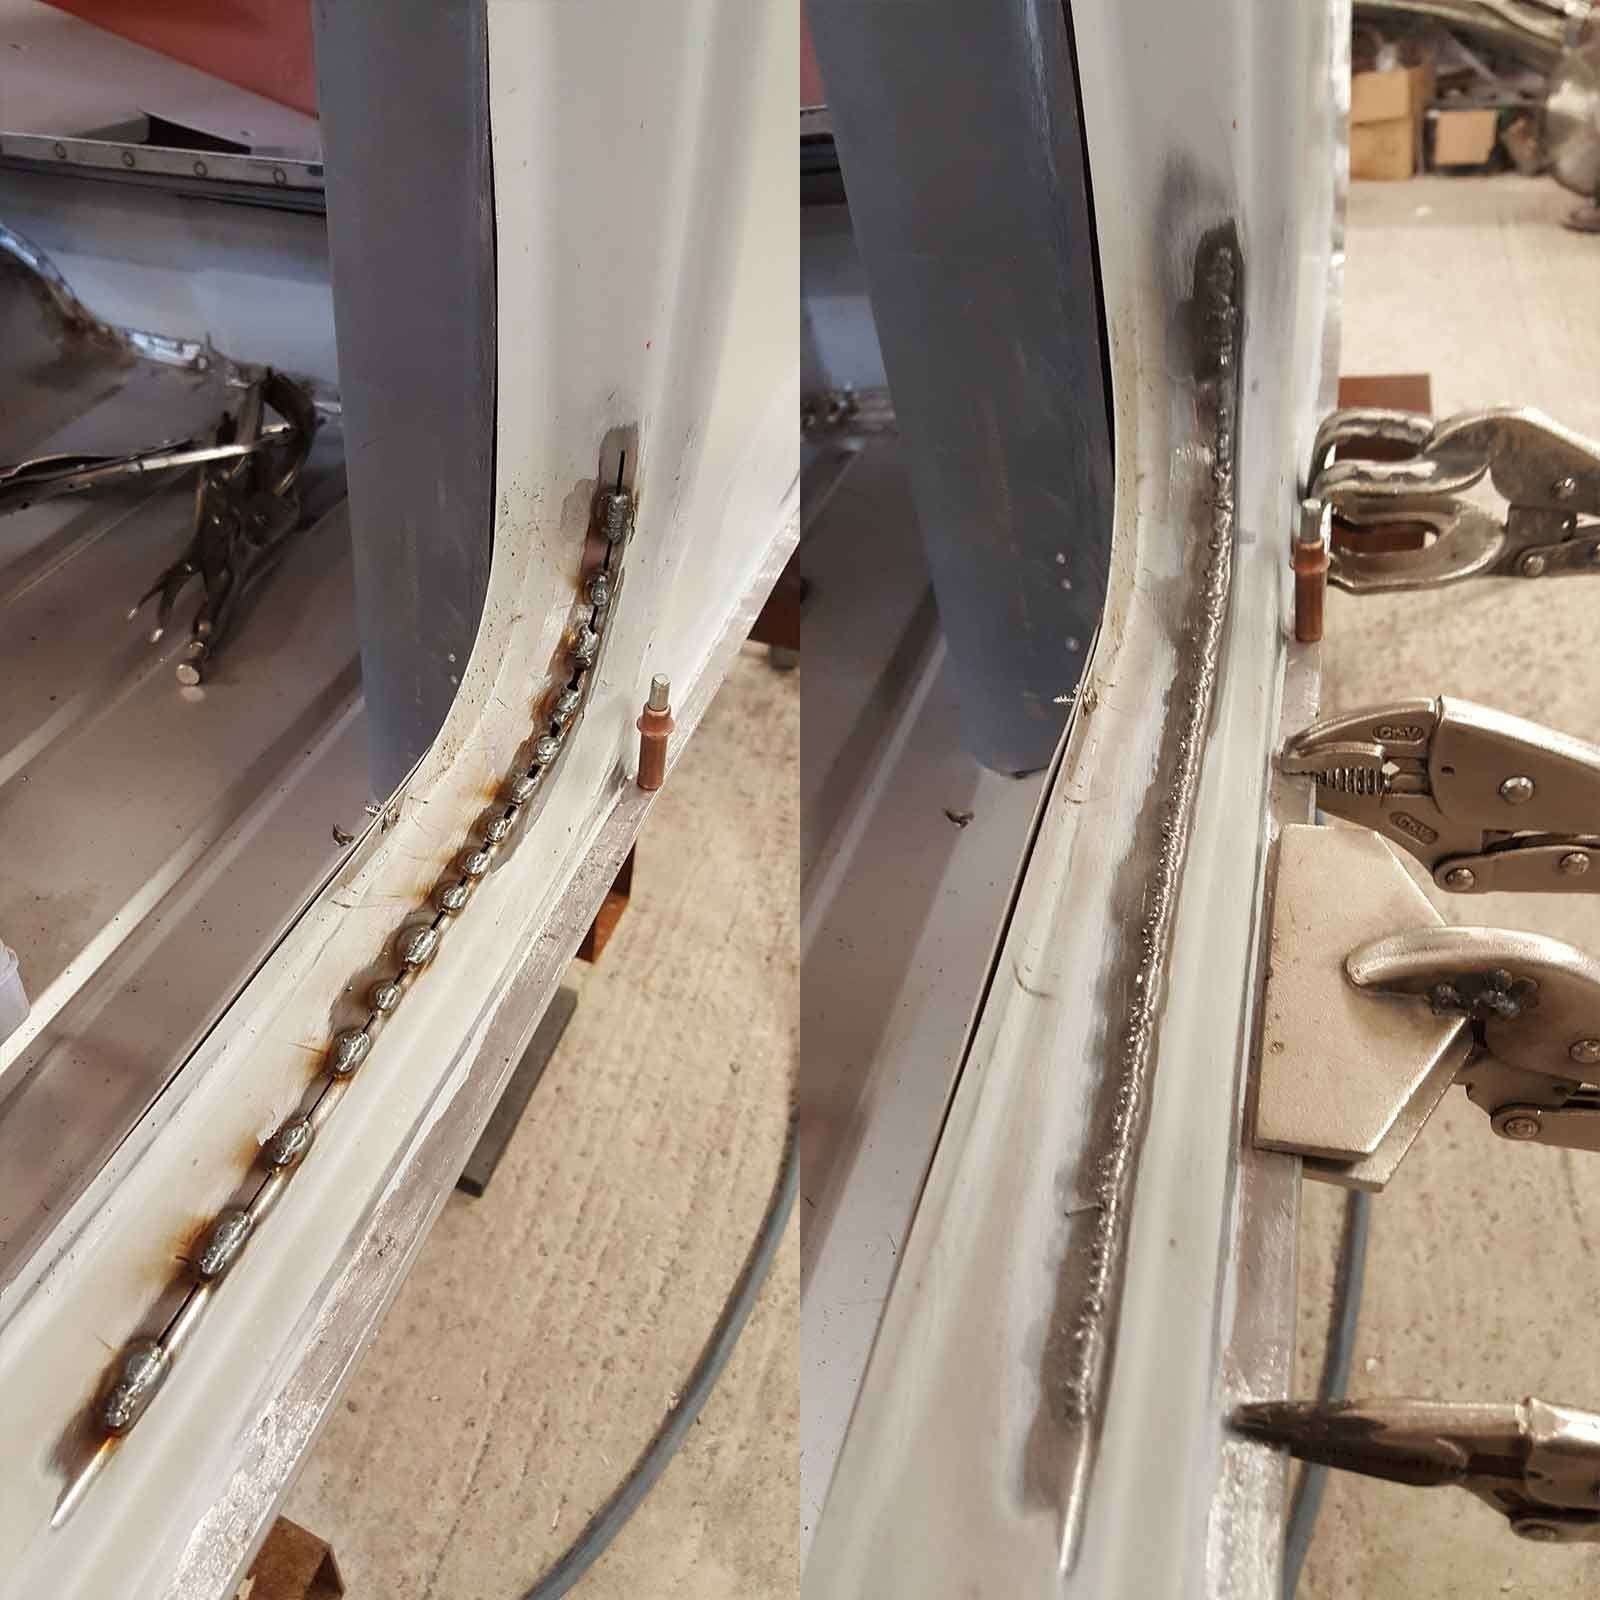
Mini Cooper 998 MkII doors do suffer from rust, but that’s no issue for us! We cut out all the rusty metal and then come more before fabricating new sections and welding into place.
Mini Cooper 998 MkII doors do suffer from rust, but that’s no issue for us! We cut out all the rusty metal and then come more before fabricating new sections and welding into place.
Mini Cooper 998 MkII doors do suffer from rust, but that’s no issue for us! We cut out all the rusty metal and then come more before fabricating new sections and welding into place.
Mini Cooper 998 MkII doors do suffer from rust, but that’s no issue for us! We cut out all the rusty metal and then come more before fabricating new sections and welding into place.
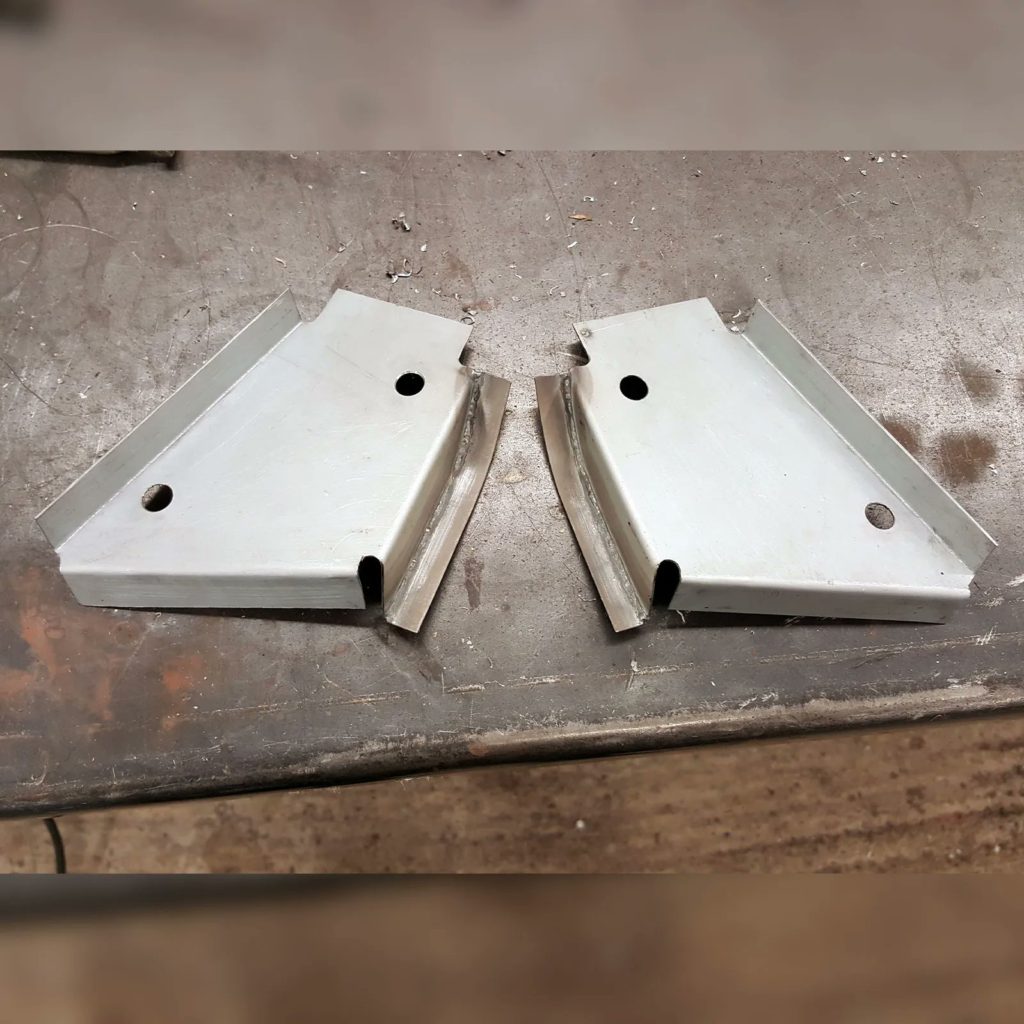
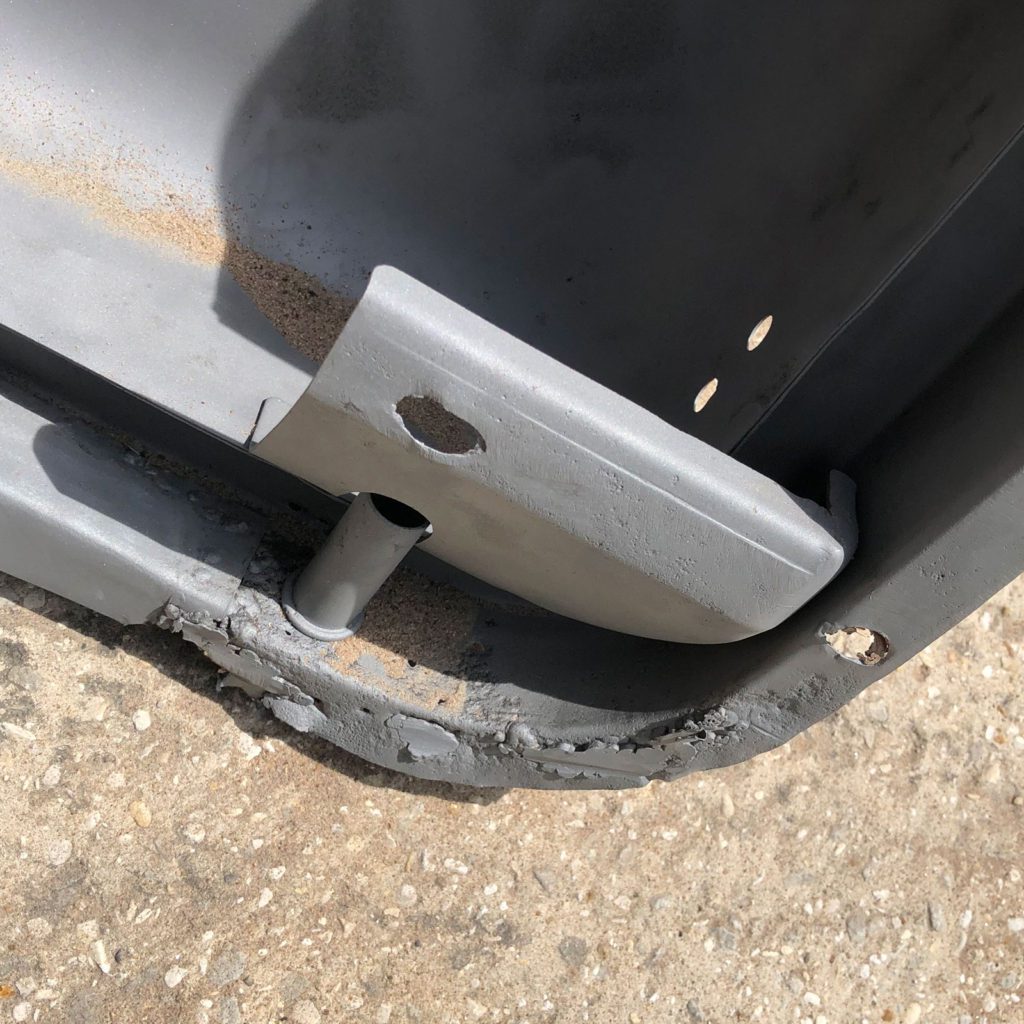
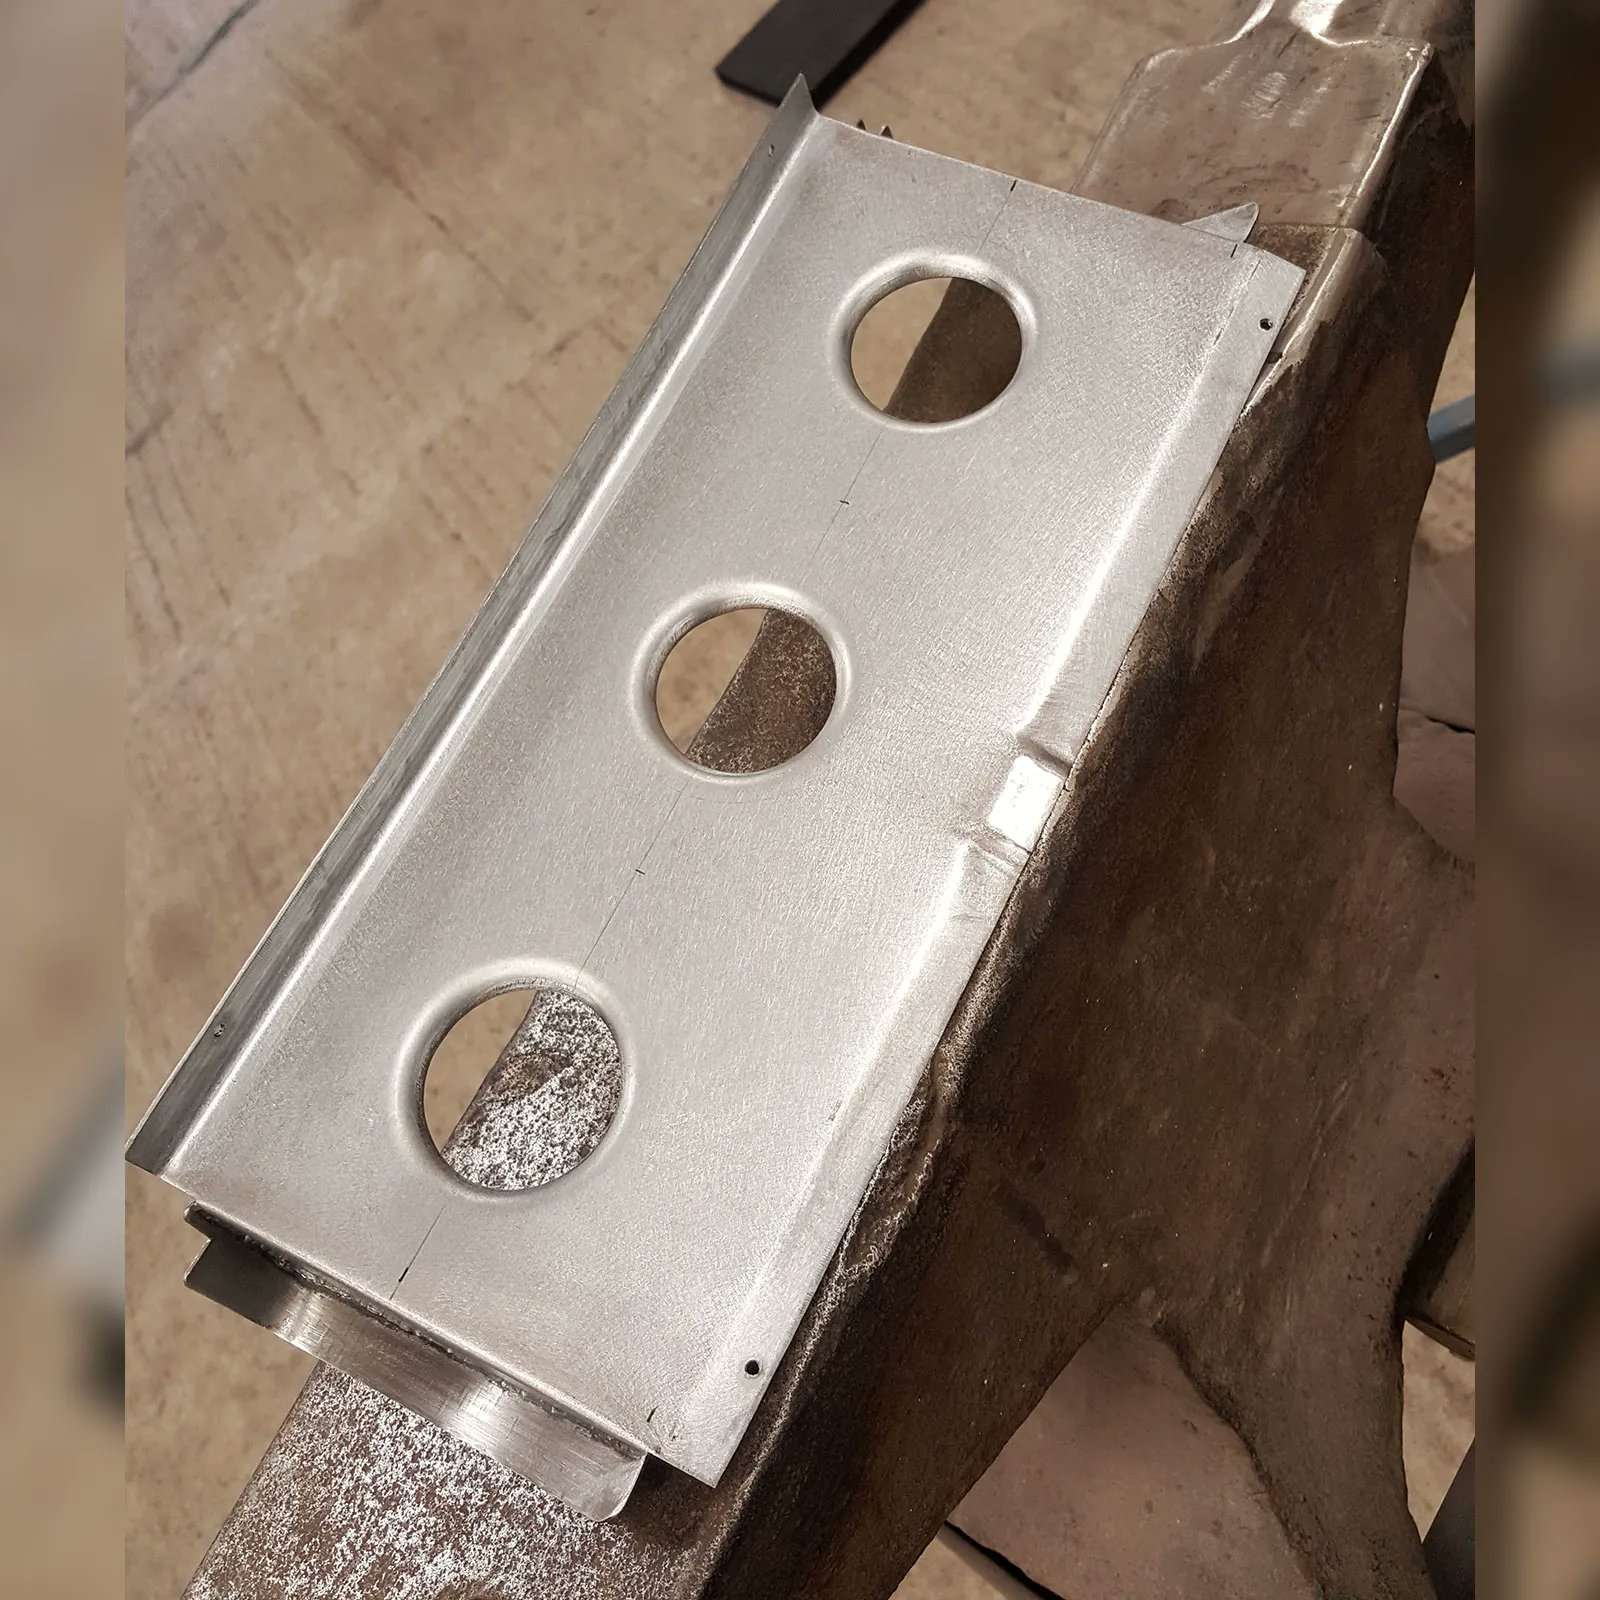
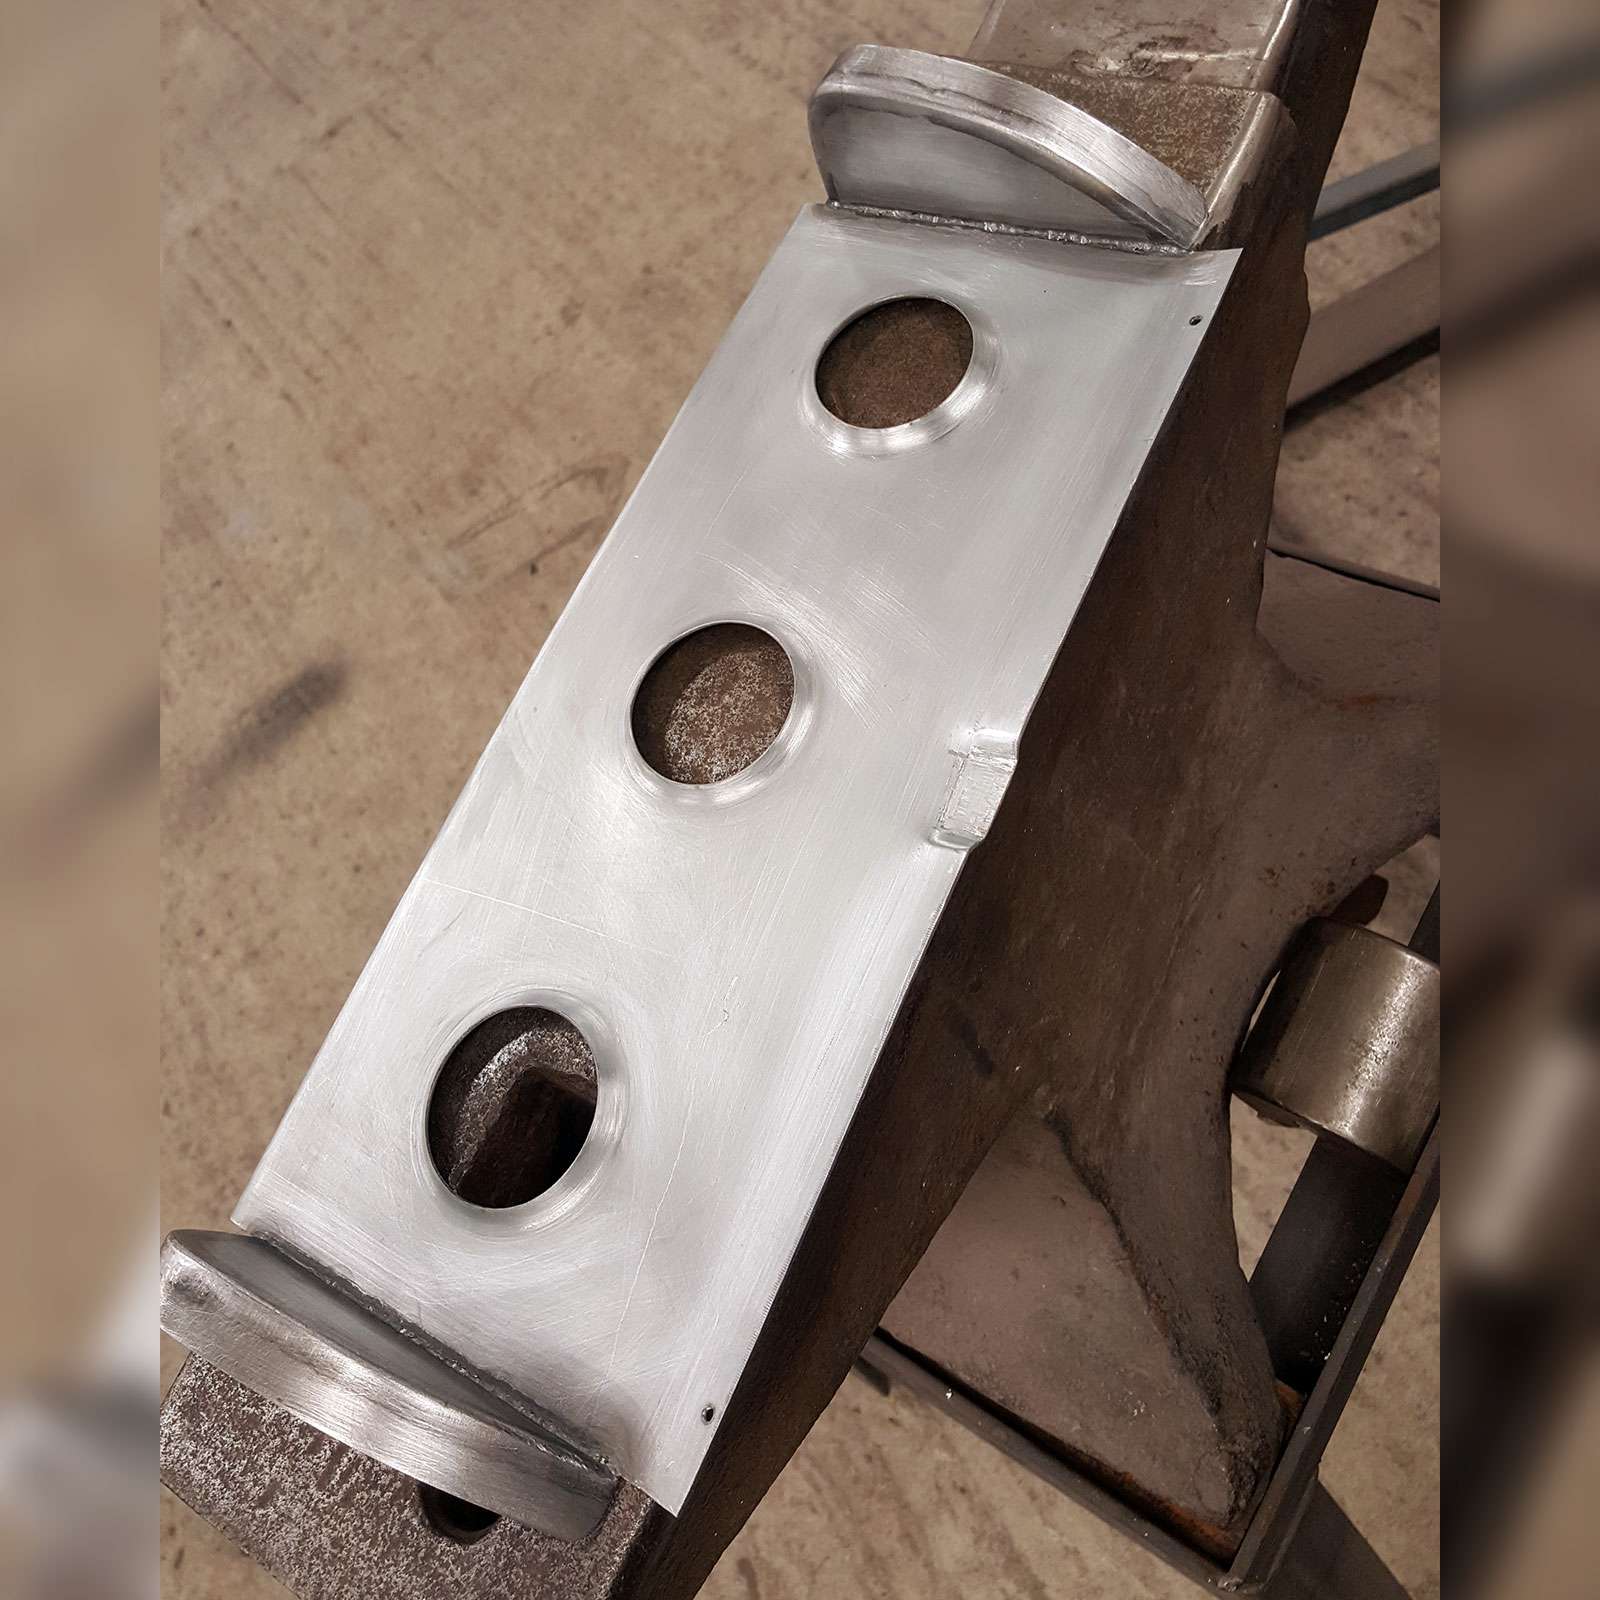
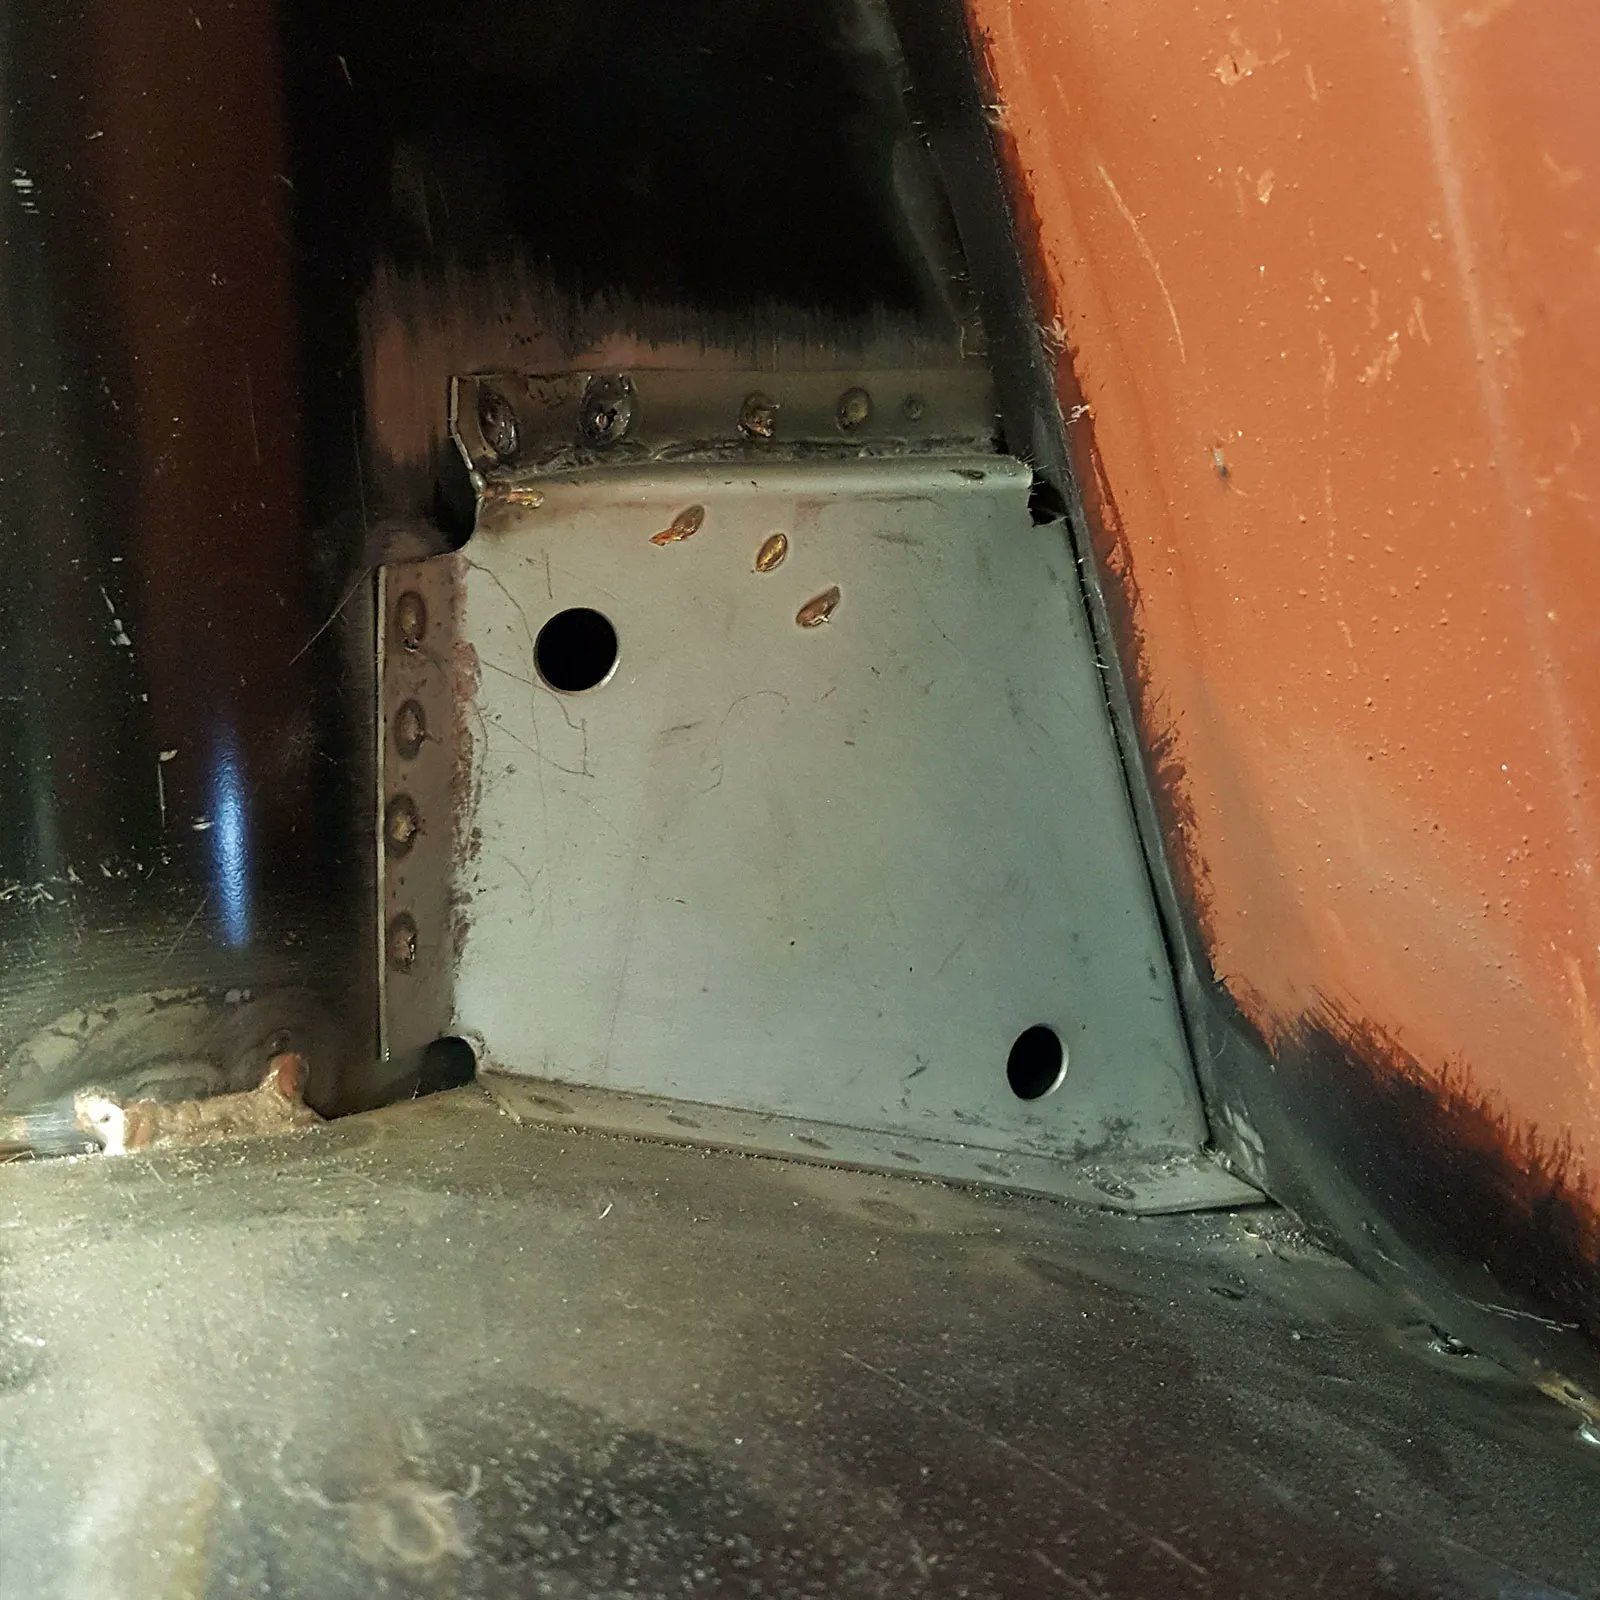
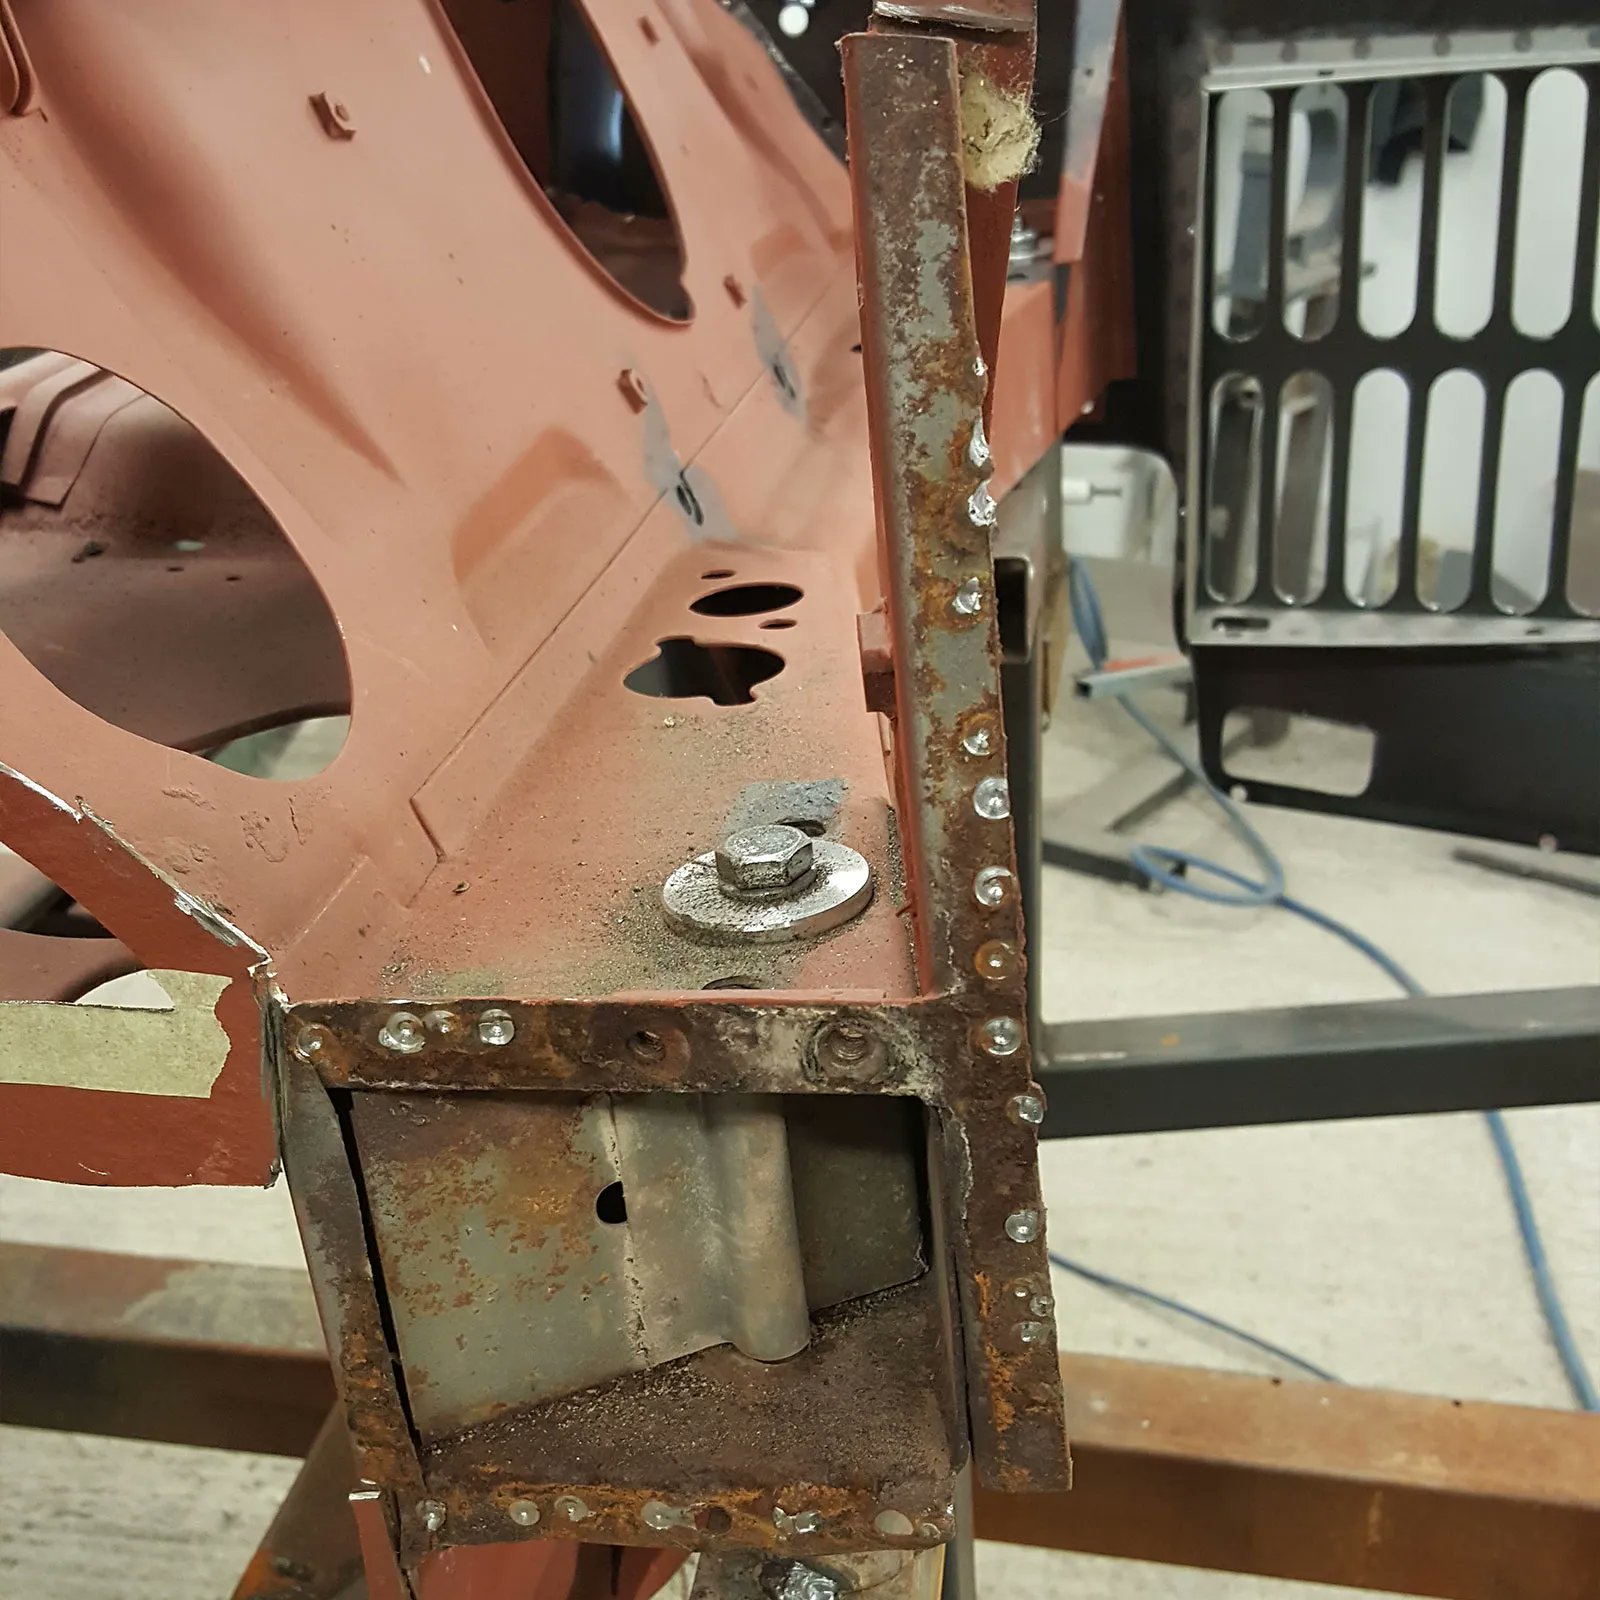
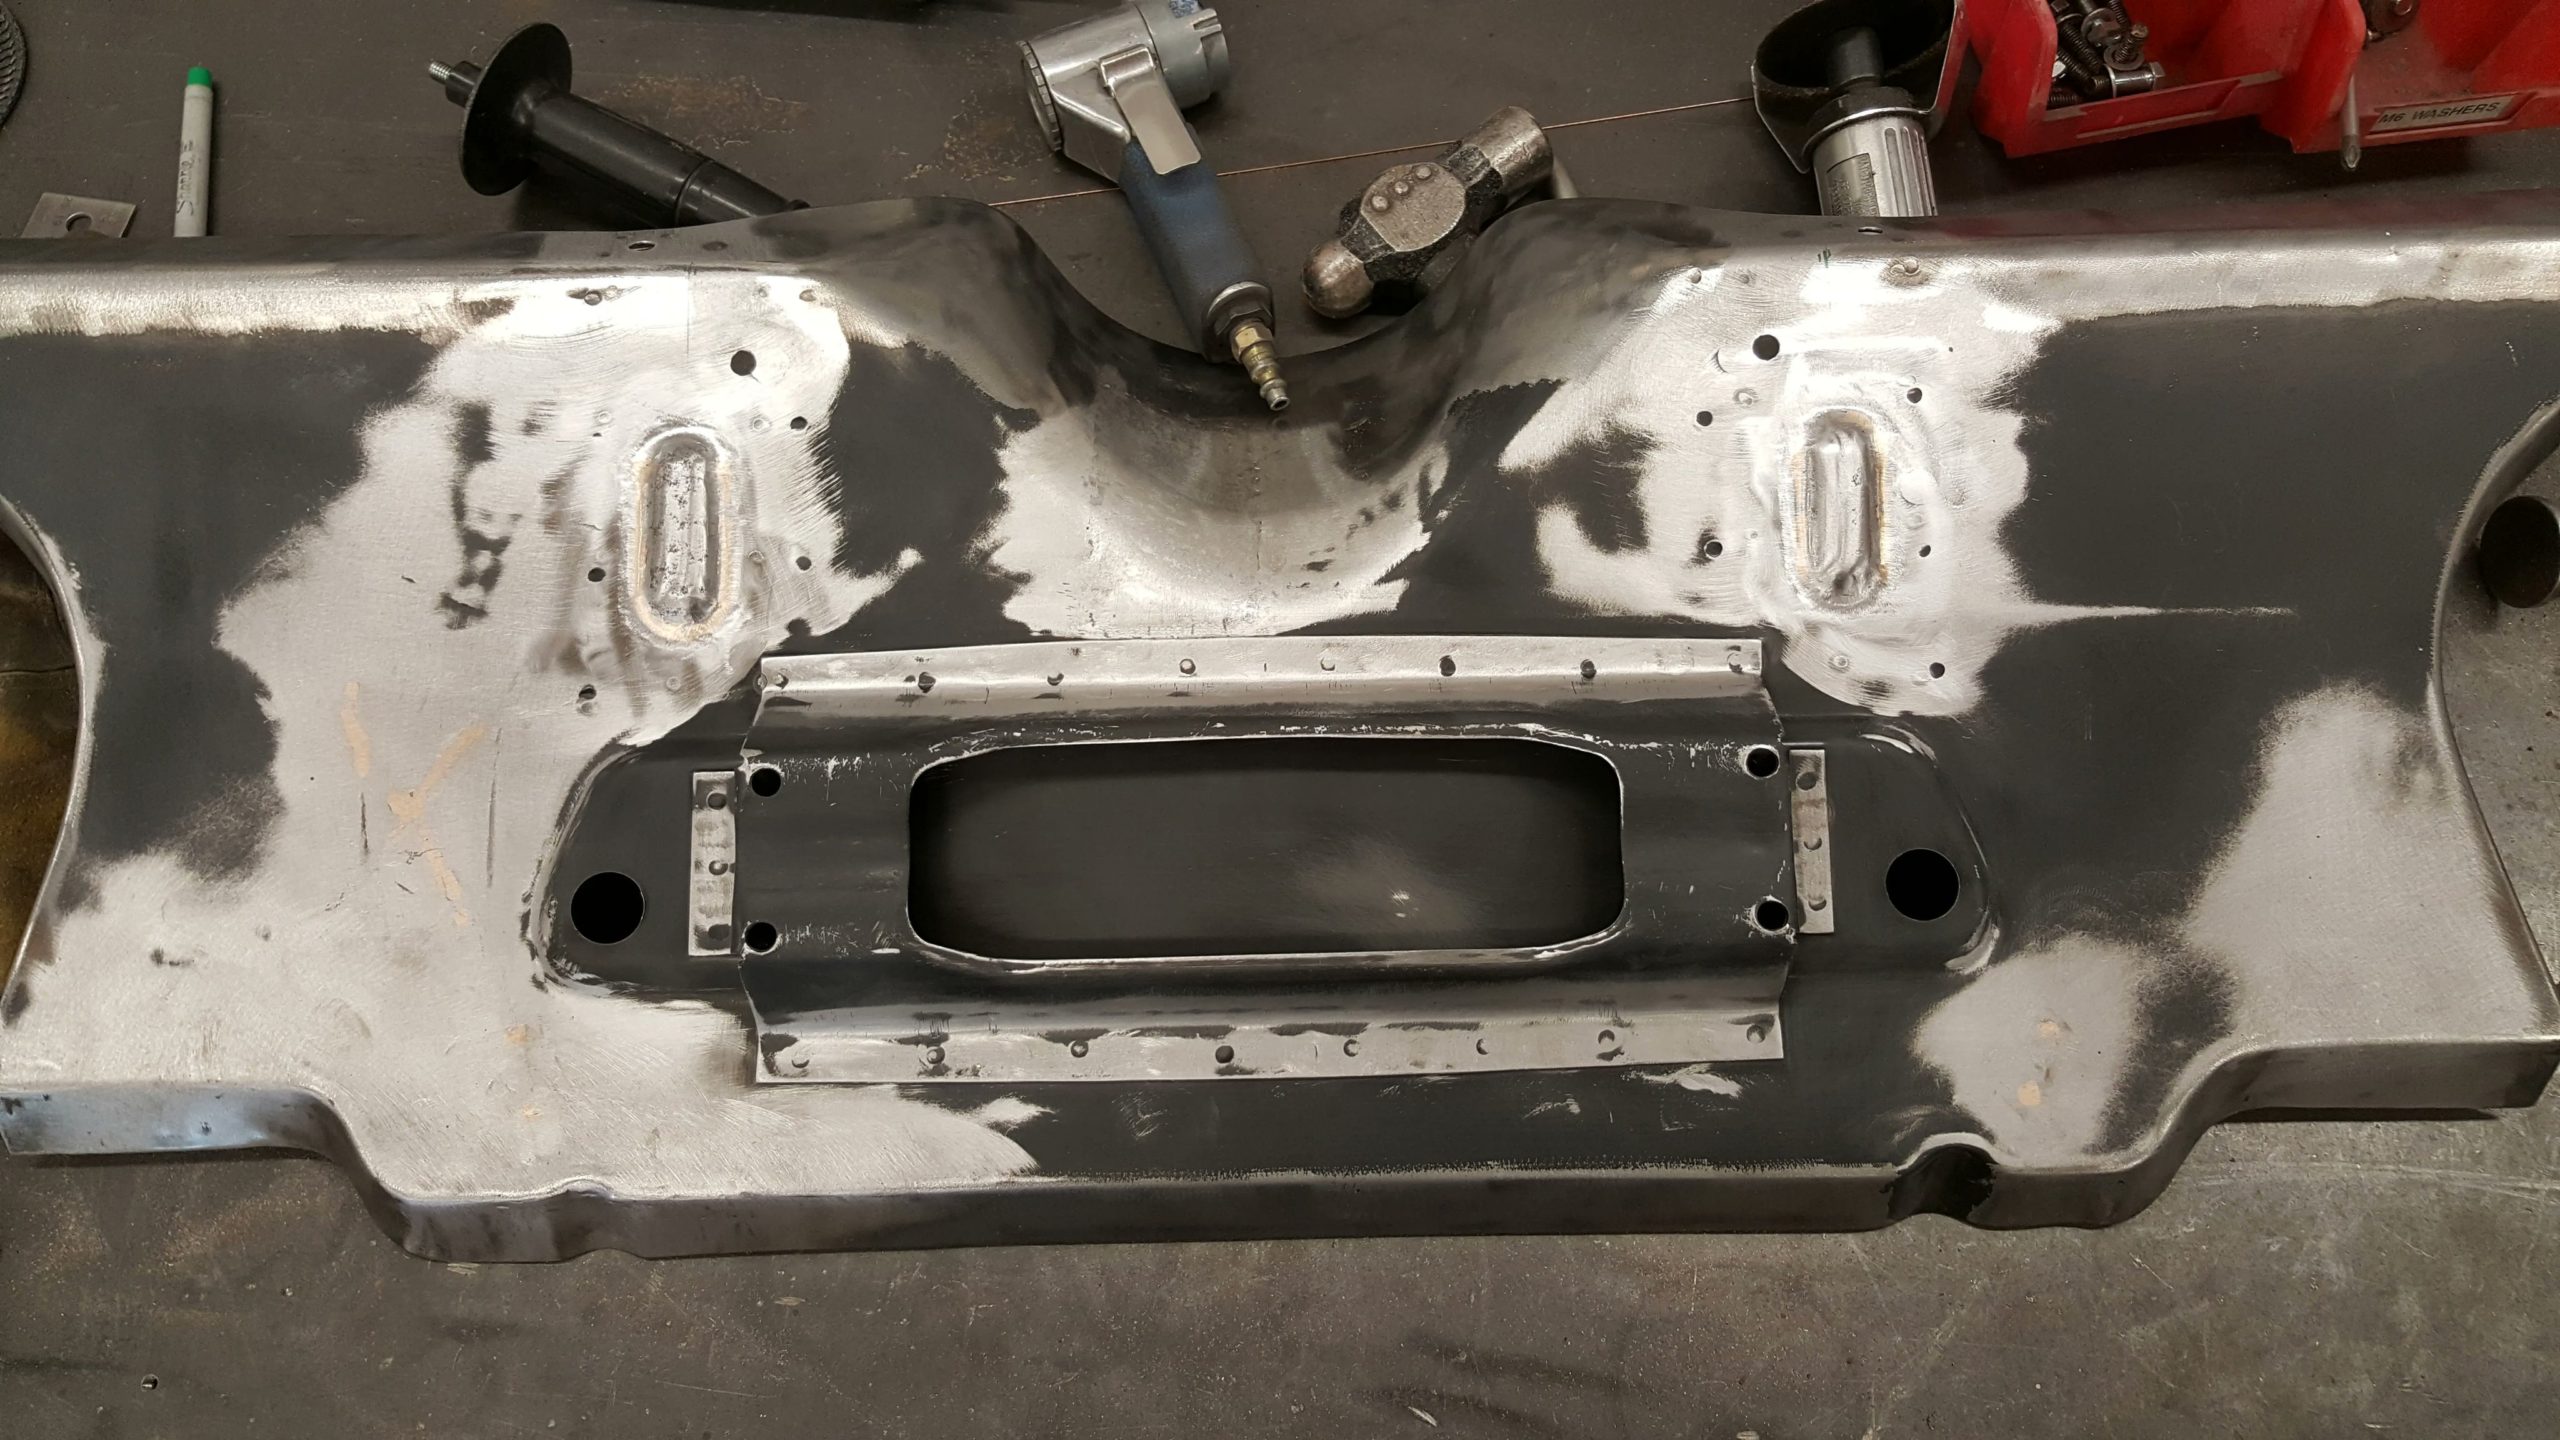
The finished oil cooler support bracket on the Plastics4Performance 1969 Mini Cooper 998 MkII is a thing of beauty. A complex piece that shows the efforts we go to on even the simplest parts.
The finished oil cooler support bracket on the Plastics4Performance 1969 Mini Cooper 998 MkII is a thing of beauty. A complex piece that shows the efforts we go to on even the simplest parts.
The finished oil cooler support bracket on the Plastics4Performance 1969 Mini Cooper 998 MkII is a thing of beauty. A complex piece that shows the efforts we go to on even the simplest parts.
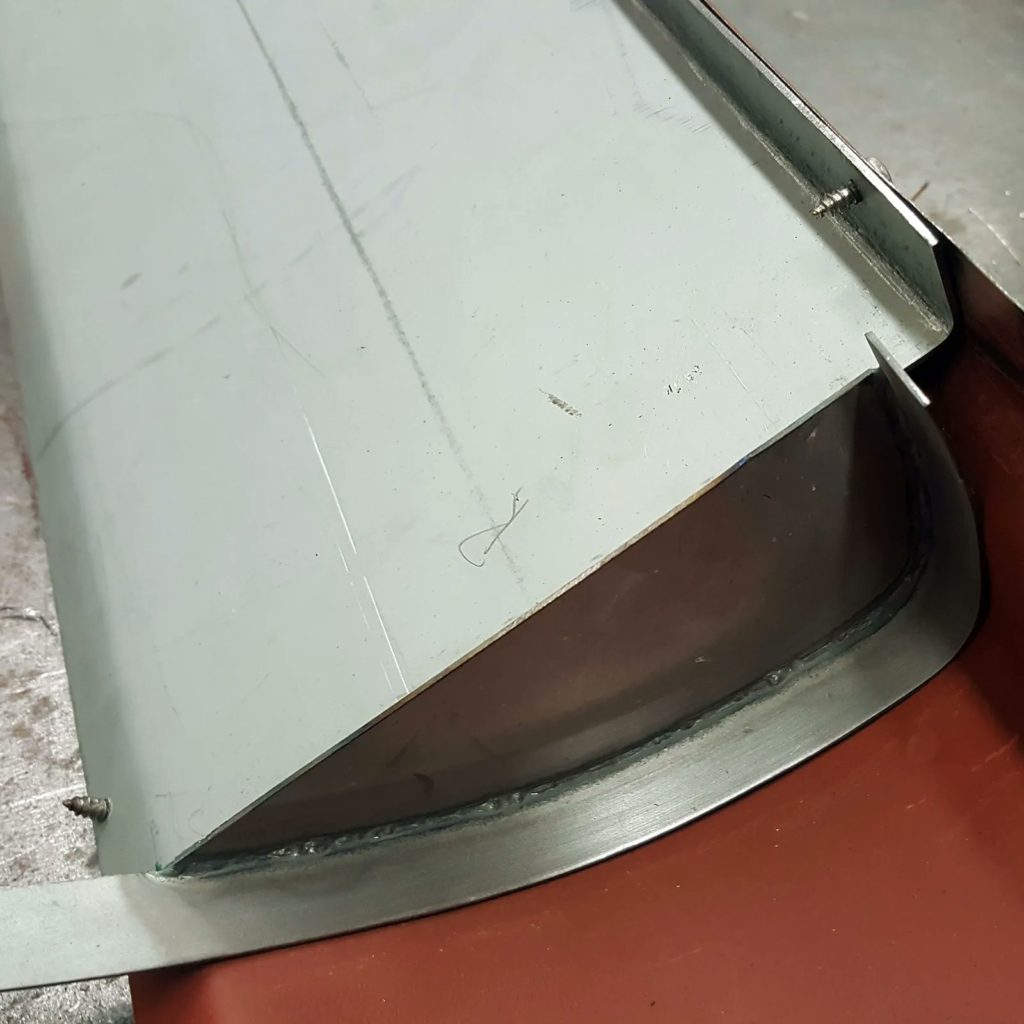
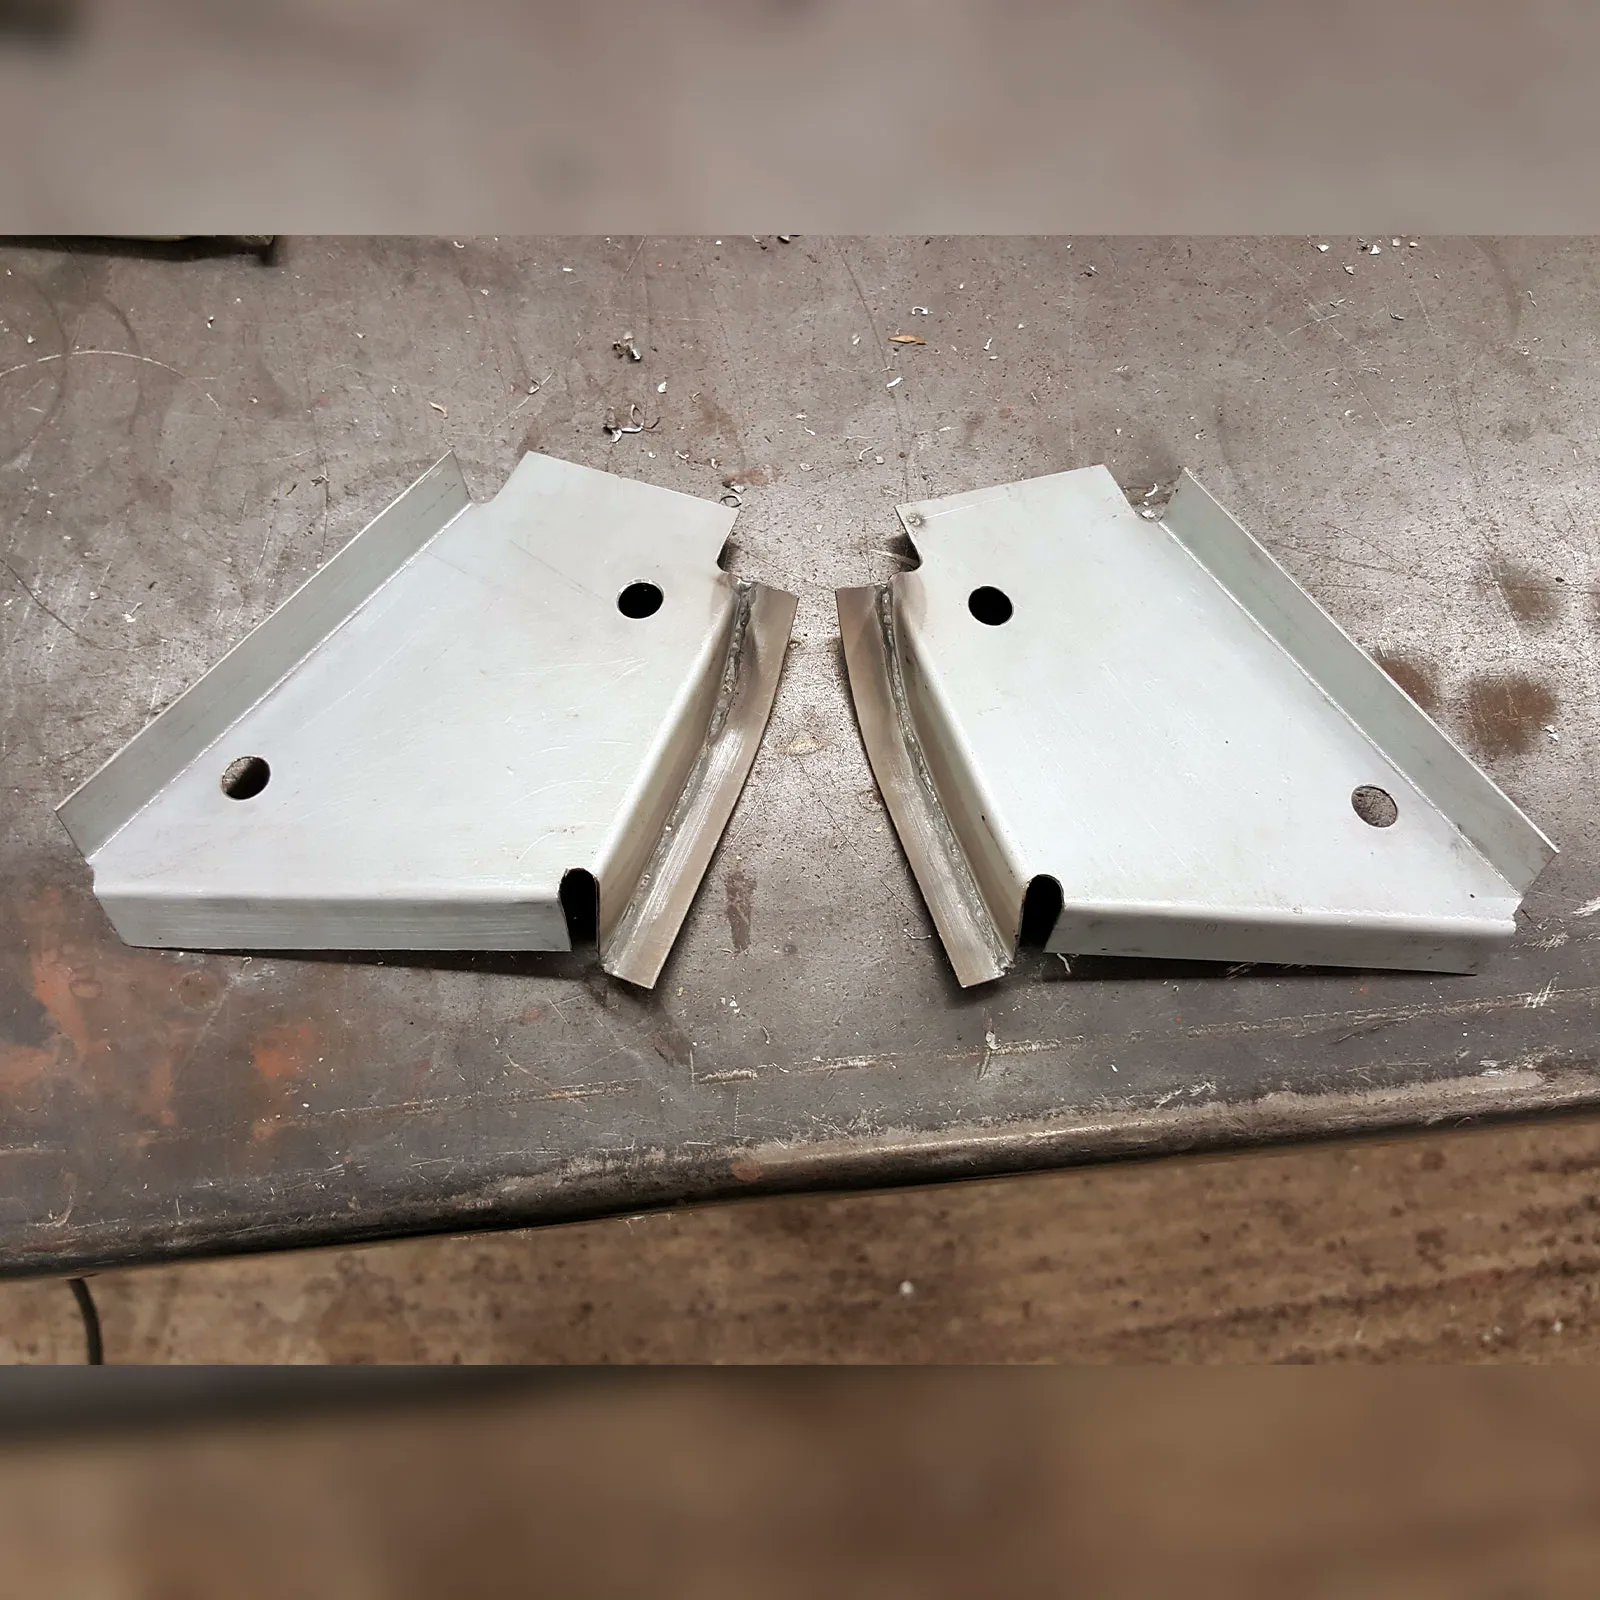
Starting work on a new fabrication on the Plastics4Performance 1969 Mini Cooper 998 MkII. Folding the edge on the front panel to accommodate an oil cooler isn’t good enough for us, so we’re fabricating an oil cooler support bracket.
Starting work on a new fabrication on the Plastics4Performance 1969 Mini Cooper 998 MkII. Folding the edge on the front panel to accommodate an oil cooler isn’t good enough for us, so we’re fabricating an oil cooler support bracket.
Starting work on a new fabrication on the Plastics4Performance 1969 Mini Cooper 998 MkII. Folding the edge on the front panel to accommodate an oil cooler isn’t good enough for us, so we’re fabricating an oil cooler support bracket.
Starting work on a new fabrication on the Plastics4Performance 1969 Mini Cooper 998 MkII. Folding the edge on the front panel to accommodate an oil cooler isn’t good enough for us, so we’re fabricating an oil cooler support bracket.
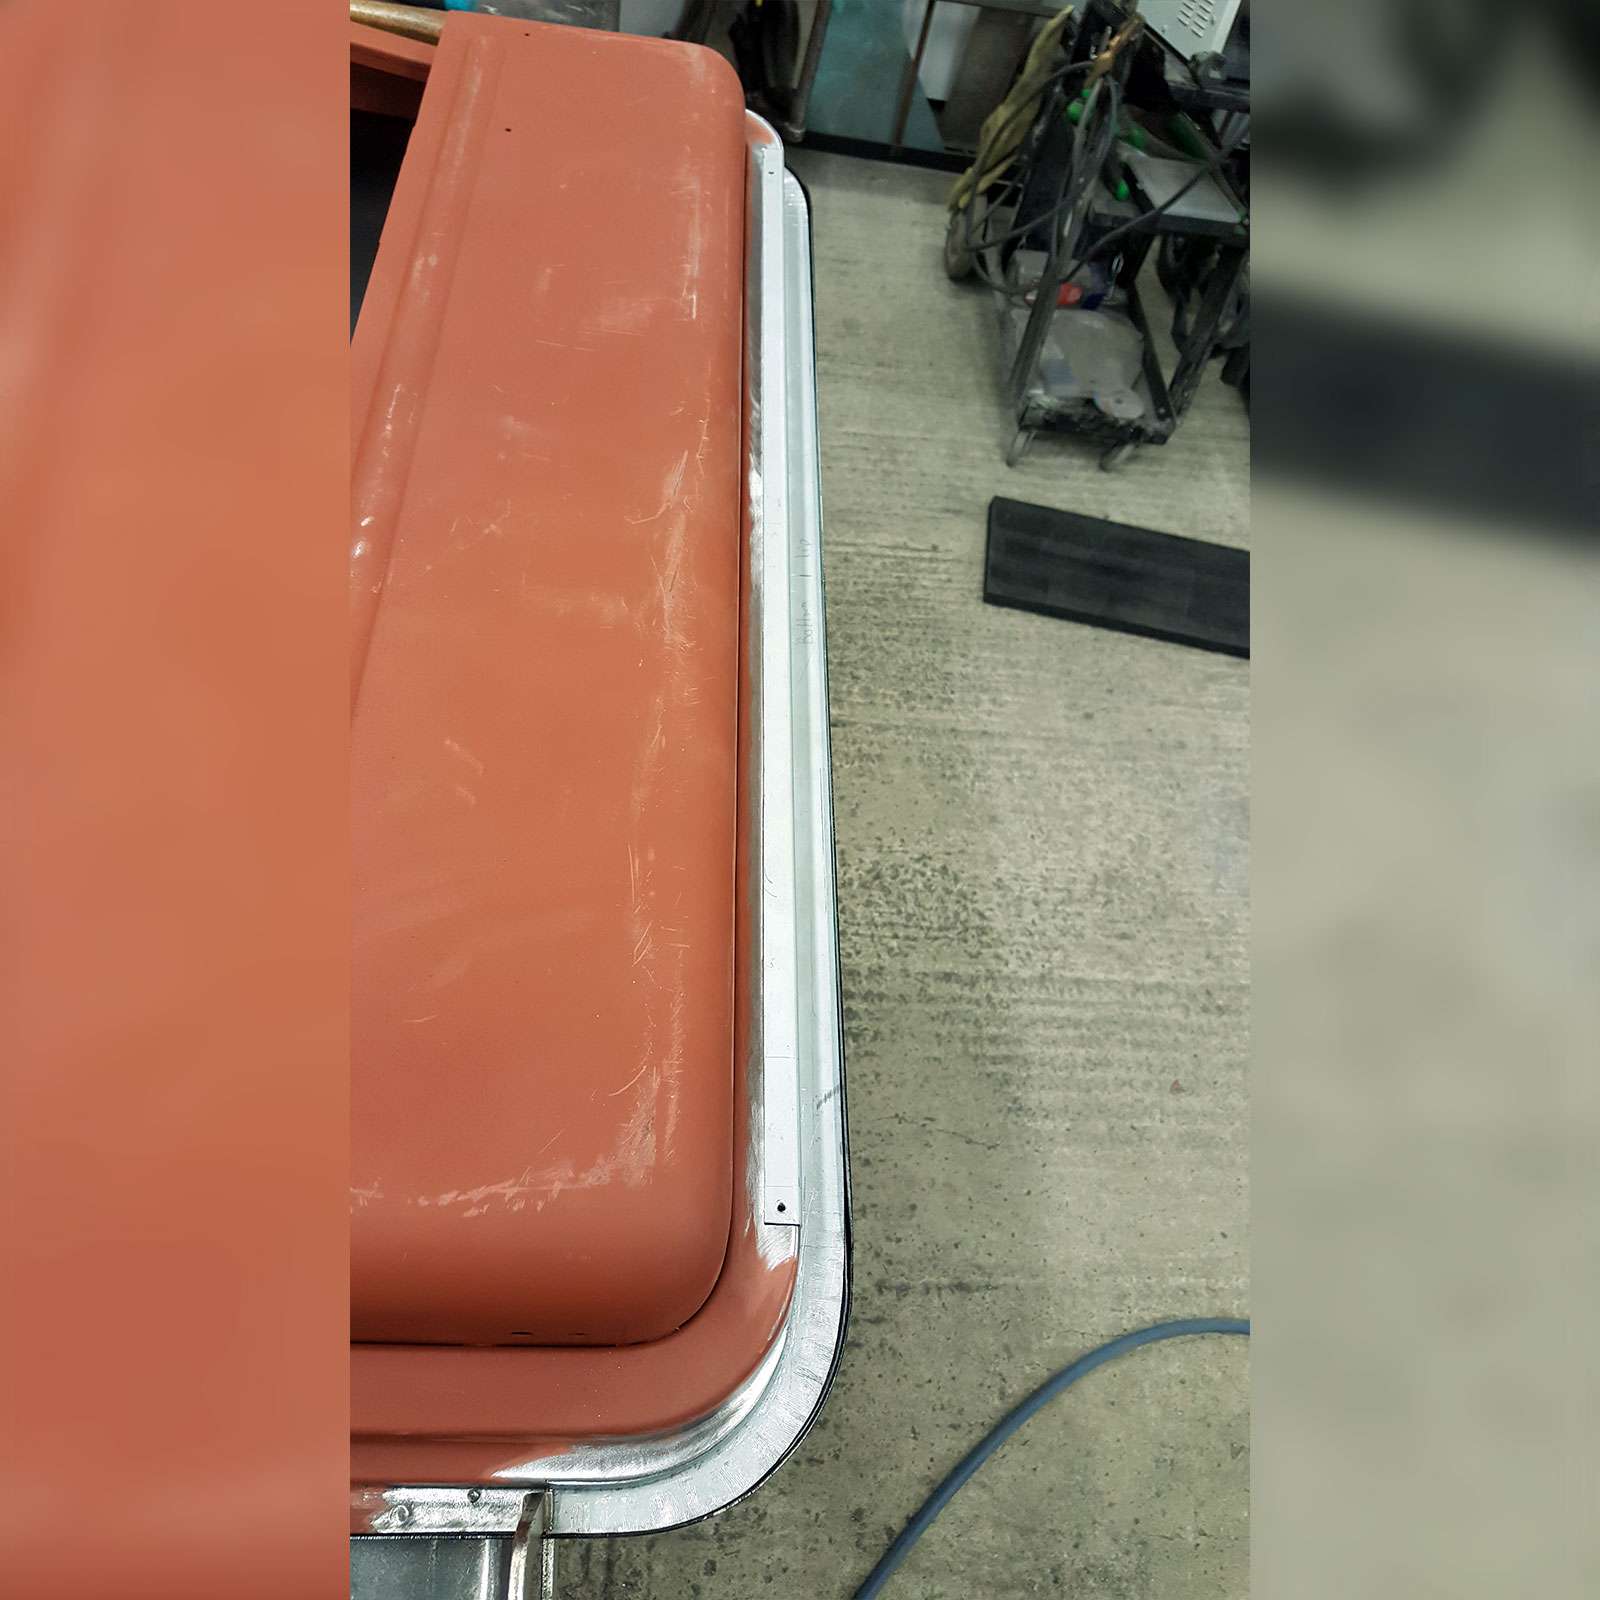
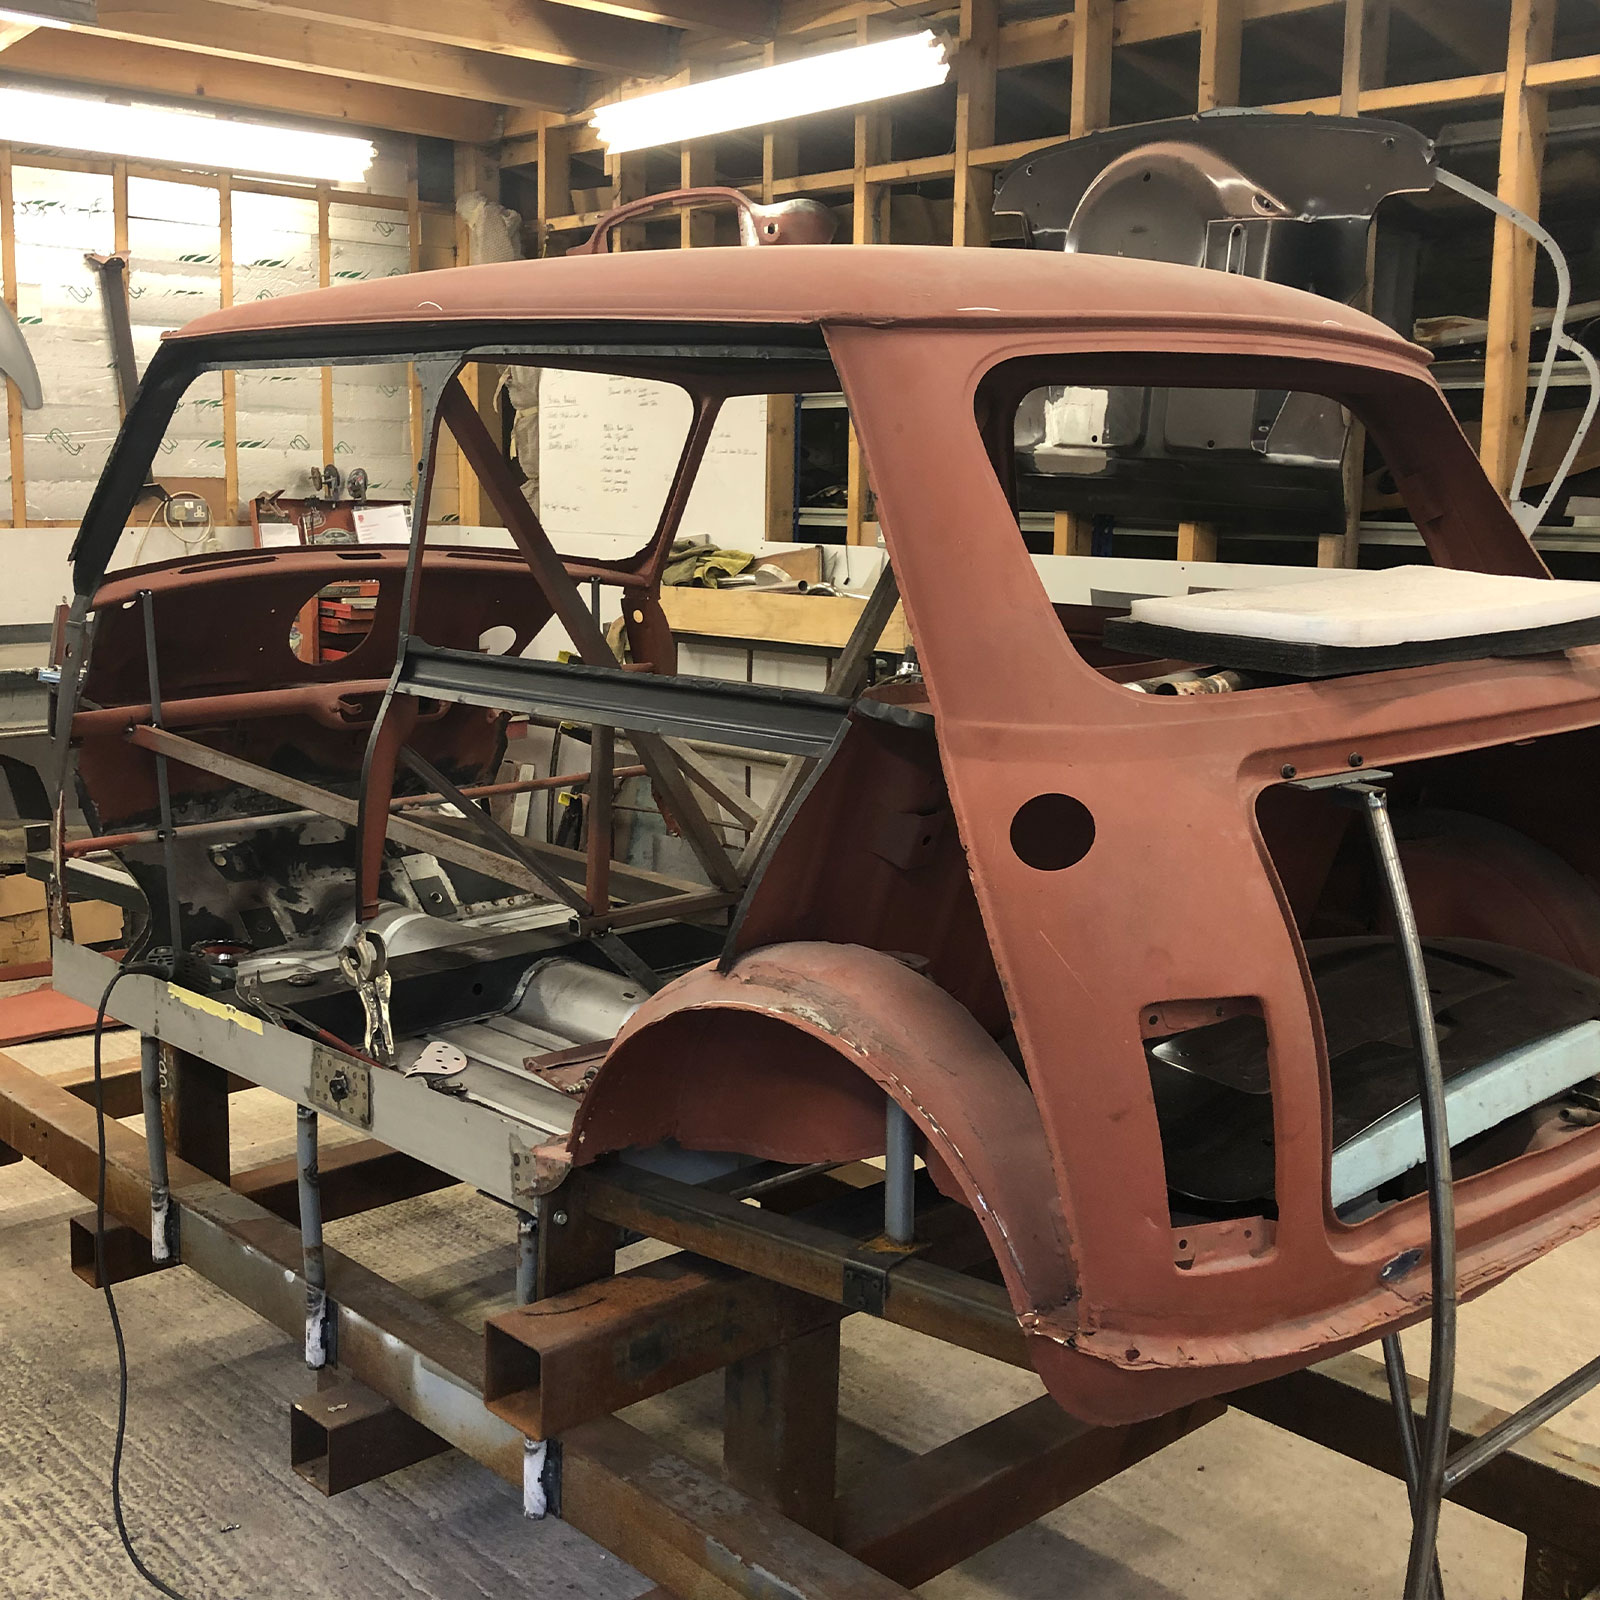
Preparing for the first test fit of a pricey Mini Sport side panel on the Plastics4Performance 1969 Mini Cooper 998 MkII. It’s exciting that such a large piece can be added in a short amount of time. We’re hoping for a great fit!
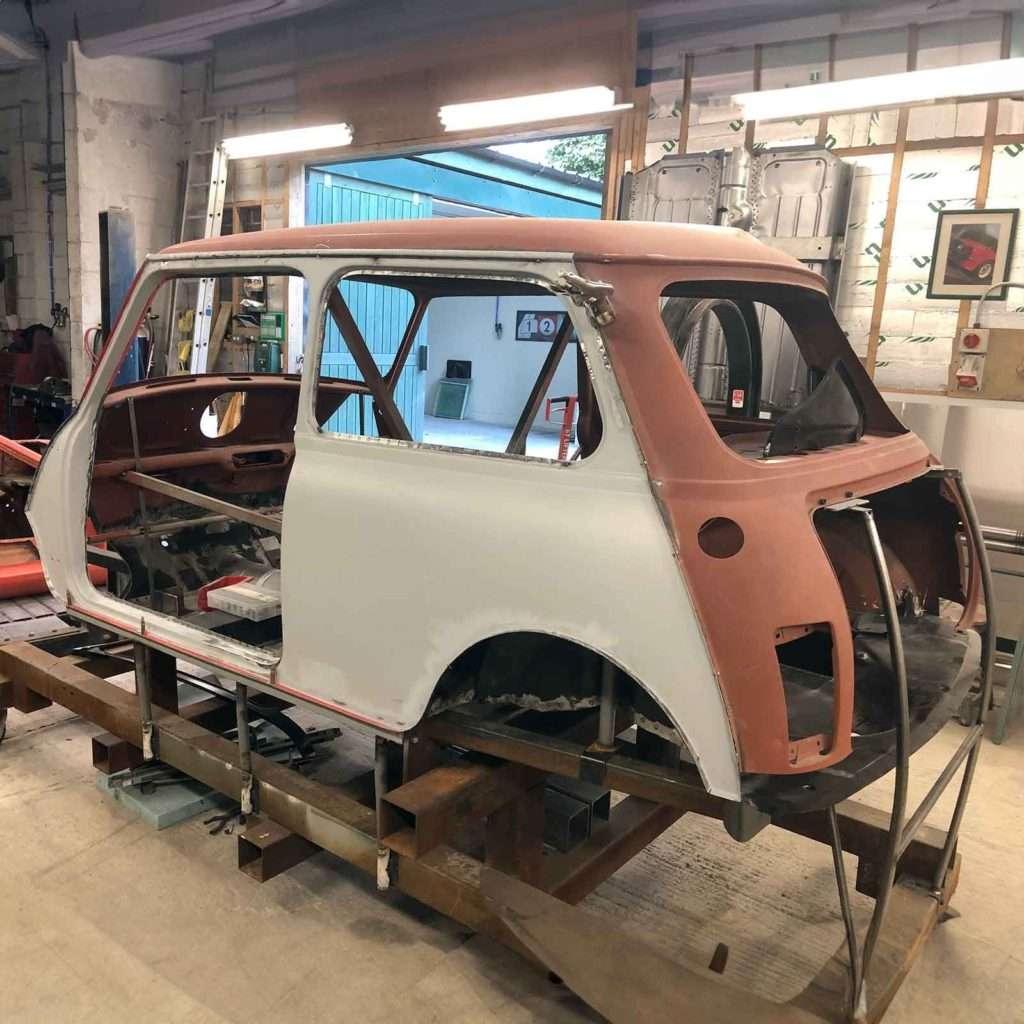
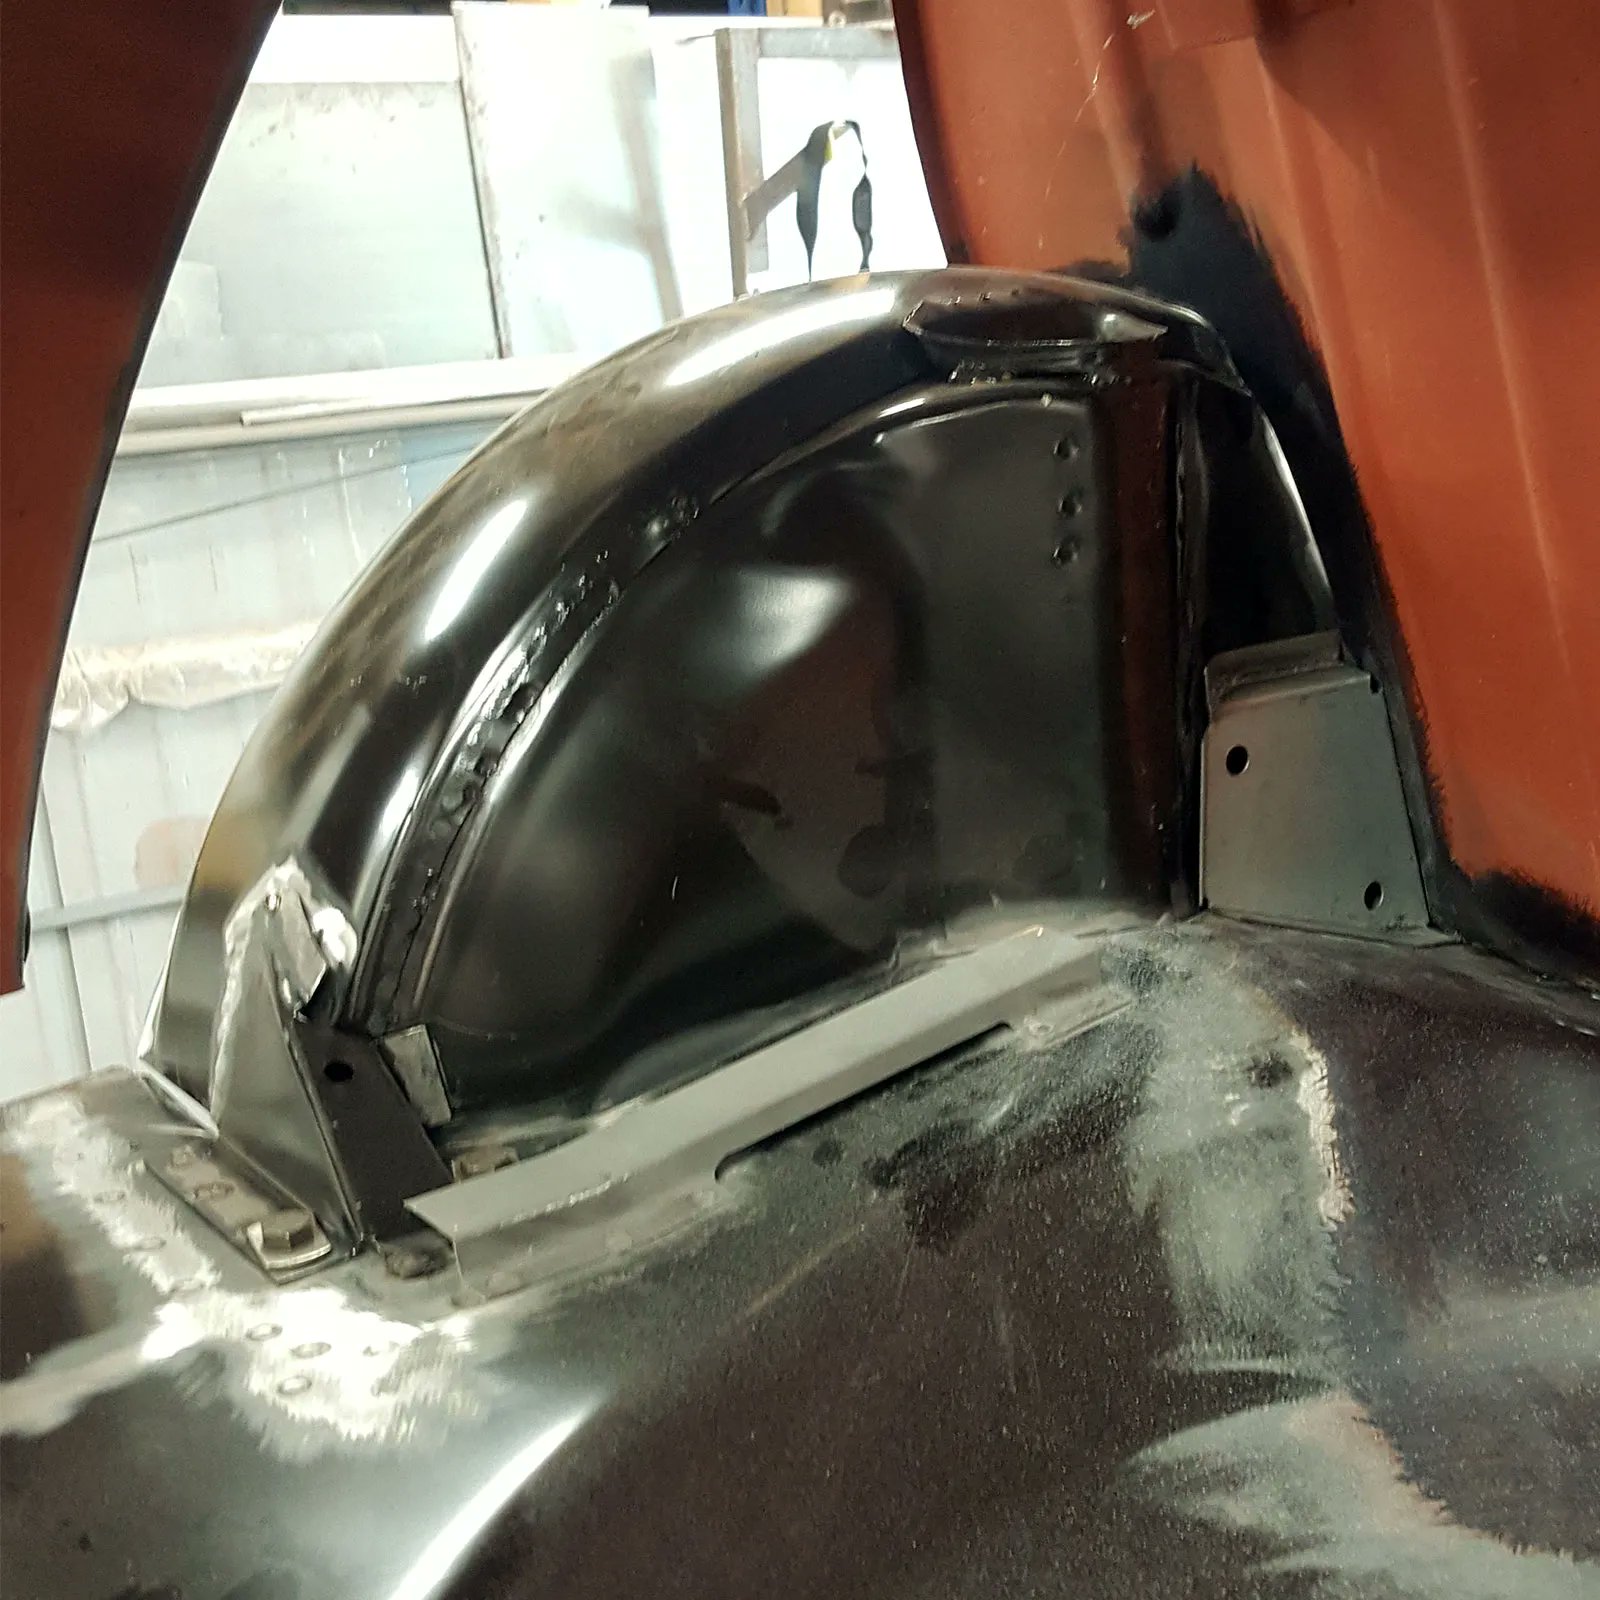
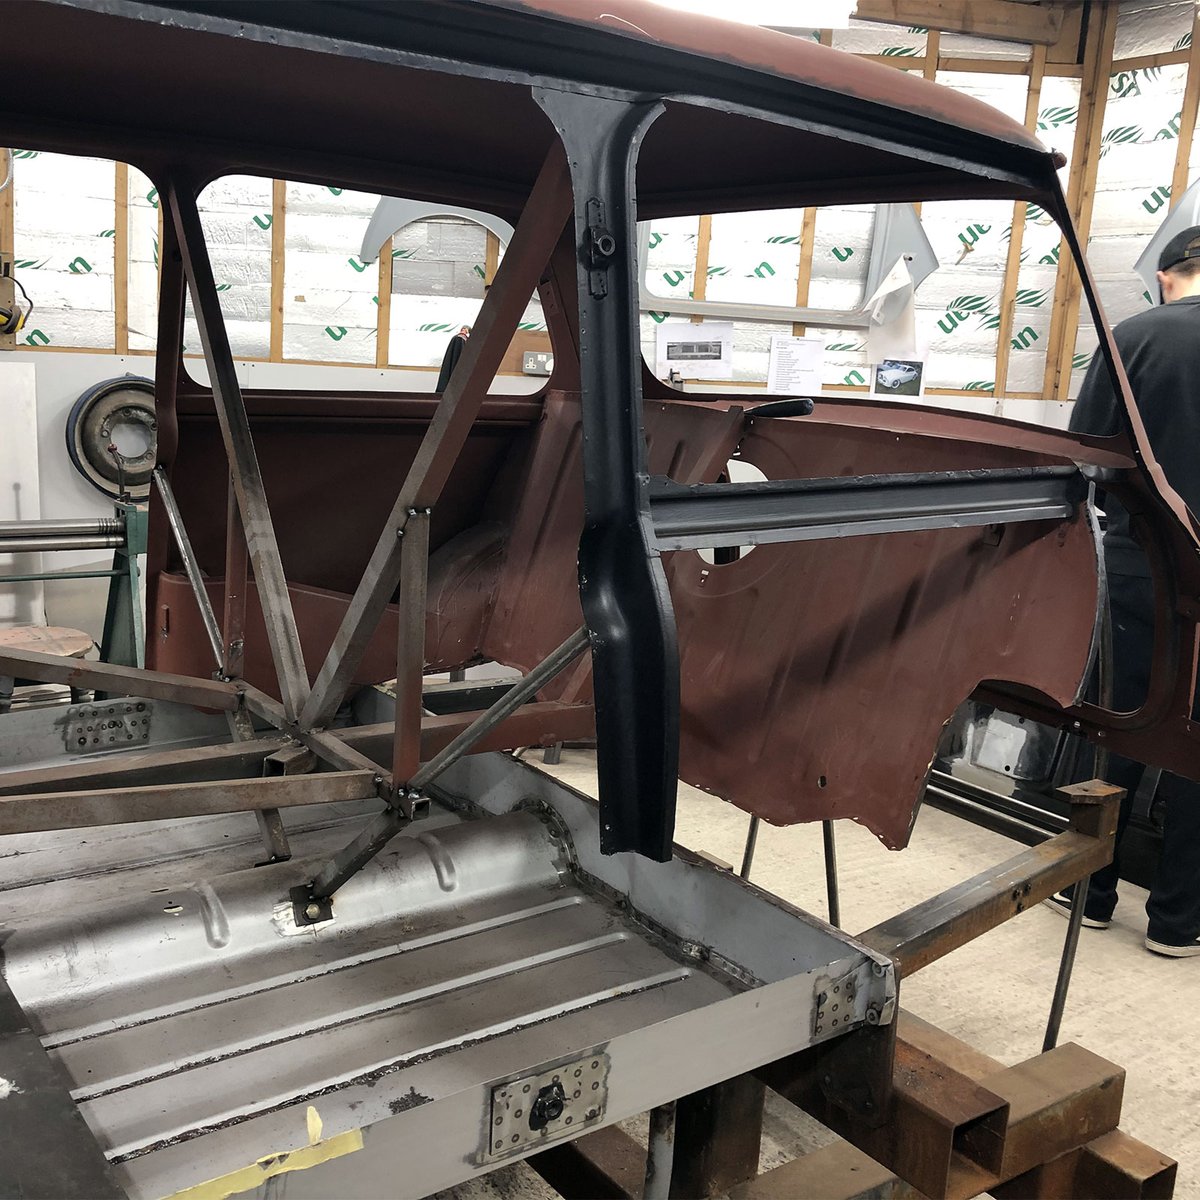
We’ve added a new Heritage wheel arch on the Plastics4Performance 1969 Mini Cooper 998 MkII to complete the look after all hard work that went into the cab and boot brackets we fabricated.
We’ve added a new Heritage wheel arch on the Plastics4Performance 1969 Mini Cooper 998 MkII to complete the look after all hard work that went into the cab and boot brackets we fabricated.
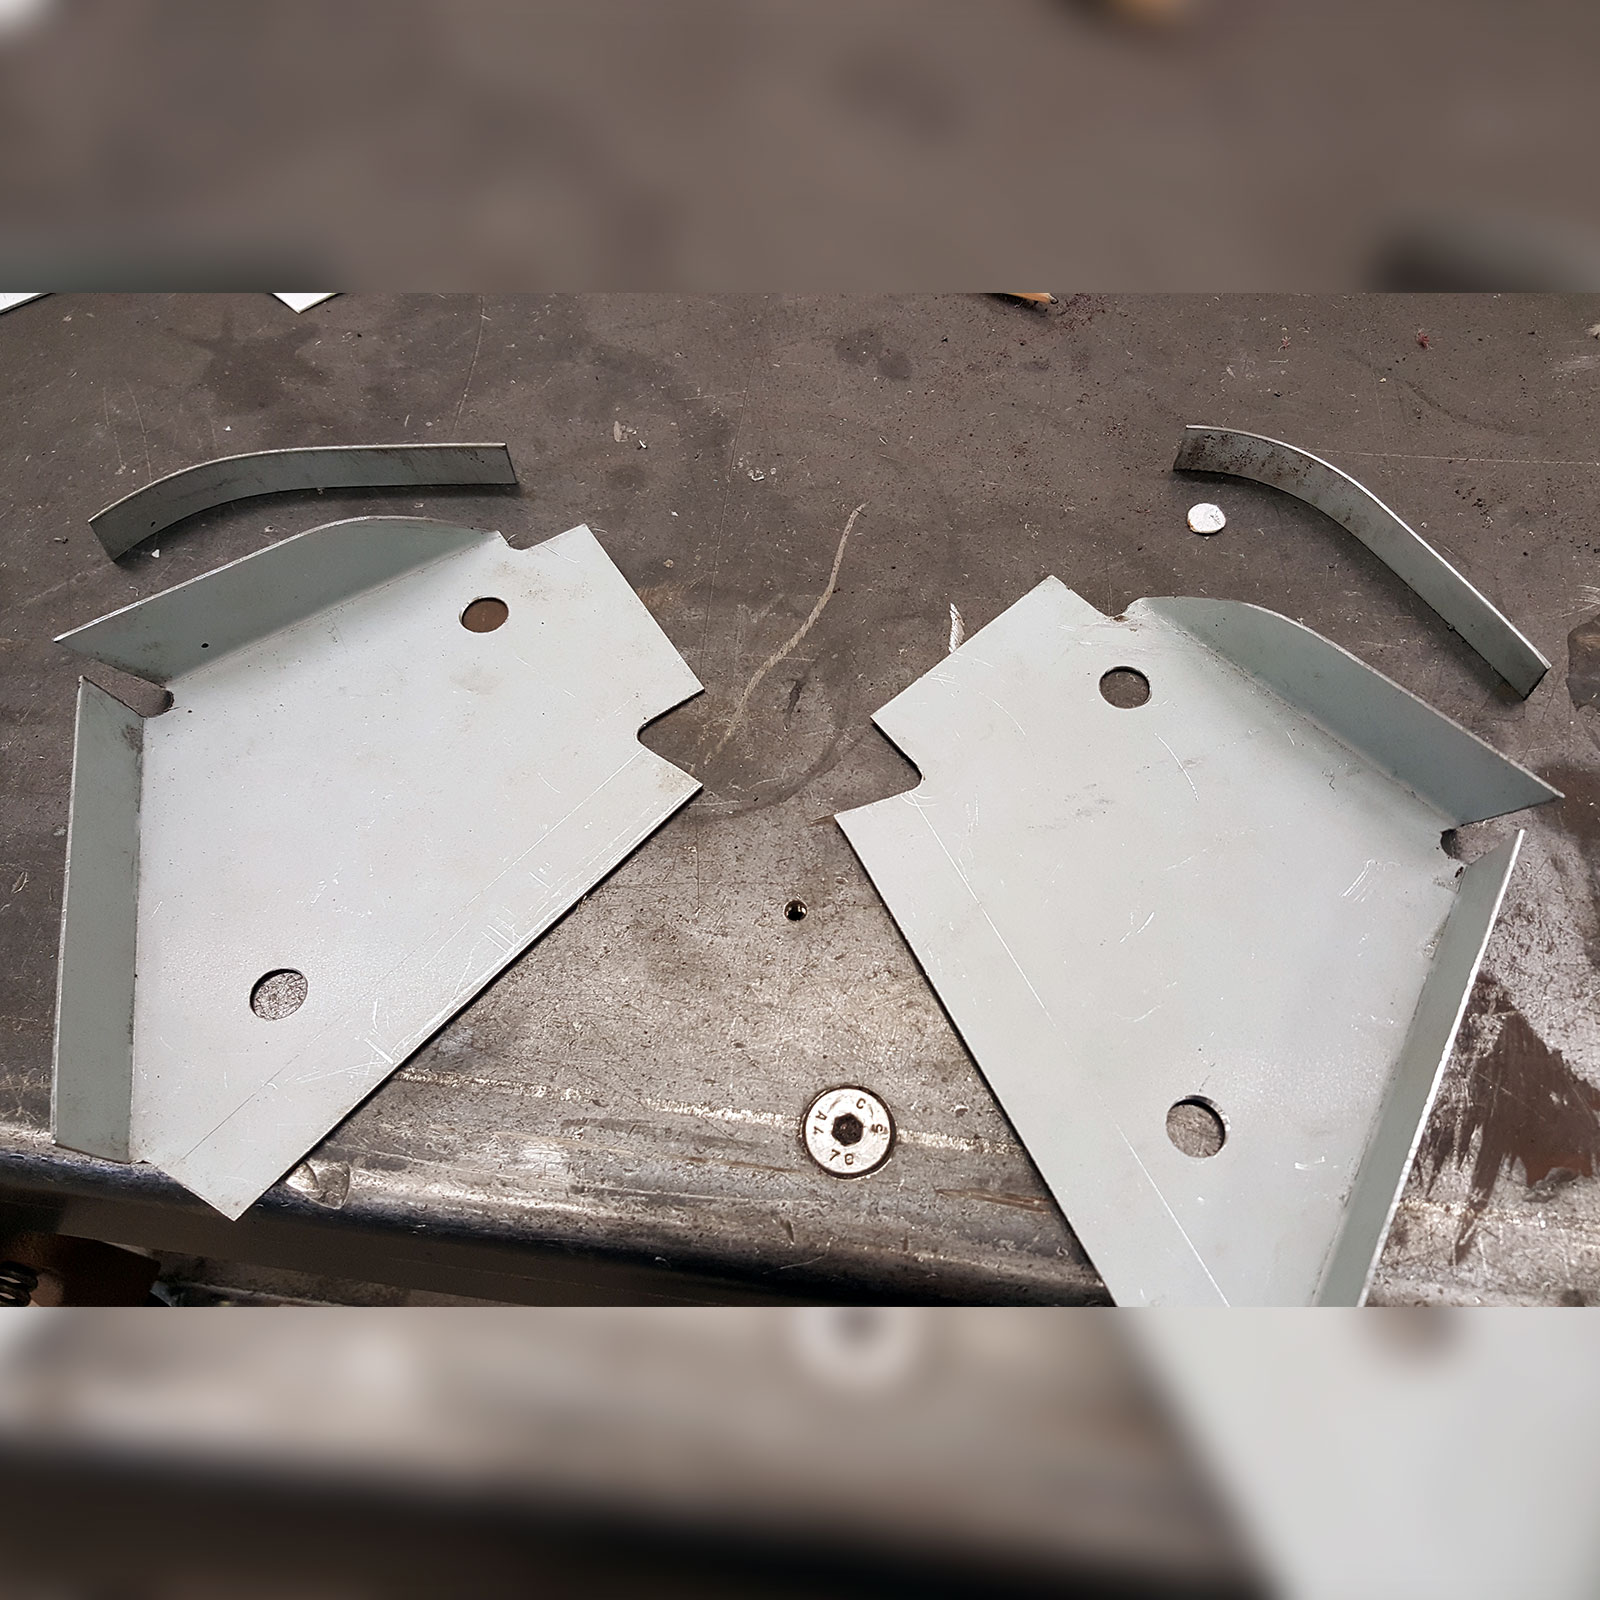
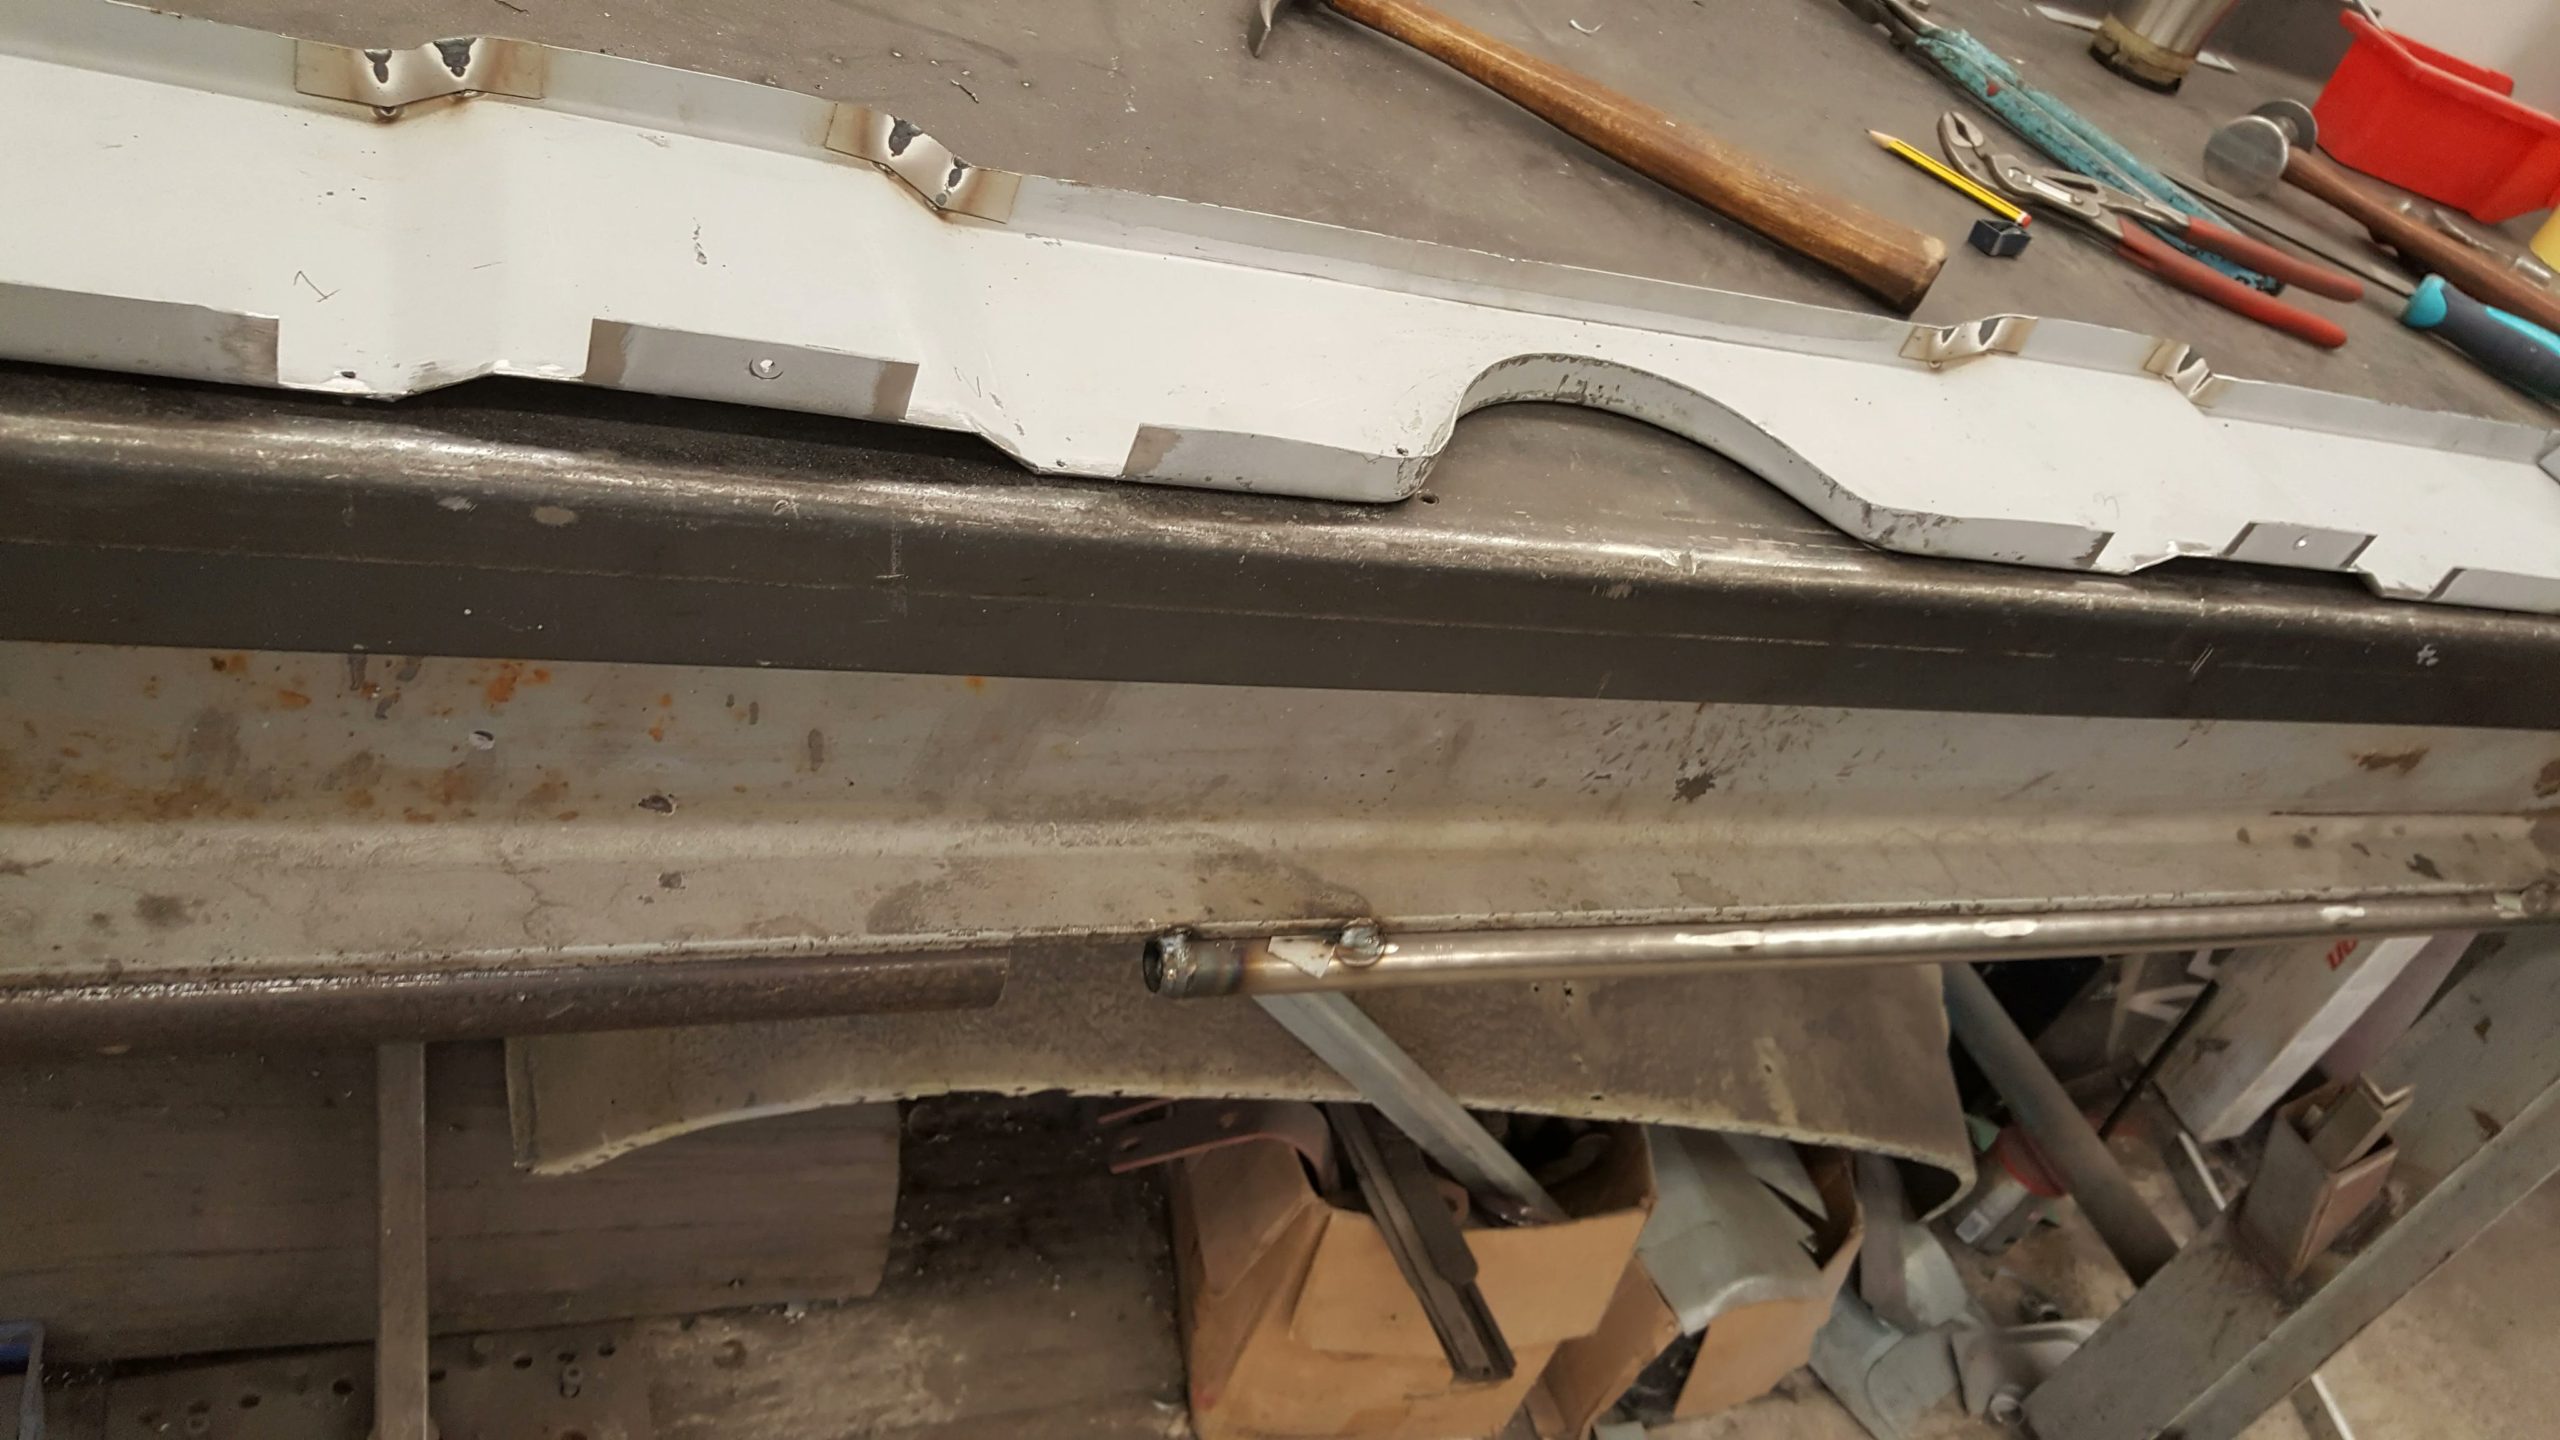
Today we’re recreating cab and boot brackets to match originals on the Plastics4Performance 1969 Mini Cooper 998 MkII.
Today we’re recreating cab and boot brackets to match originals on the Plastics4Performance 1969 Mini Cooper 998 MkII.
Today we’re recreating cab and boot brackets to match originals on the Plastics4Performance 1969 Mini Cooper 998 MkII.
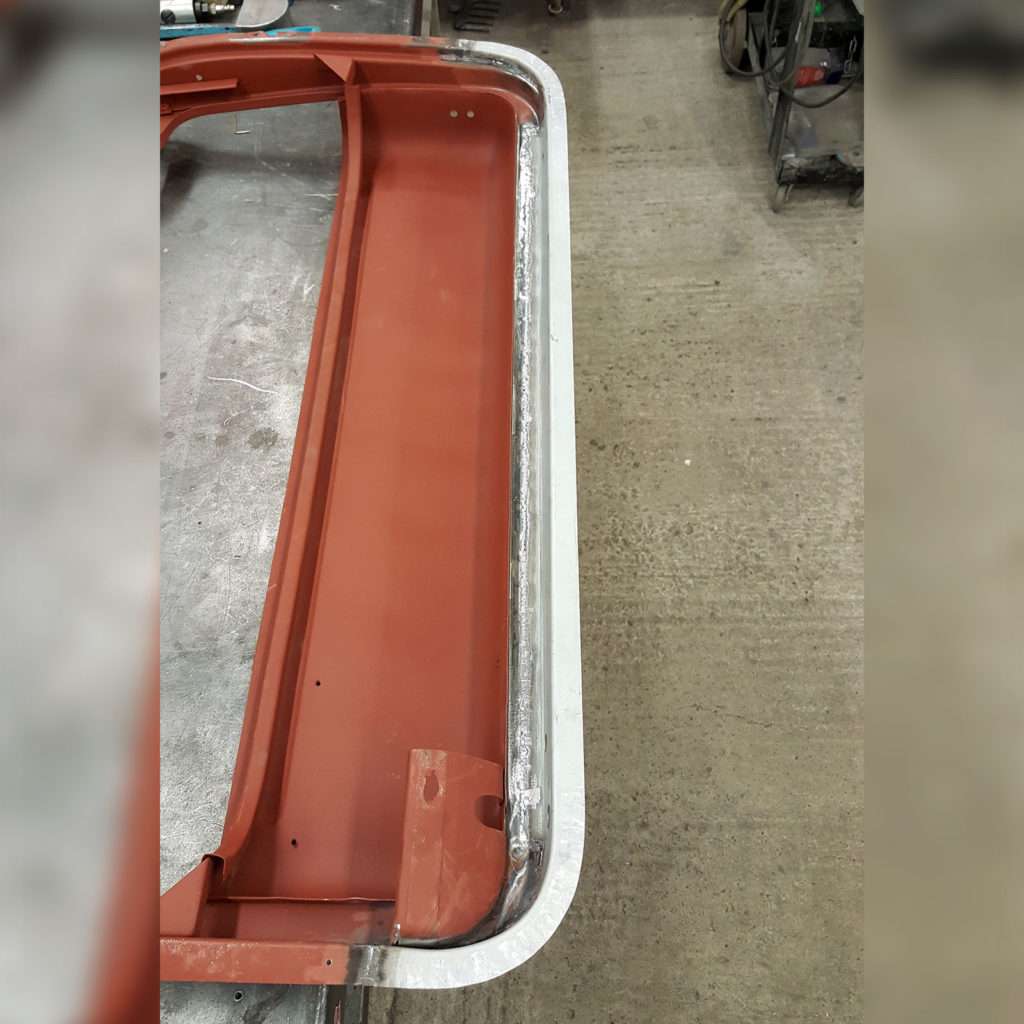
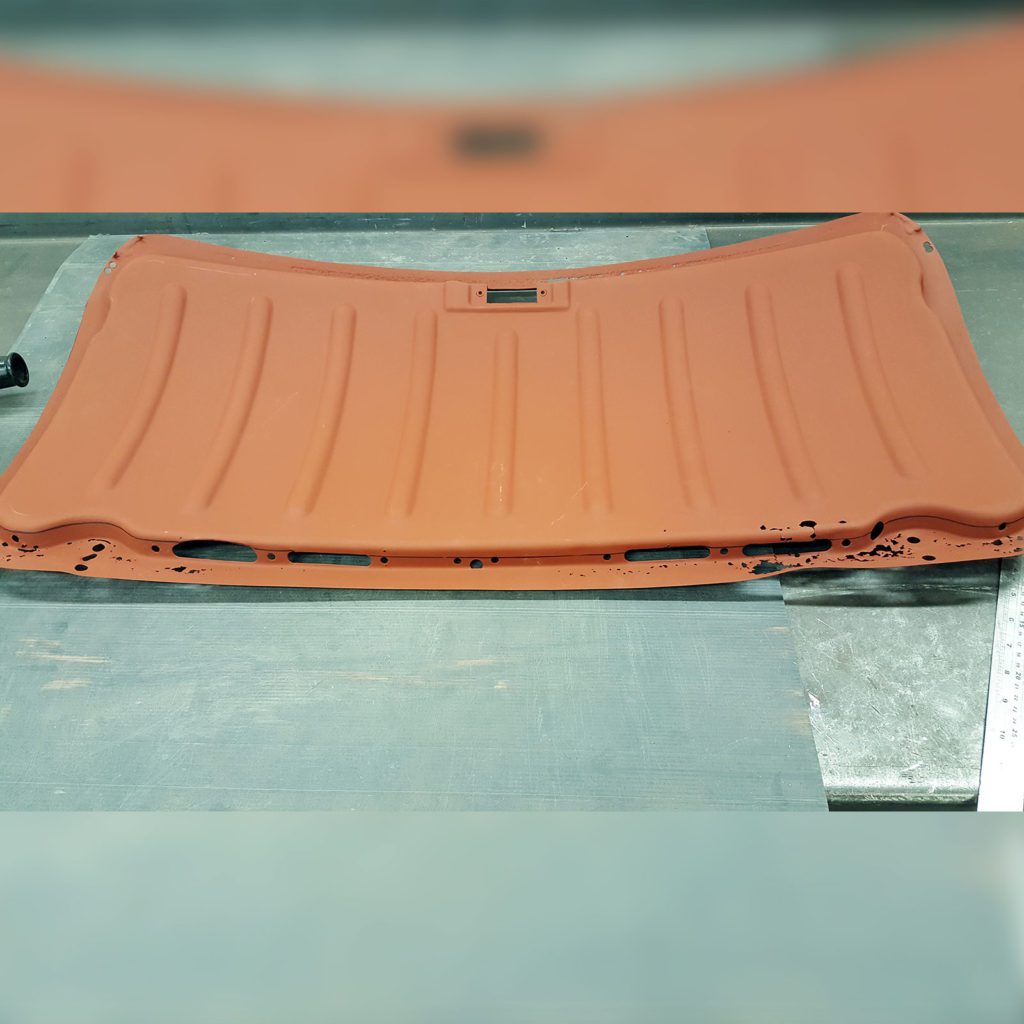
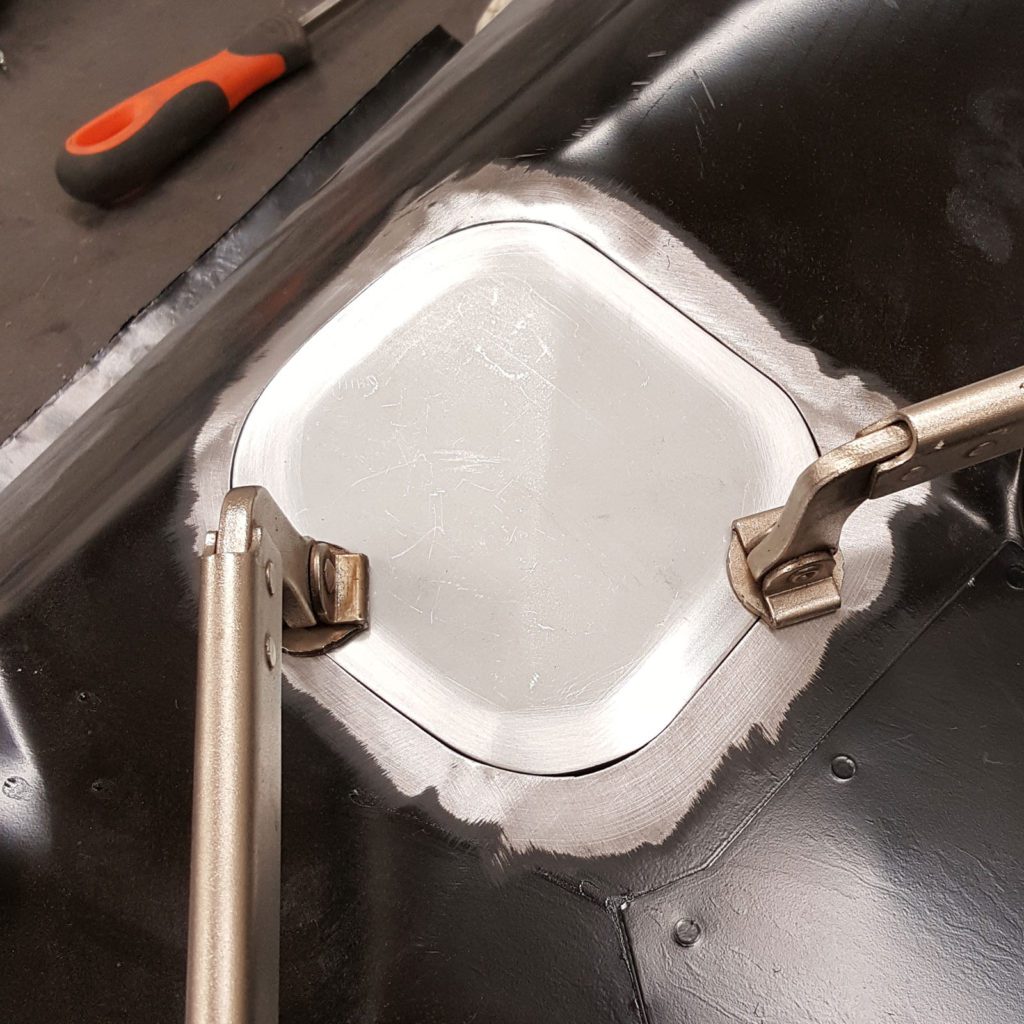
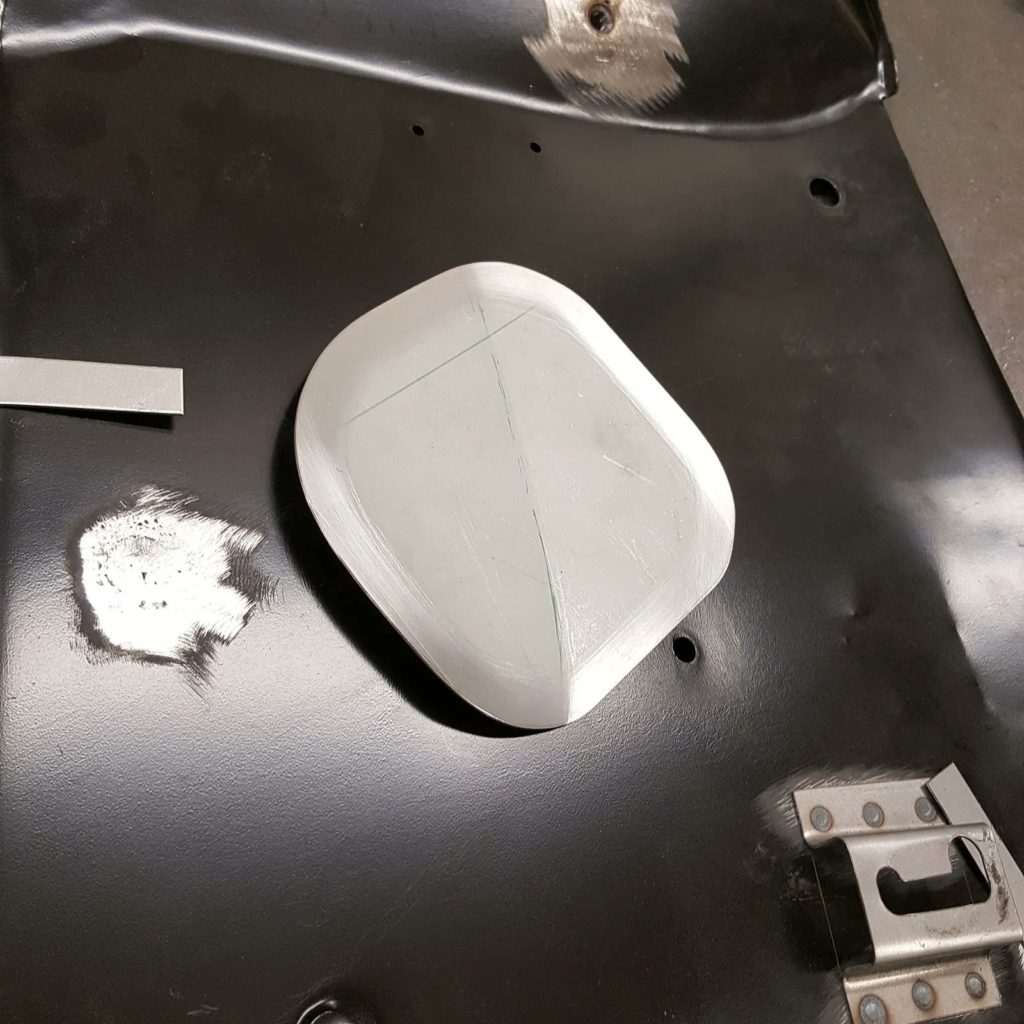
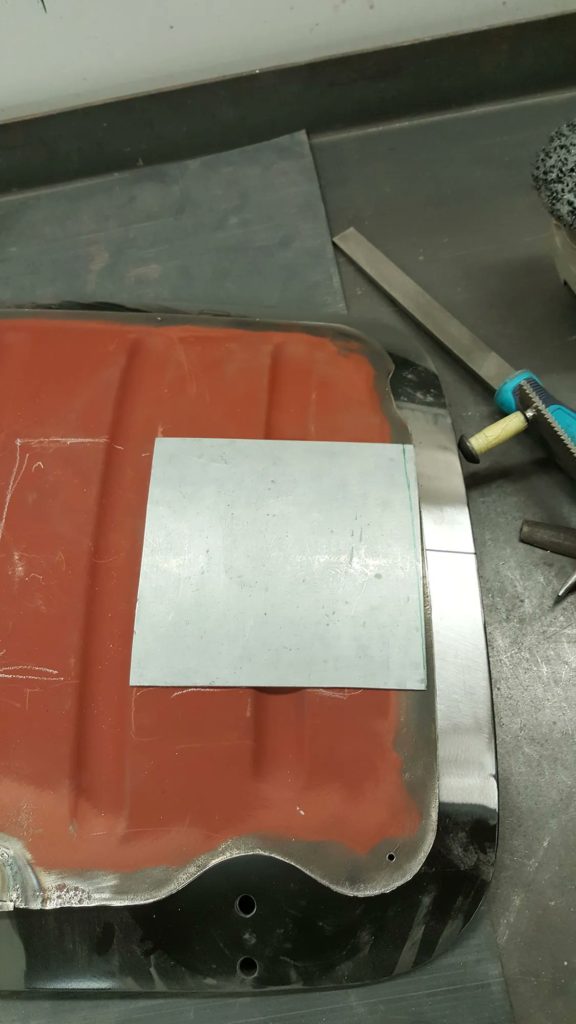
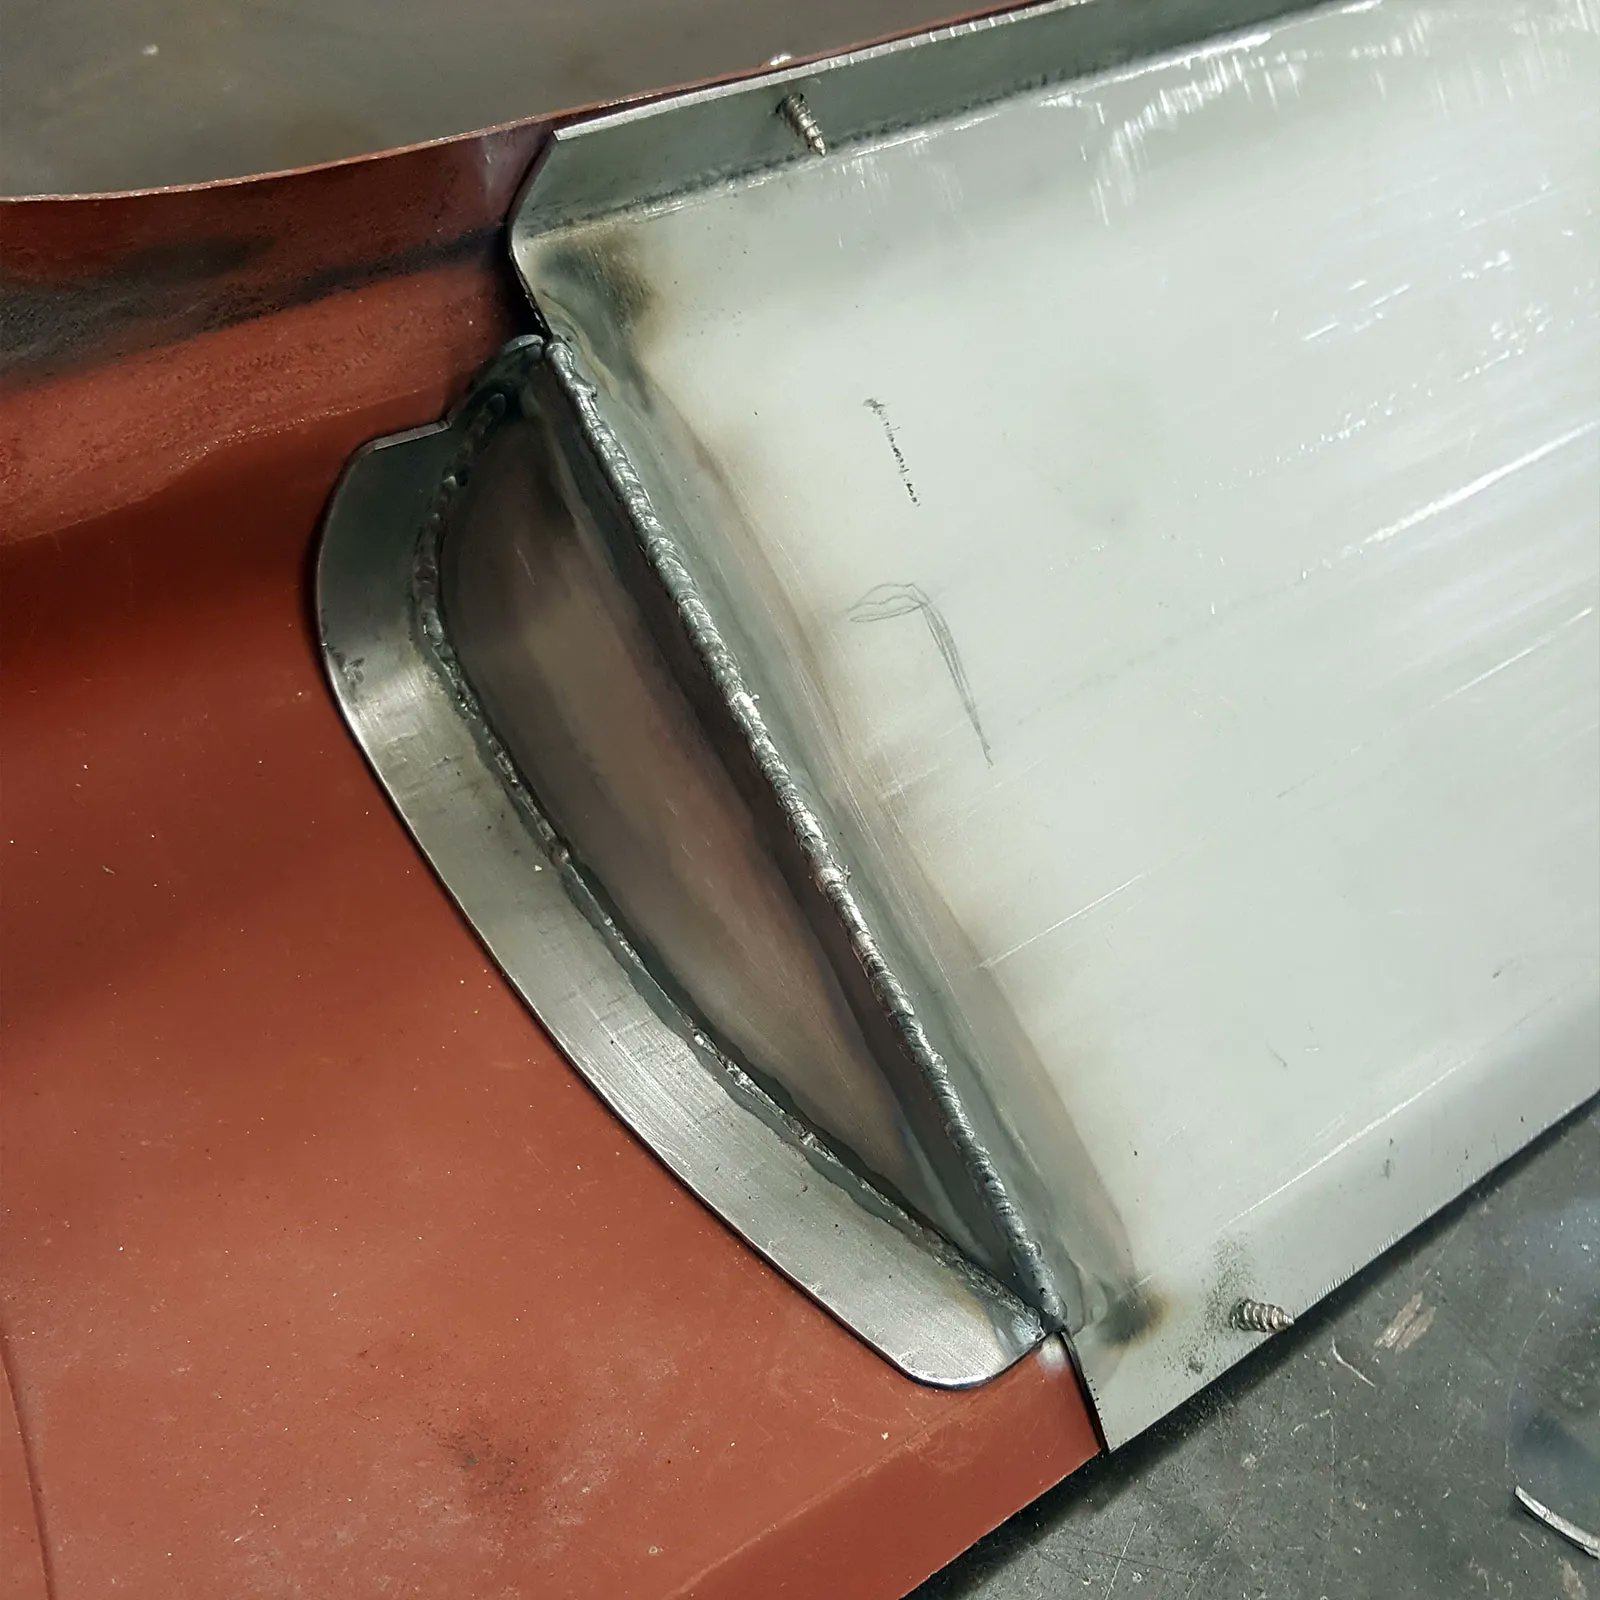
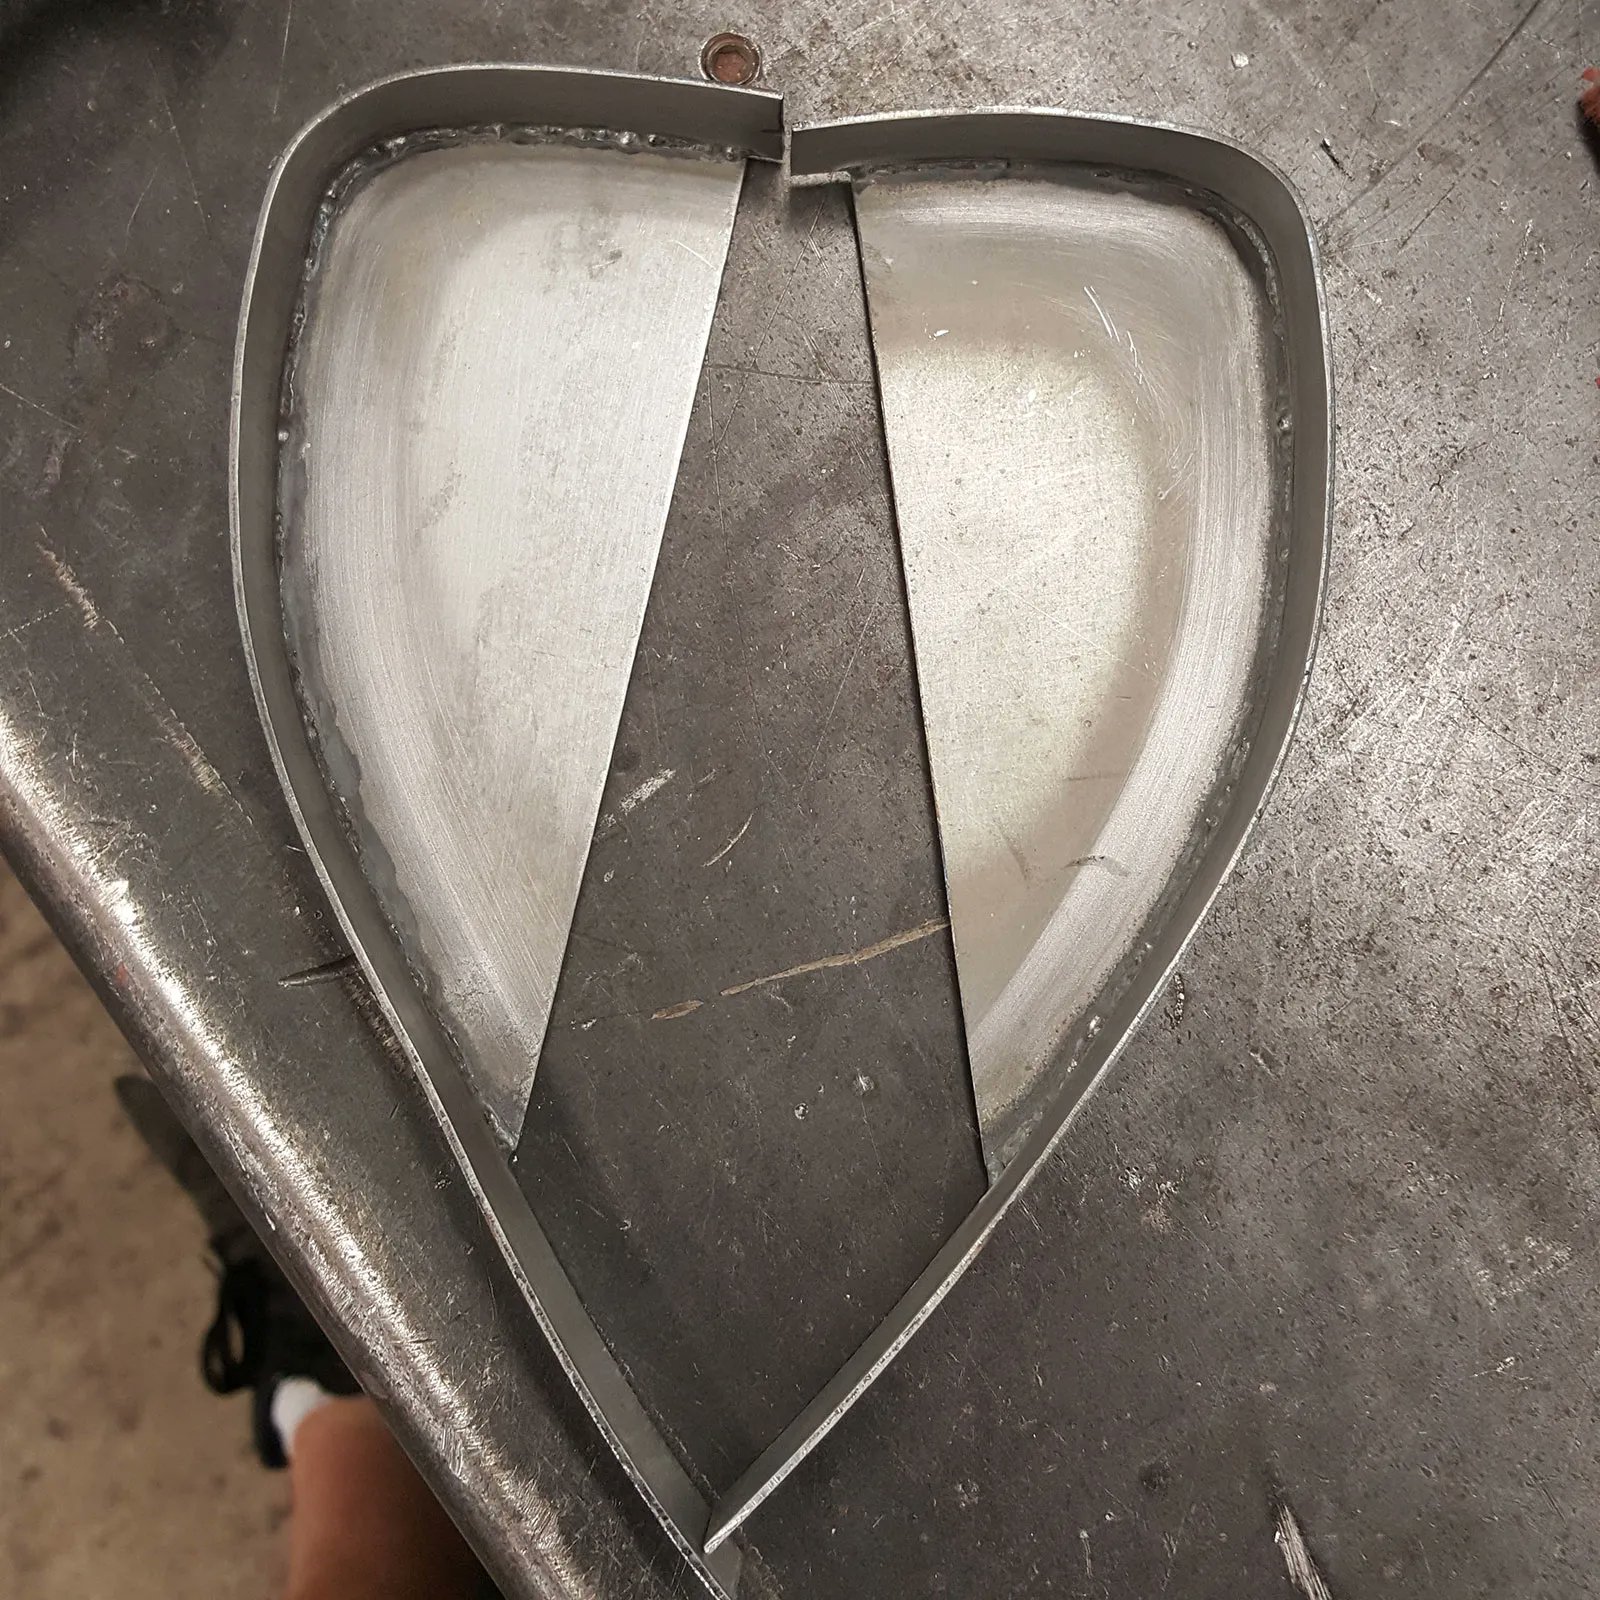
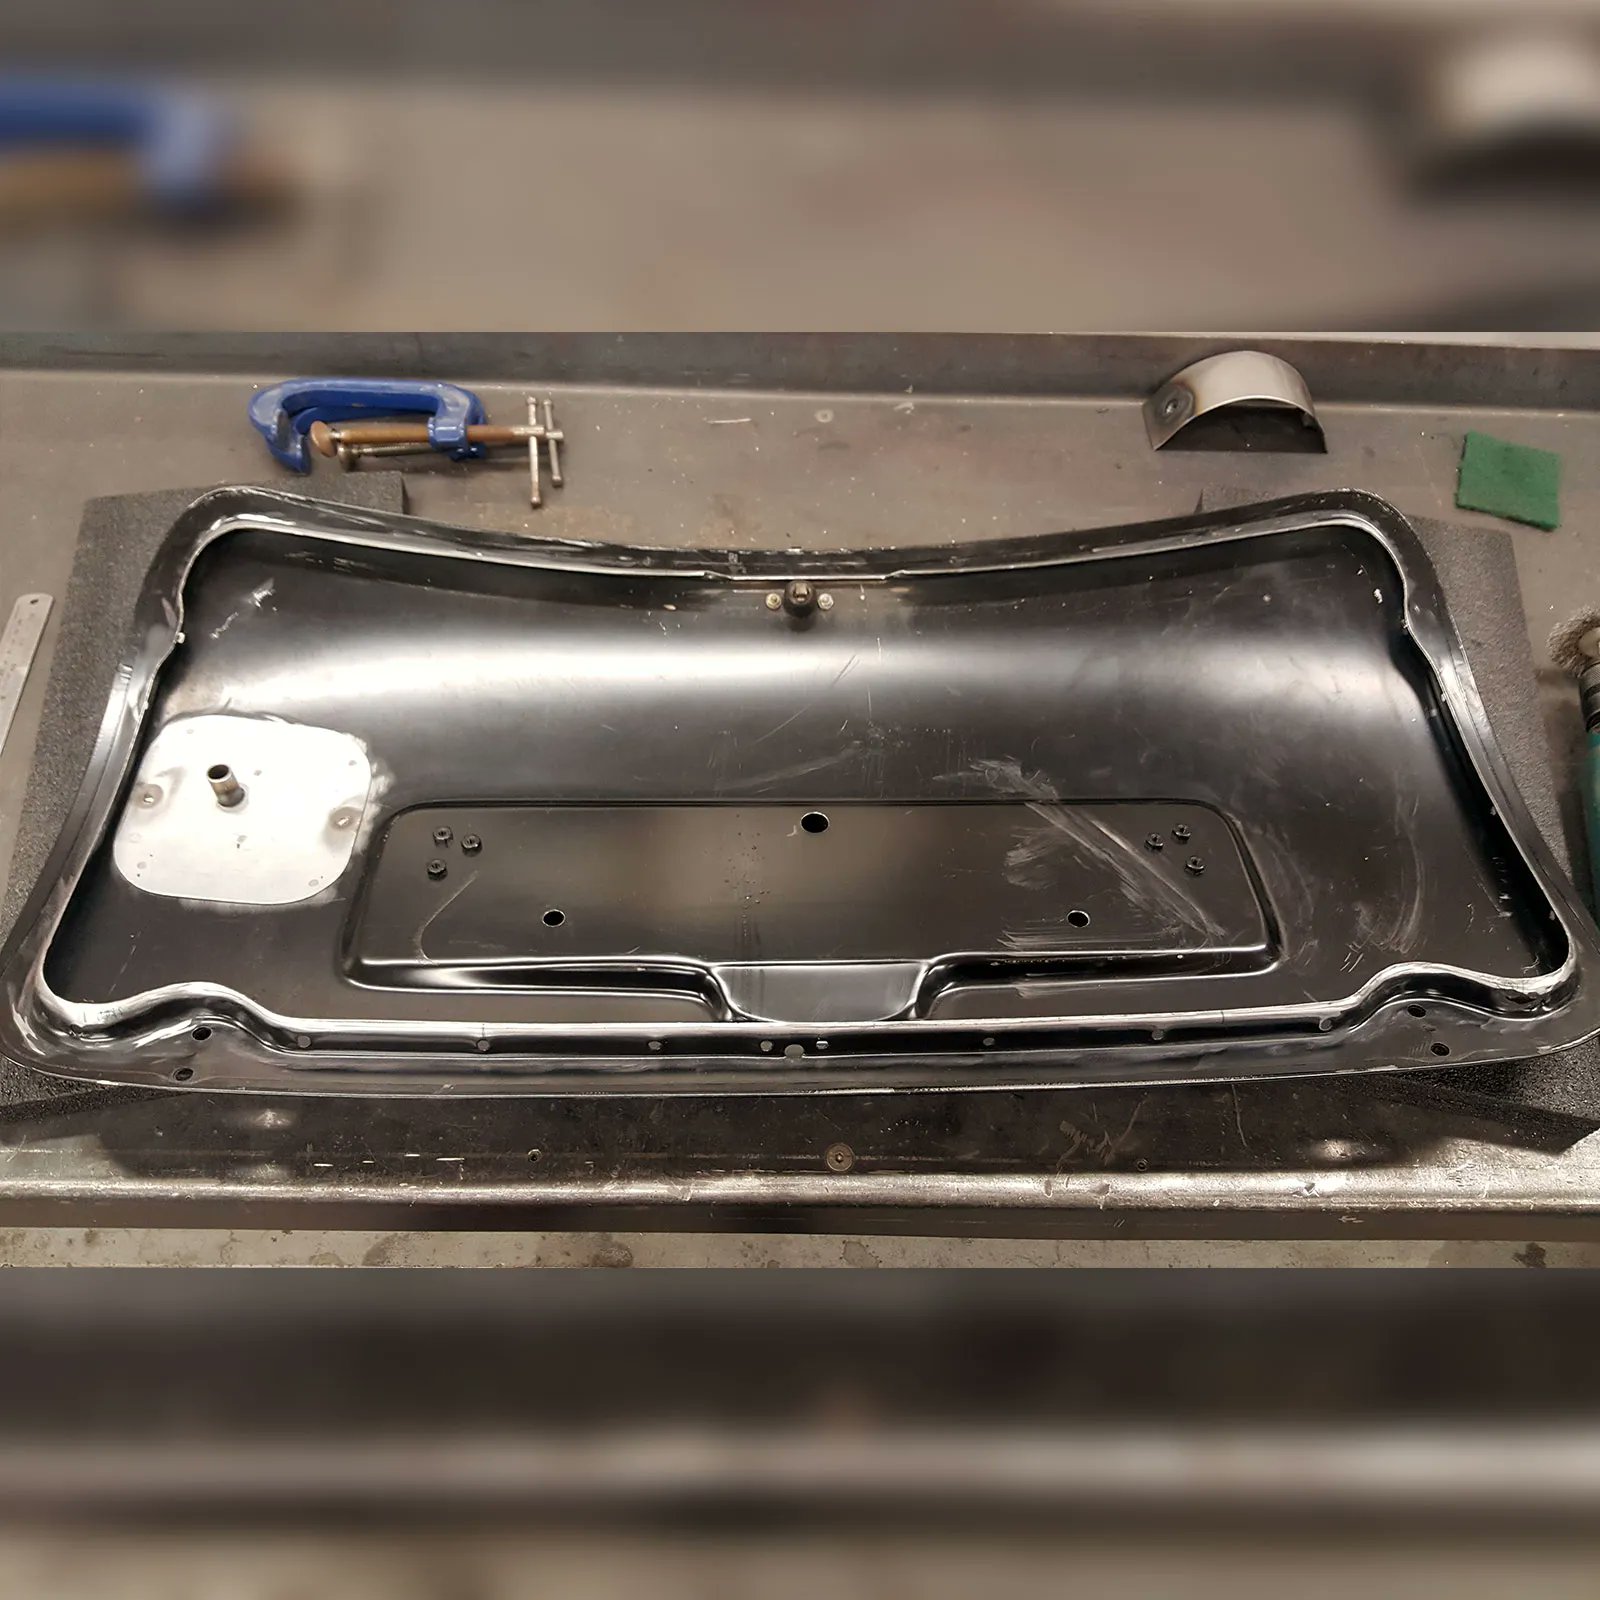
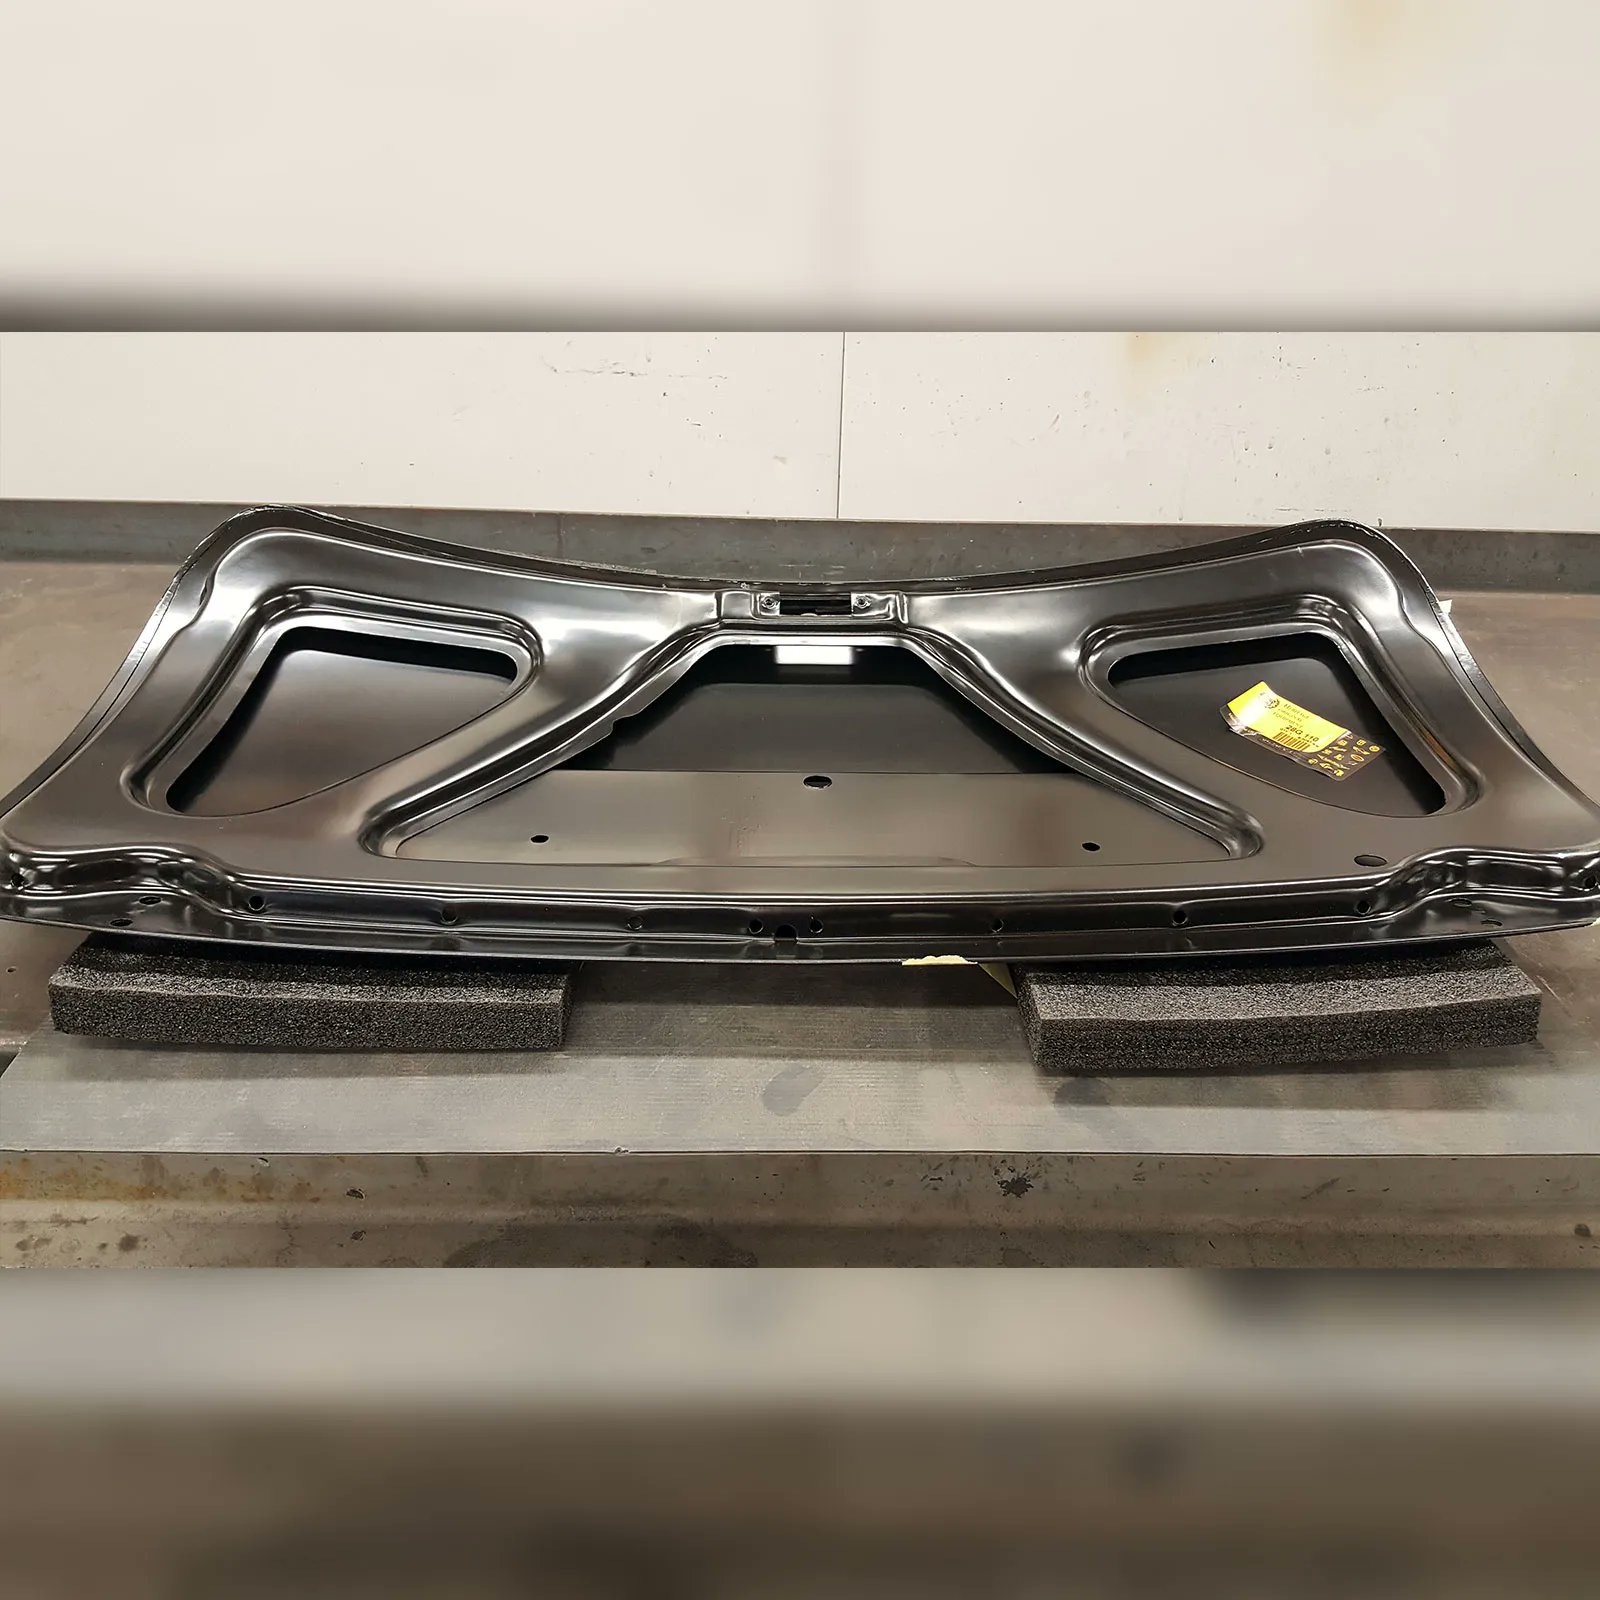
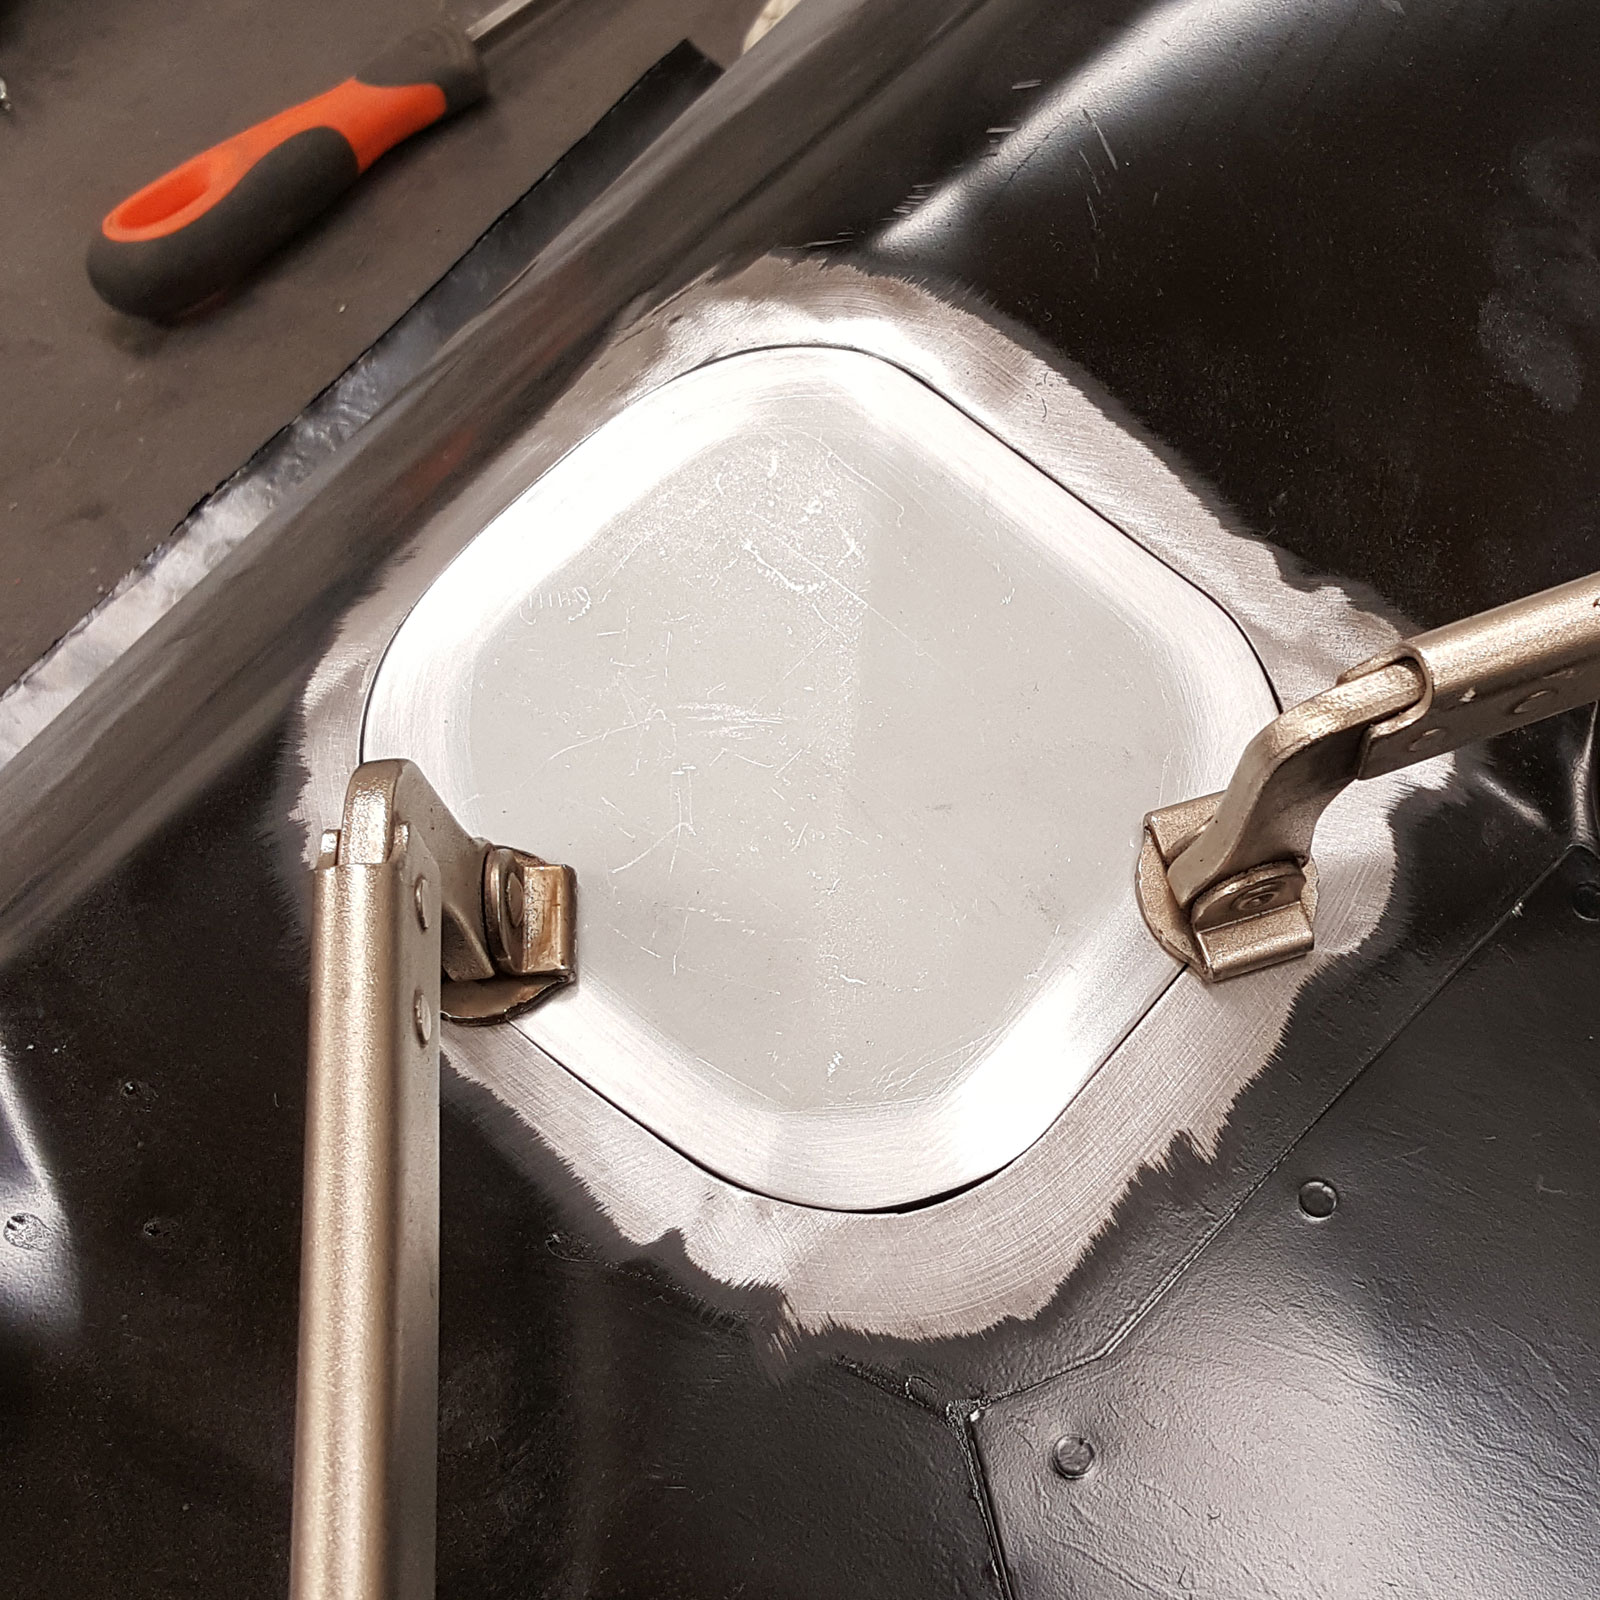
We’re back on the Plastics4Performance Mini Cooper! We used a MkIII onwards Heritage boot lid with a correct MkII inner skin, adding strengthening plates to both surfaces & a tube to prevent crushing. Now, the finished boot lid is ready for a rear light without damaging it!
We’re back on the Plastics4Performance Mini Cooper! We used a MkIII onwards Heritage boot lid with a correct MkII inner skin, adding strengthening plates to both surfaces & a tube to prevent crushing. Now, the finished boot lid is ready for a rear light without damaging it!
We’re back on the Plastics4Performance Mini Cooper! We used a MkIII onwards Heritage boot lid with a correct MkII inner skin, adding strengthening plates to both surfaces & a tube to prevent crushing. Now, the finished boot lid is ready for a rear light without damaging it!
We’re back on the Plastics4Performance Mini Cooper! We used a MkIII onwards Heritage boot lid with a correct MkII inner skin, adding strengthening plates to both surfaces & a tube to prevent crushing. Now, the finished boot lid is ready for a rear light without damaging it!
Just one example of how far we’re going to make sure the Plastics4Performance Mini Cooper 998 MkII is done properly.
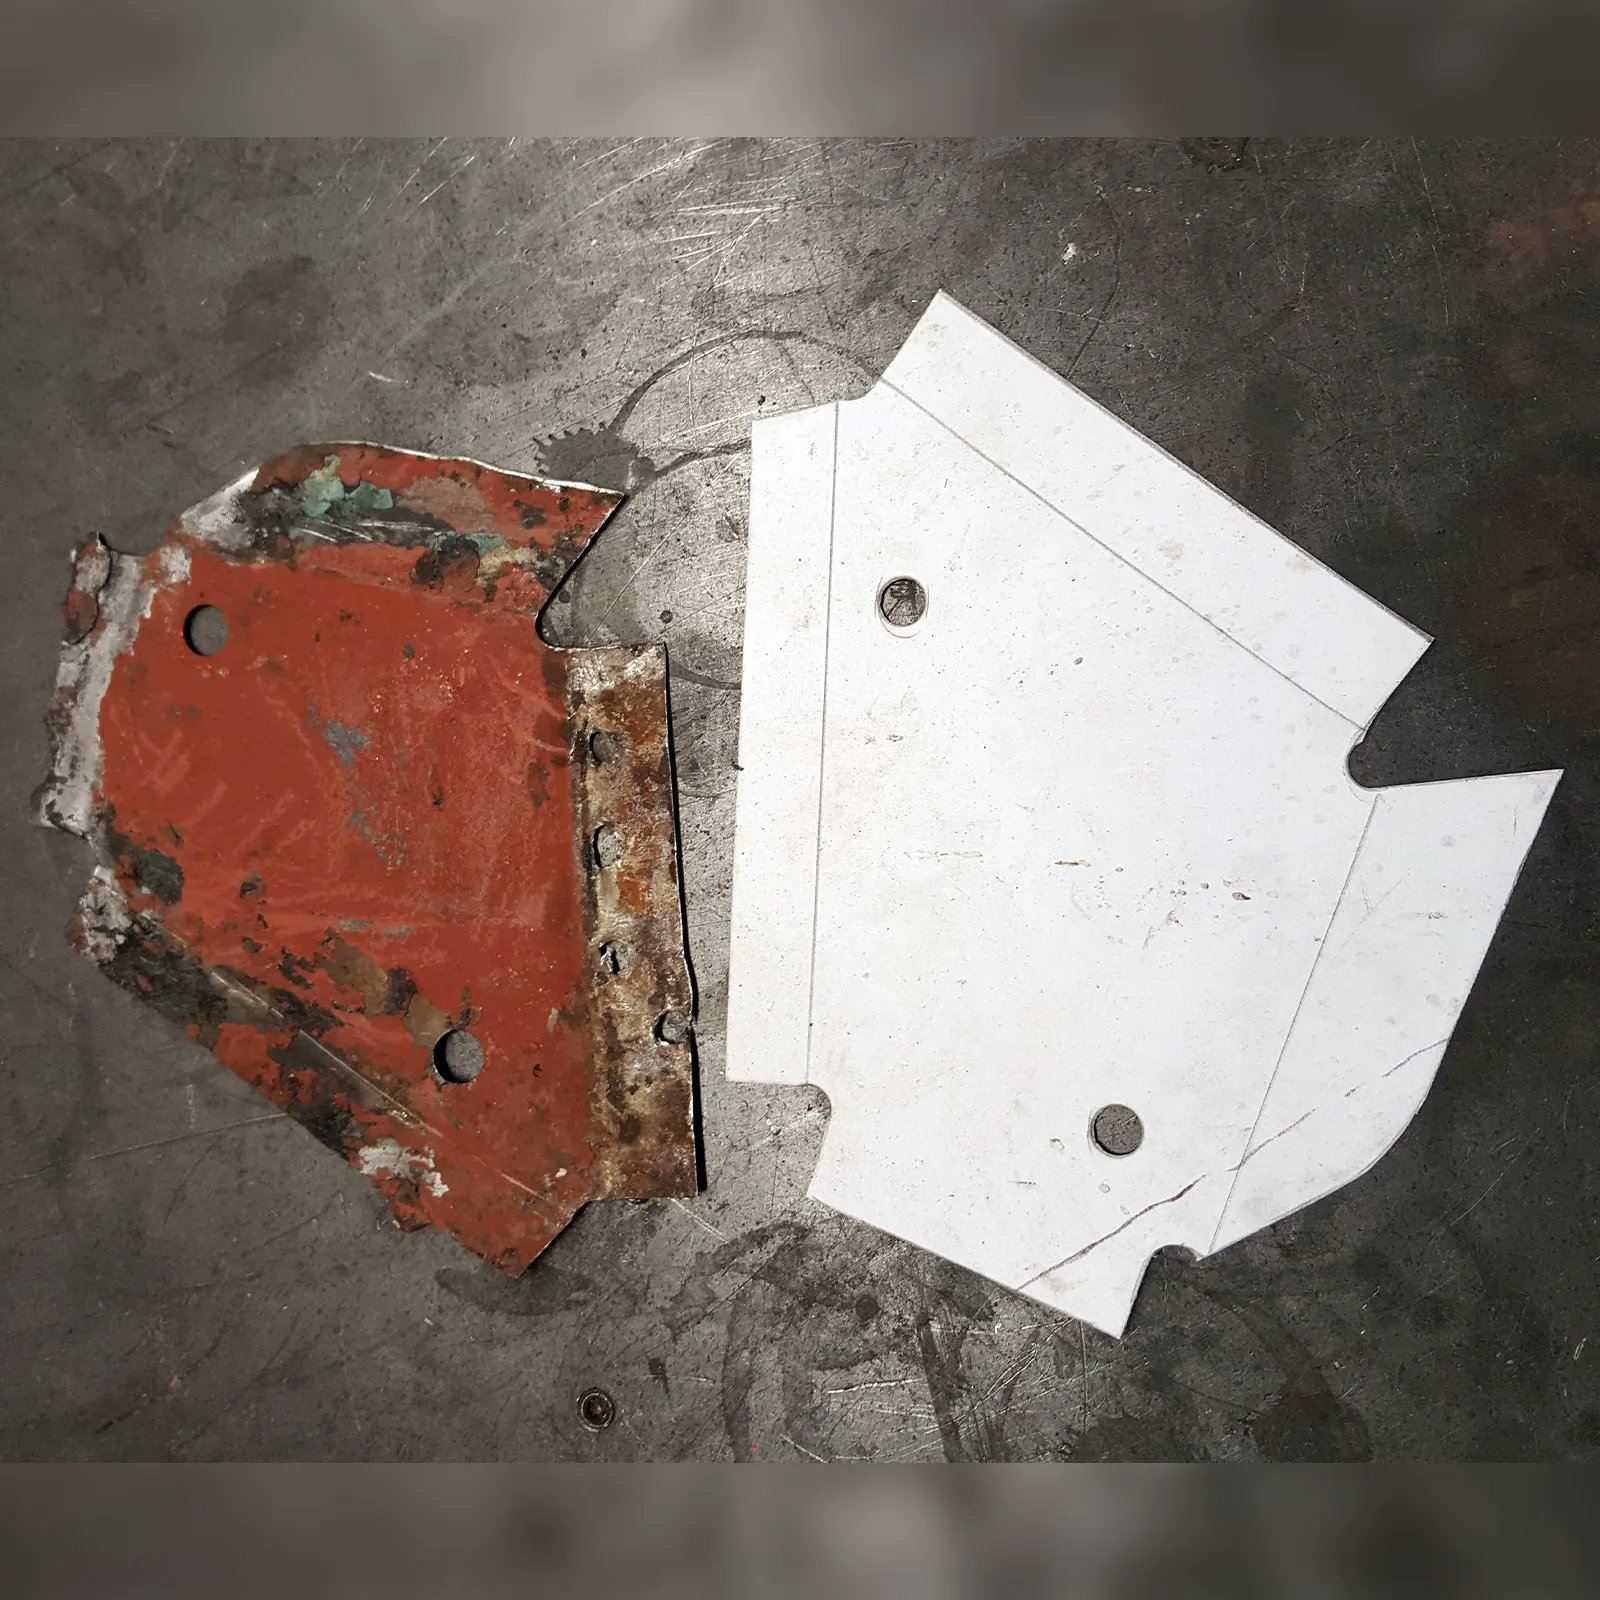
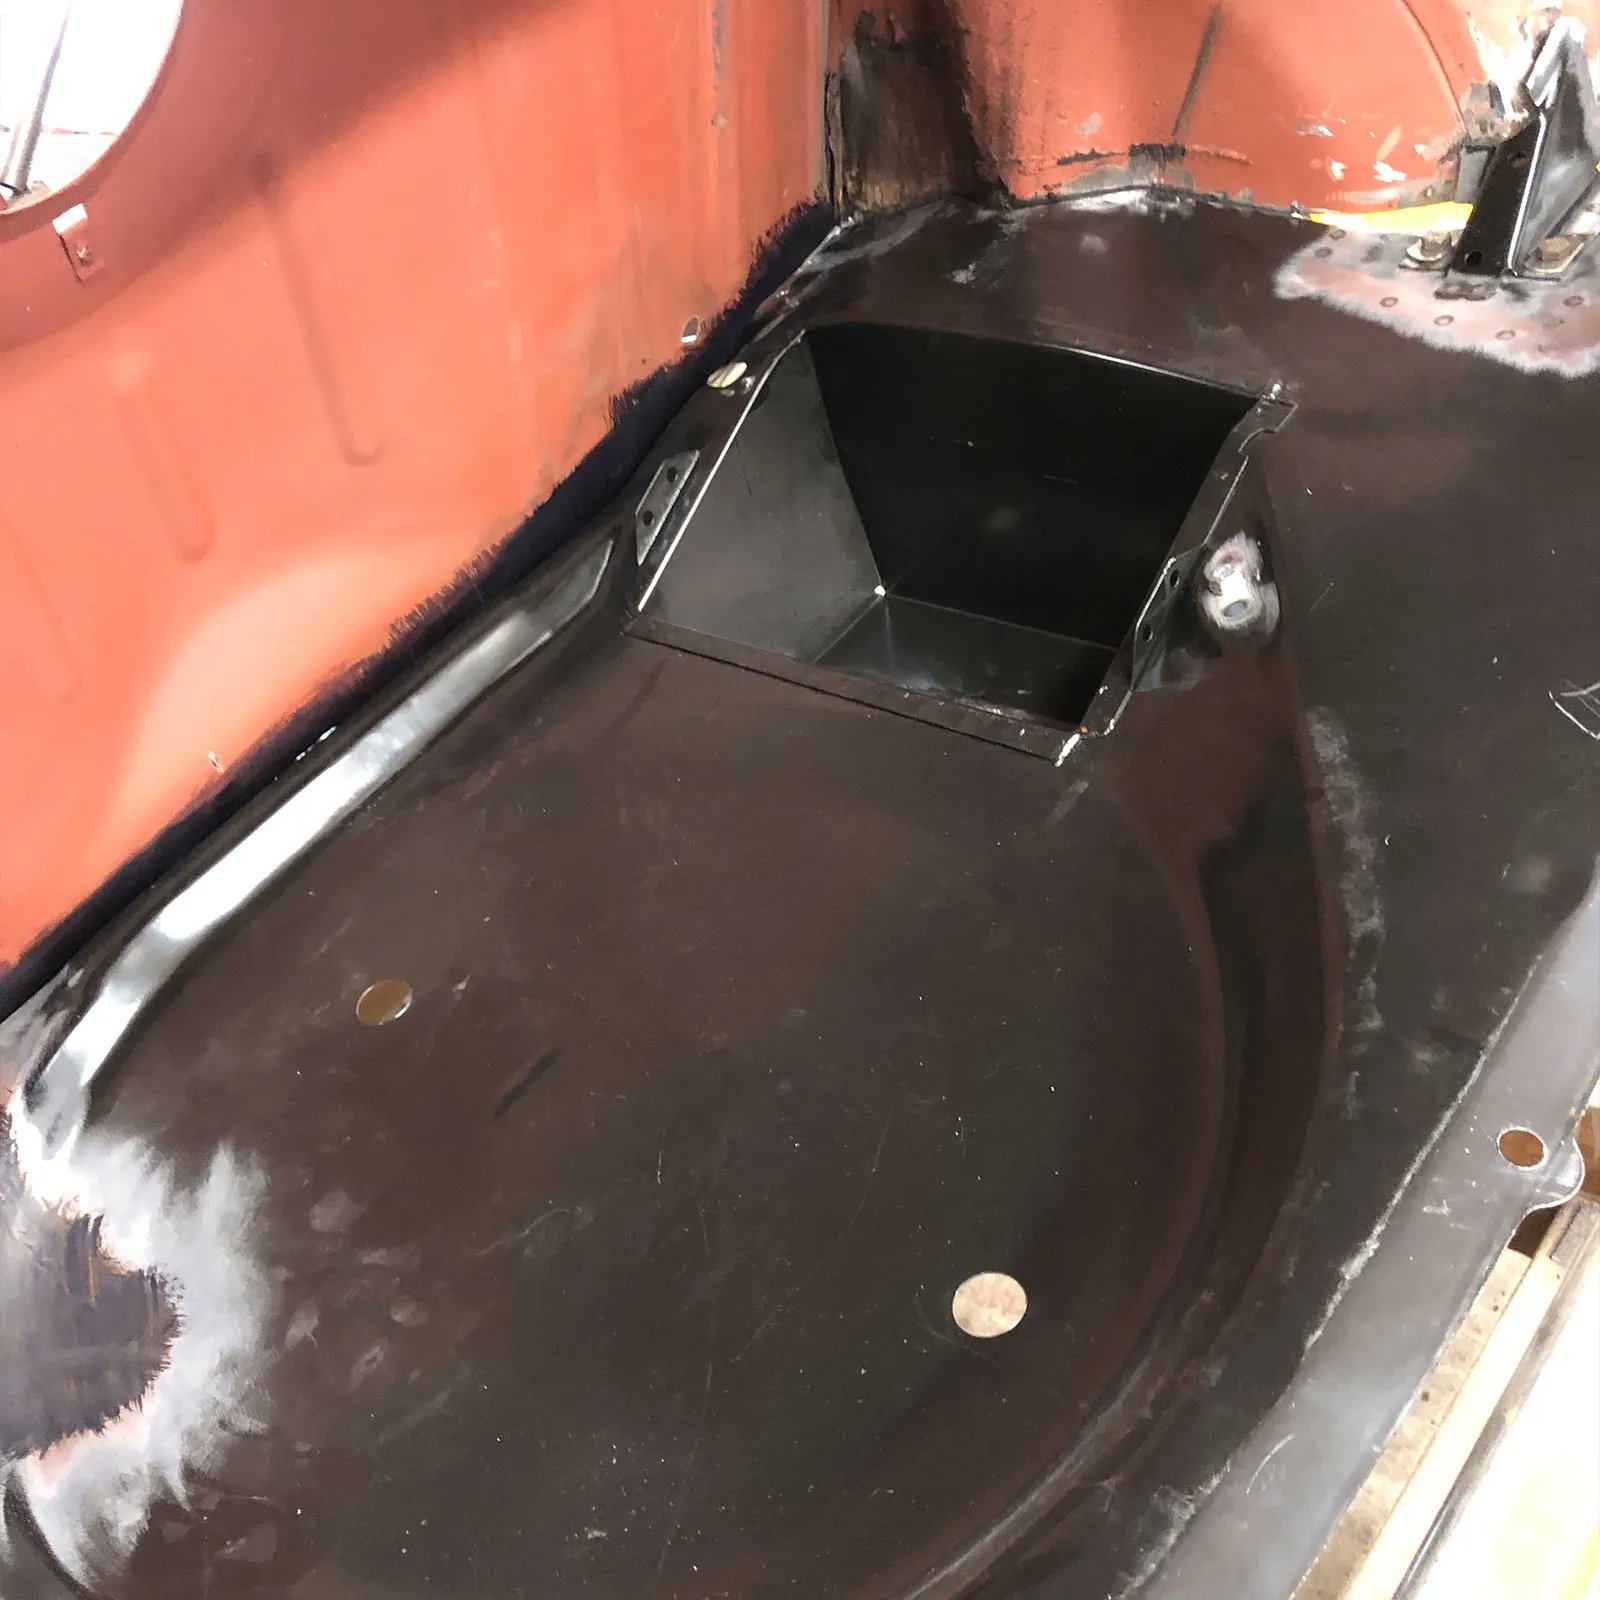
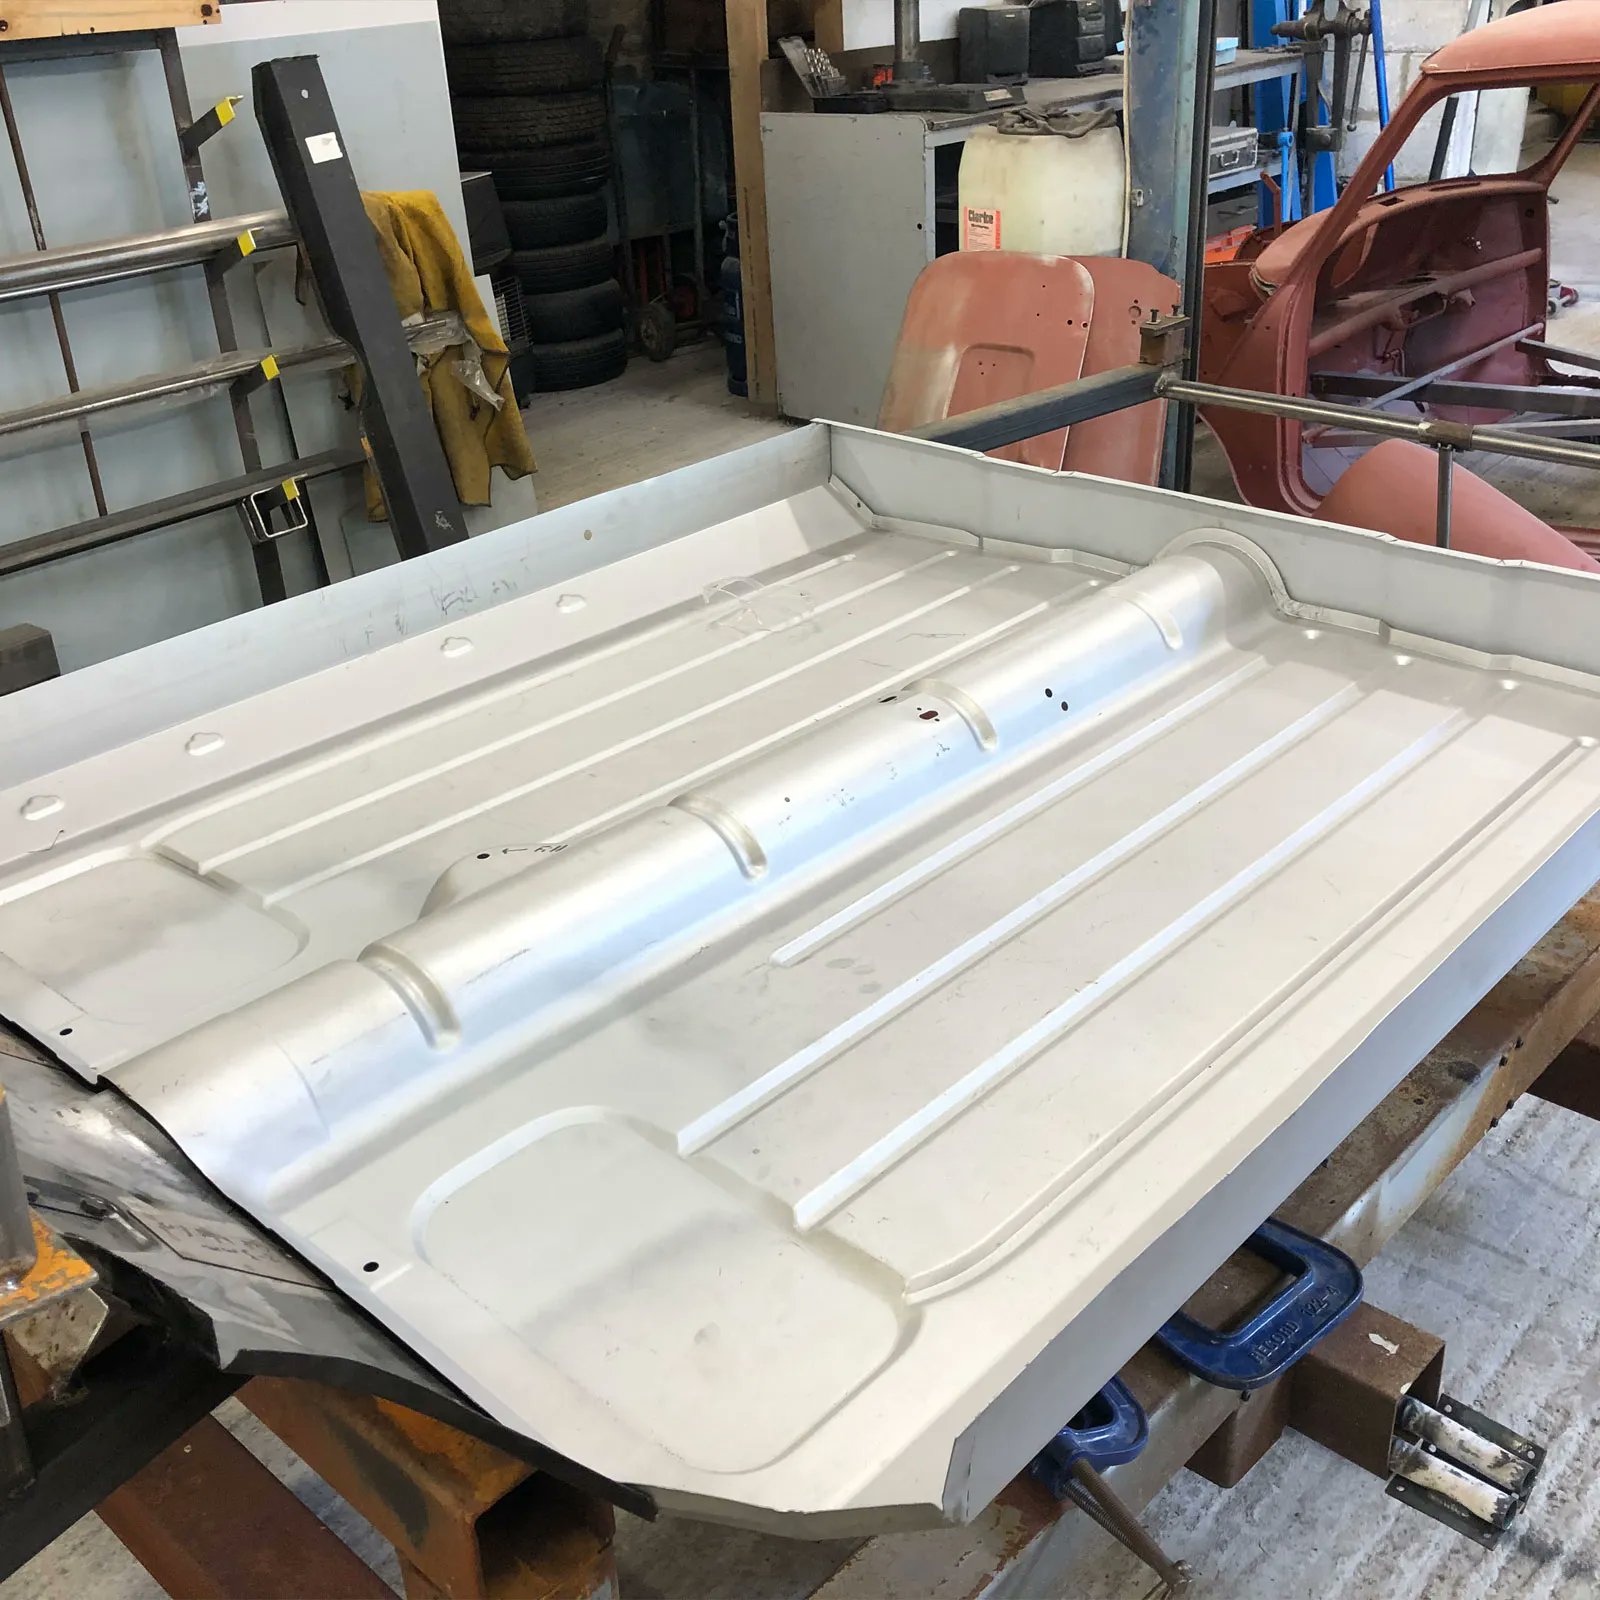
Modifying the rear floor board on the Plastics4Performance Mini Cooper 998 MkII. After this, it fit the floor much better!
Modifying the rear floor board on the Plastics4Performance Mini Cooper 998 MkII. After this, it fit the floor much better!
Modifying the rear floor board on the Plastics4Performance Mini Cooper 998 MkII. After this, it fit the floor much better!
We modified the rear floor board of the Plastics 4 Performance Mini Cooper 998 MkII to fit the new floor correctly.
We were unhappy with the manufacture of this panel on the Plastics4Performance Mini Cooper 998 MkII. Not a problem, we can fix it!
These aren’t the easiest of panels to fit, but they went in eventually on the Plastics4Performance Mini Cooper 998 MkII.
These aren’t the easiest of panels to fit, but they went in eventually on the Plastics4Performance Mini Cooper 998 MkII.
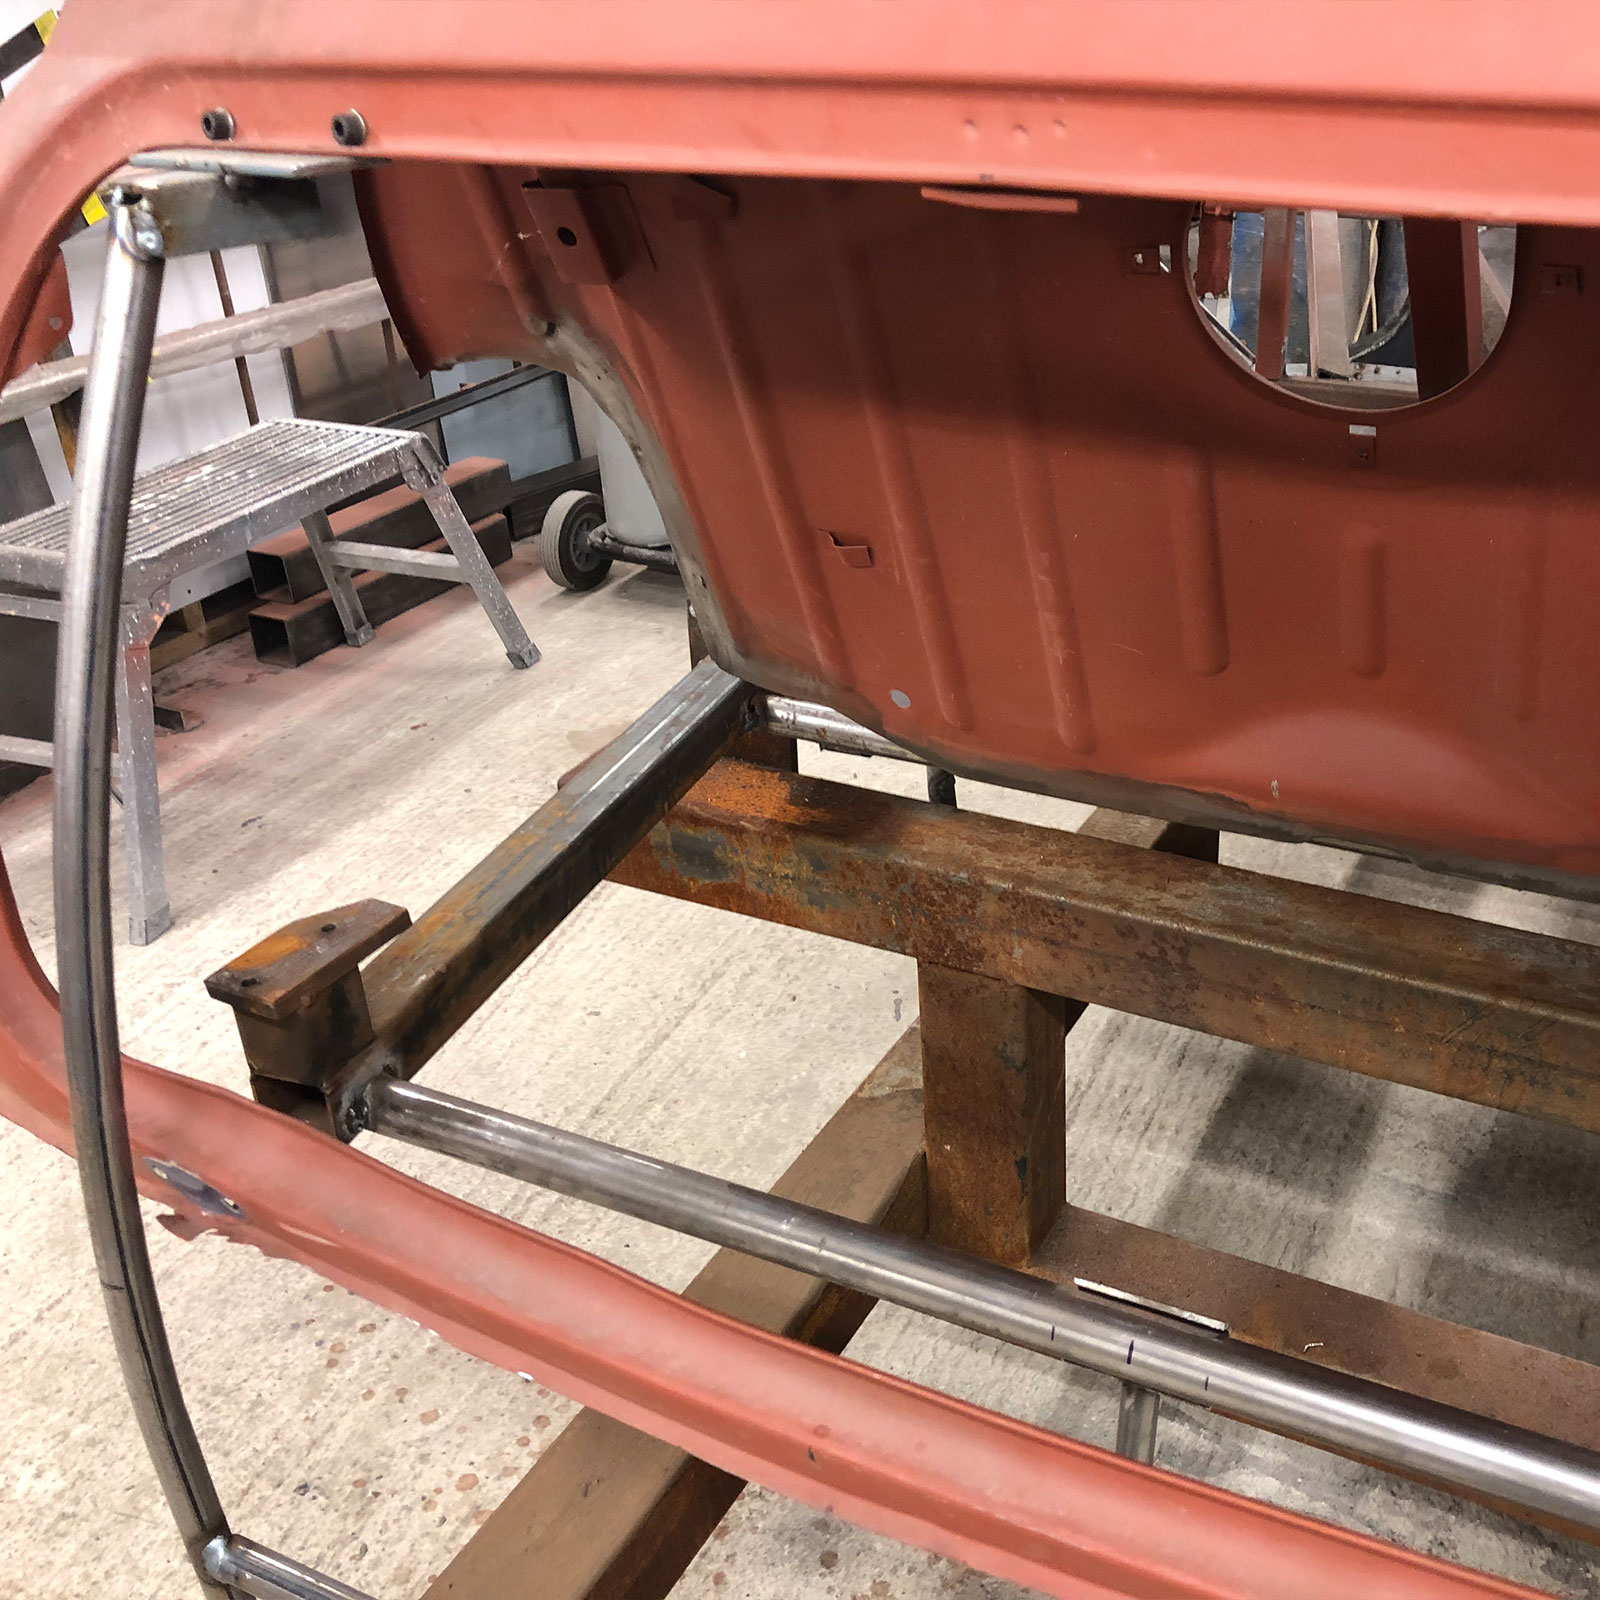
The Plastics4Performance Mini Cooper 998 MkII on a jig to keep things all in-line for when the modified boot floor goes in.
The Plastics4Performance Mini Cooper 998 MkII on a jig to keep things all in-line for when the modified boot floor goes in.
The Plastics4Performance Mini Cooper 998 MkII on a jig to keep things all in-line for when the modified boot floor goes in.
Once we’re happy and all is secure on the Plastics4Performance Mini Cooper 998 MkII, we remove the seat base / floor rear for new.
A quick dry check fit of this one piece Mini Sport side panel on the Plastics4Performance Mini Cooper 998 MkII.
The floor of the Plastics4Performance Mini Cooper 998 MkII is now in place. Again, checking and double checking all associated panels both existing and new.
The floor of the Plastics4Performance Mini Cooper 998 MkII is now in place. Again, checking and double checking all associated panels both existing and new.
A lot of time was spent checking fitting, removing, modifying, re-fitting and re-checking prior to spot welding on in place with the Plastics4Performance Mini Cooper 998 MkII.
A lot of time was spent checking fitting, removing, modifying, re-fitting and re-checking prior to spot welding on in place with the Plastics4Performance Mini Cooper 998 MkII.
The next stage on the Plastics4Performance Mini Cooper 998 MkII was to put the shell in place on rig, then additional panels removal. Checking fitment of supplied modified Heritage panels.
The next stage on the Plastics4Performance Mini Cooper 998 MkII was to put the shell in place on rig, then additional panels removal. Checking fitment of supplied modified Heritage panels.
The next stage on the Plastics4Performance Mini Cooper 998 MkII was to put the shell in place on rig, then additional panels removal. Checking fitment of supplied modified Heritage panels.
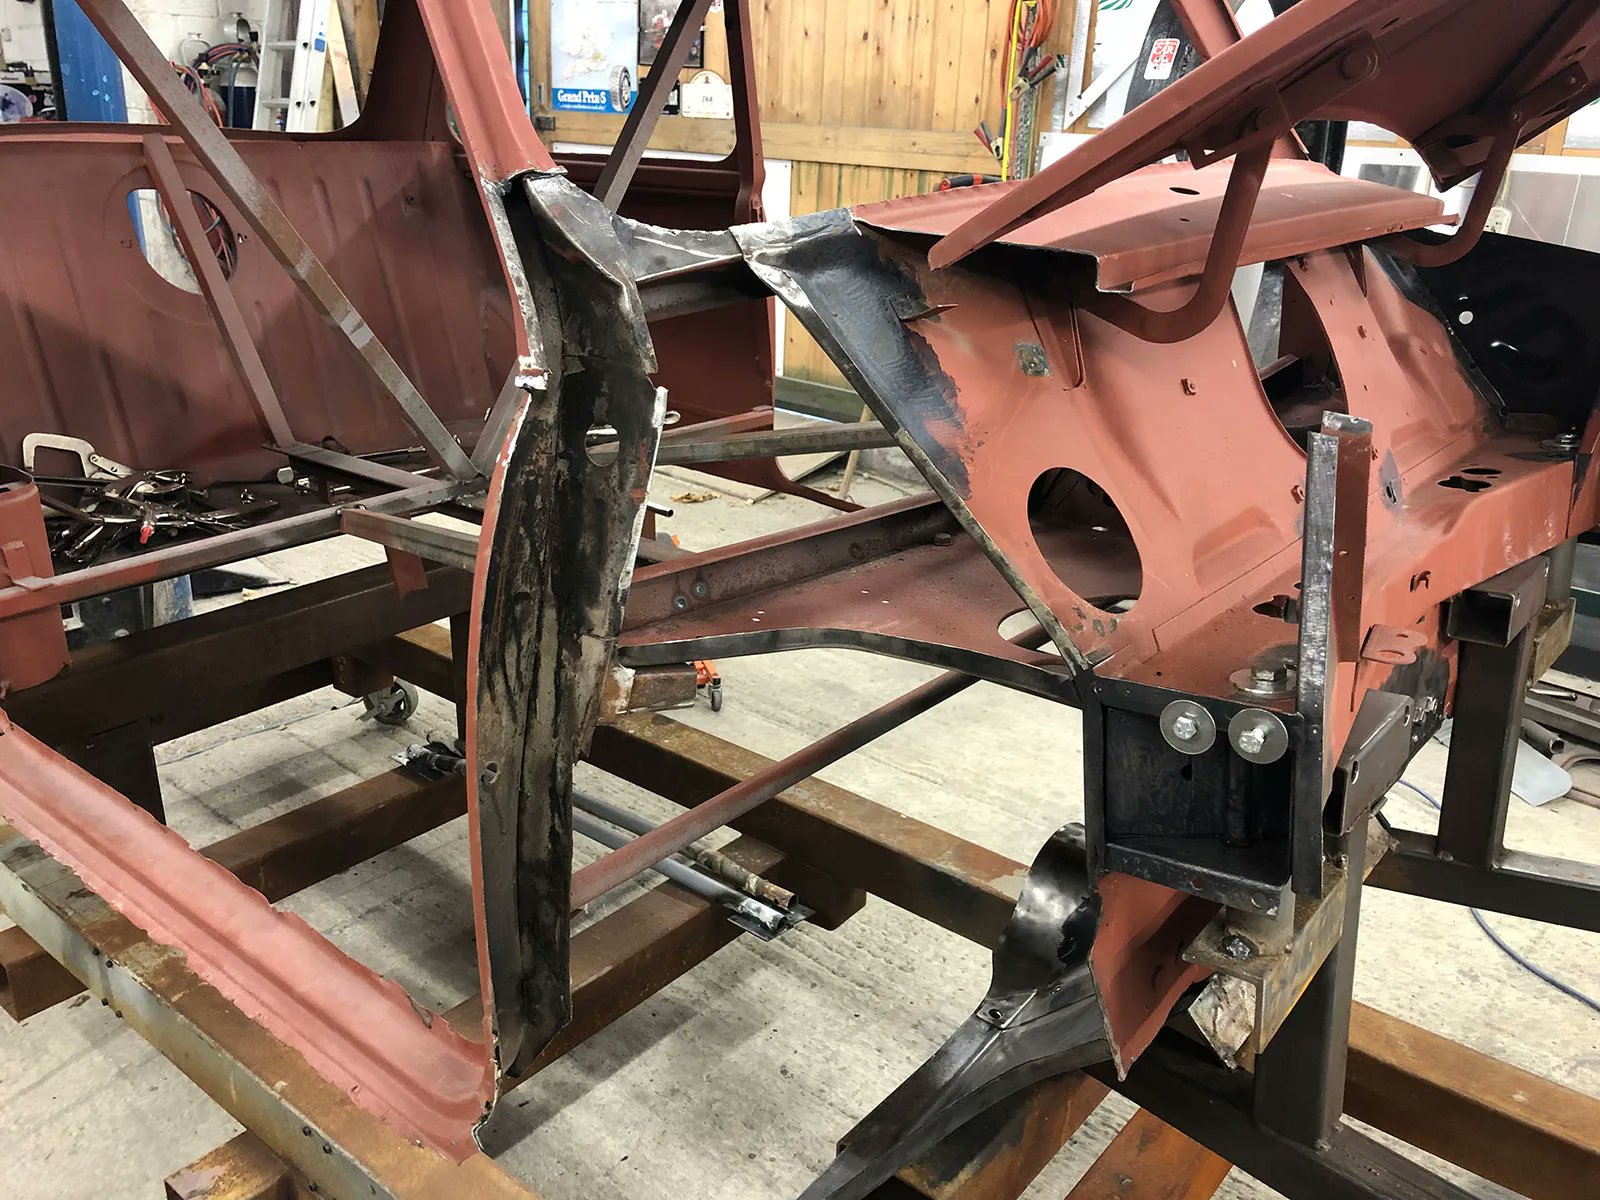
When it comes to the Plastics4Performance Mini Cooper 998 MkII, the devil is in the detail. Original missing pressings are put in location near the steering rack.
The Magnum supplied one piece floor on the Plastics4Performance Mini Cooper 998 MkII, seen here checking fitment with the modified front board.
The Magnum supplied one piece floor on the Plastics4Performance Mini Cooper 998 MkII, seen here checking fitment with the modified front board.
The Plastics4Performance Mini Cooper 998 MkII received a one piece floor with front and rear boards supplied by Magnum. Seen here checking fitment.
The Plastics4Performance Mini Cooper 998 MkII door was stripped to reveal the rusted areas hidden behind every seam. These will be dealt with by creating new fabricated sections.
The Plastics4Performance Mini Cooper 998 MkII door was stripped to reveal the rusted areas hidden behind every seam. These will be dealt with by creating new fabricated sections.
Who just loves a rusty Mini Cooper 998 MkII door? 🙄
Who just loves a rusty Mini Cooper 998 MkII door? 🙄
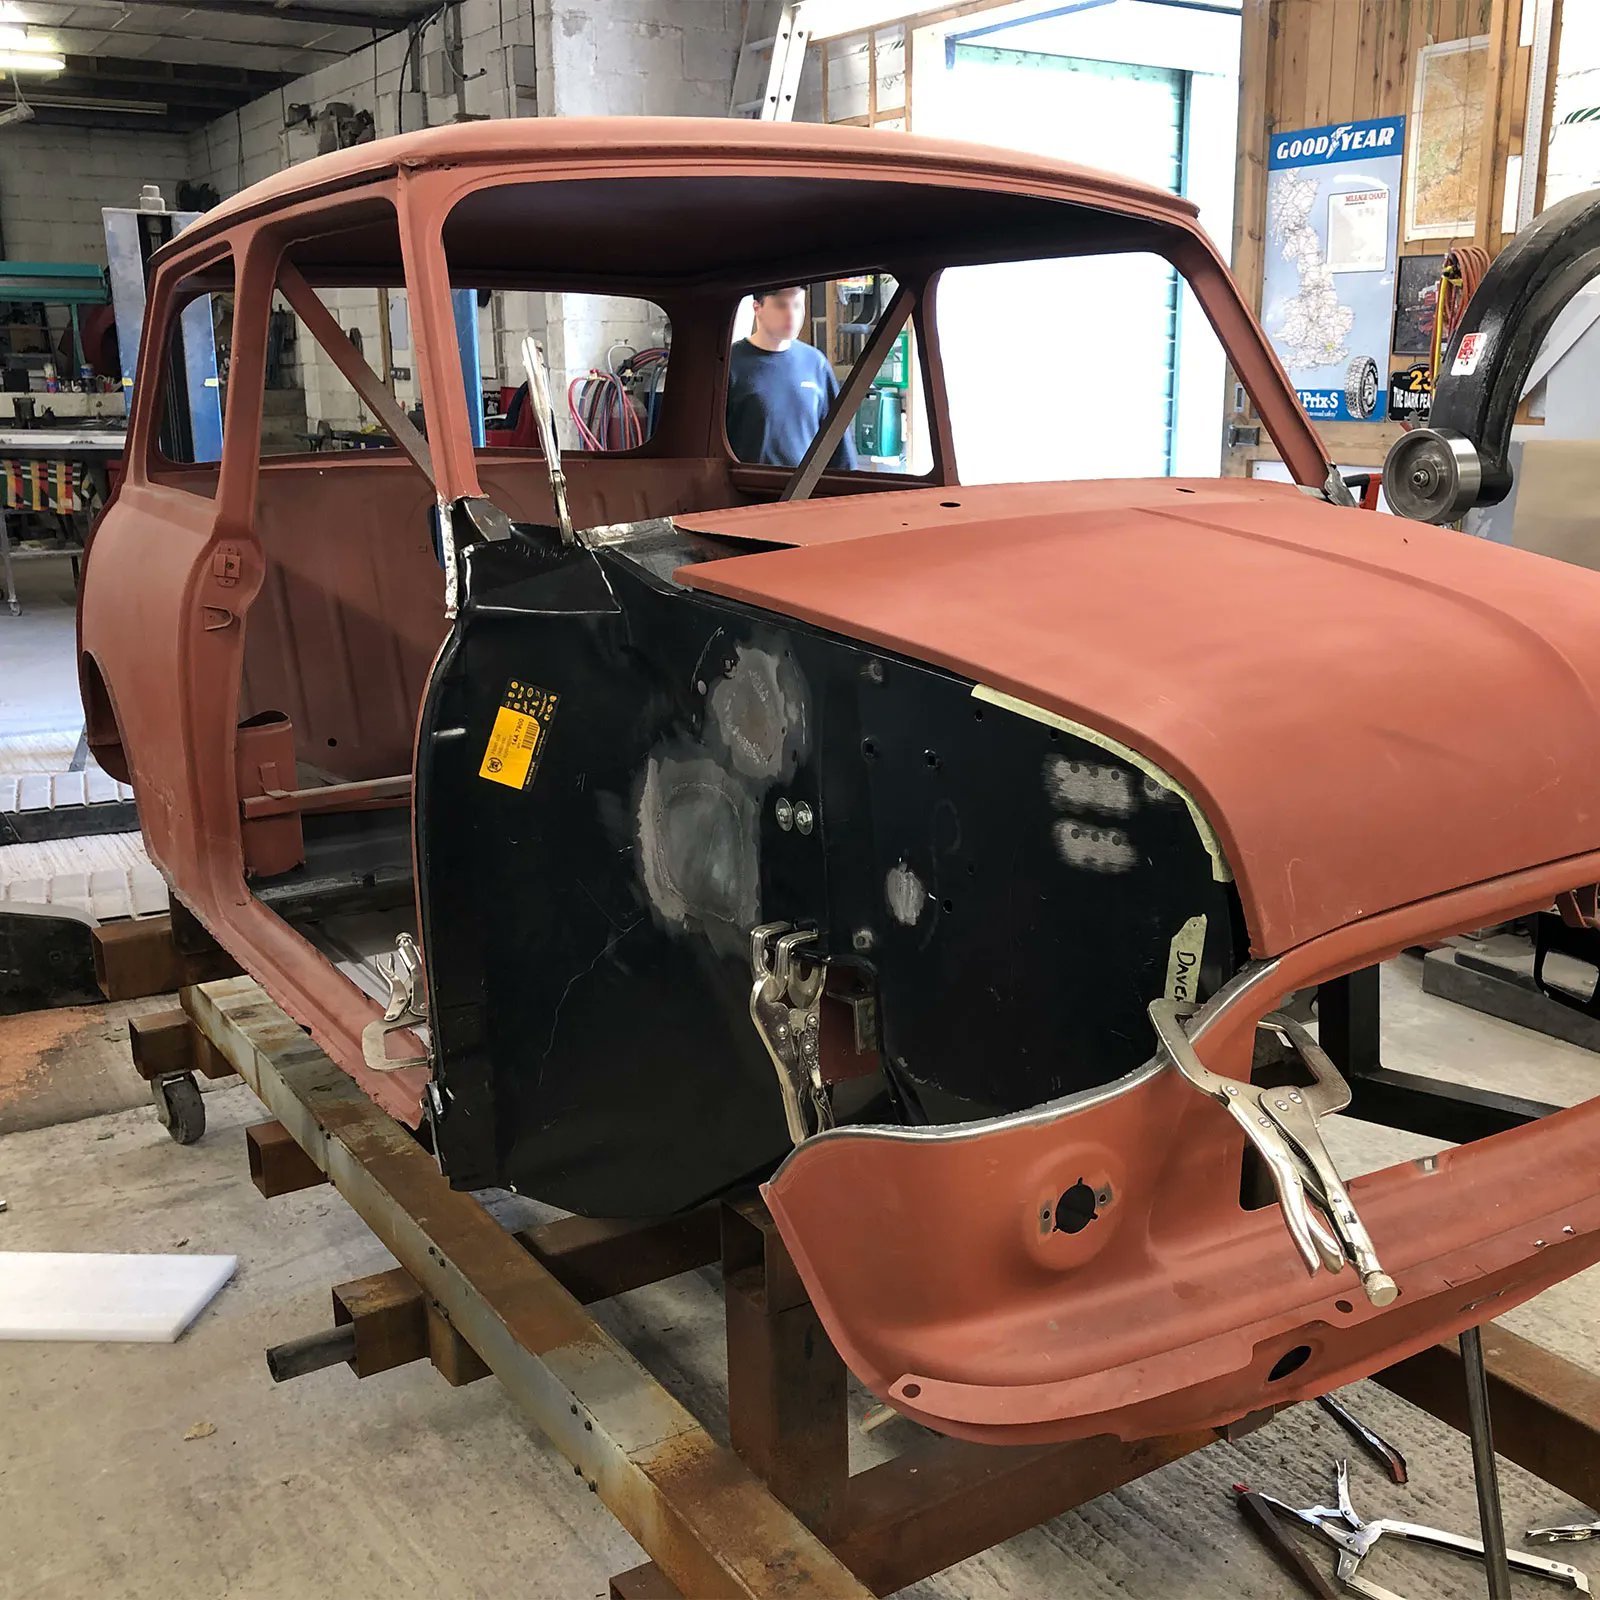
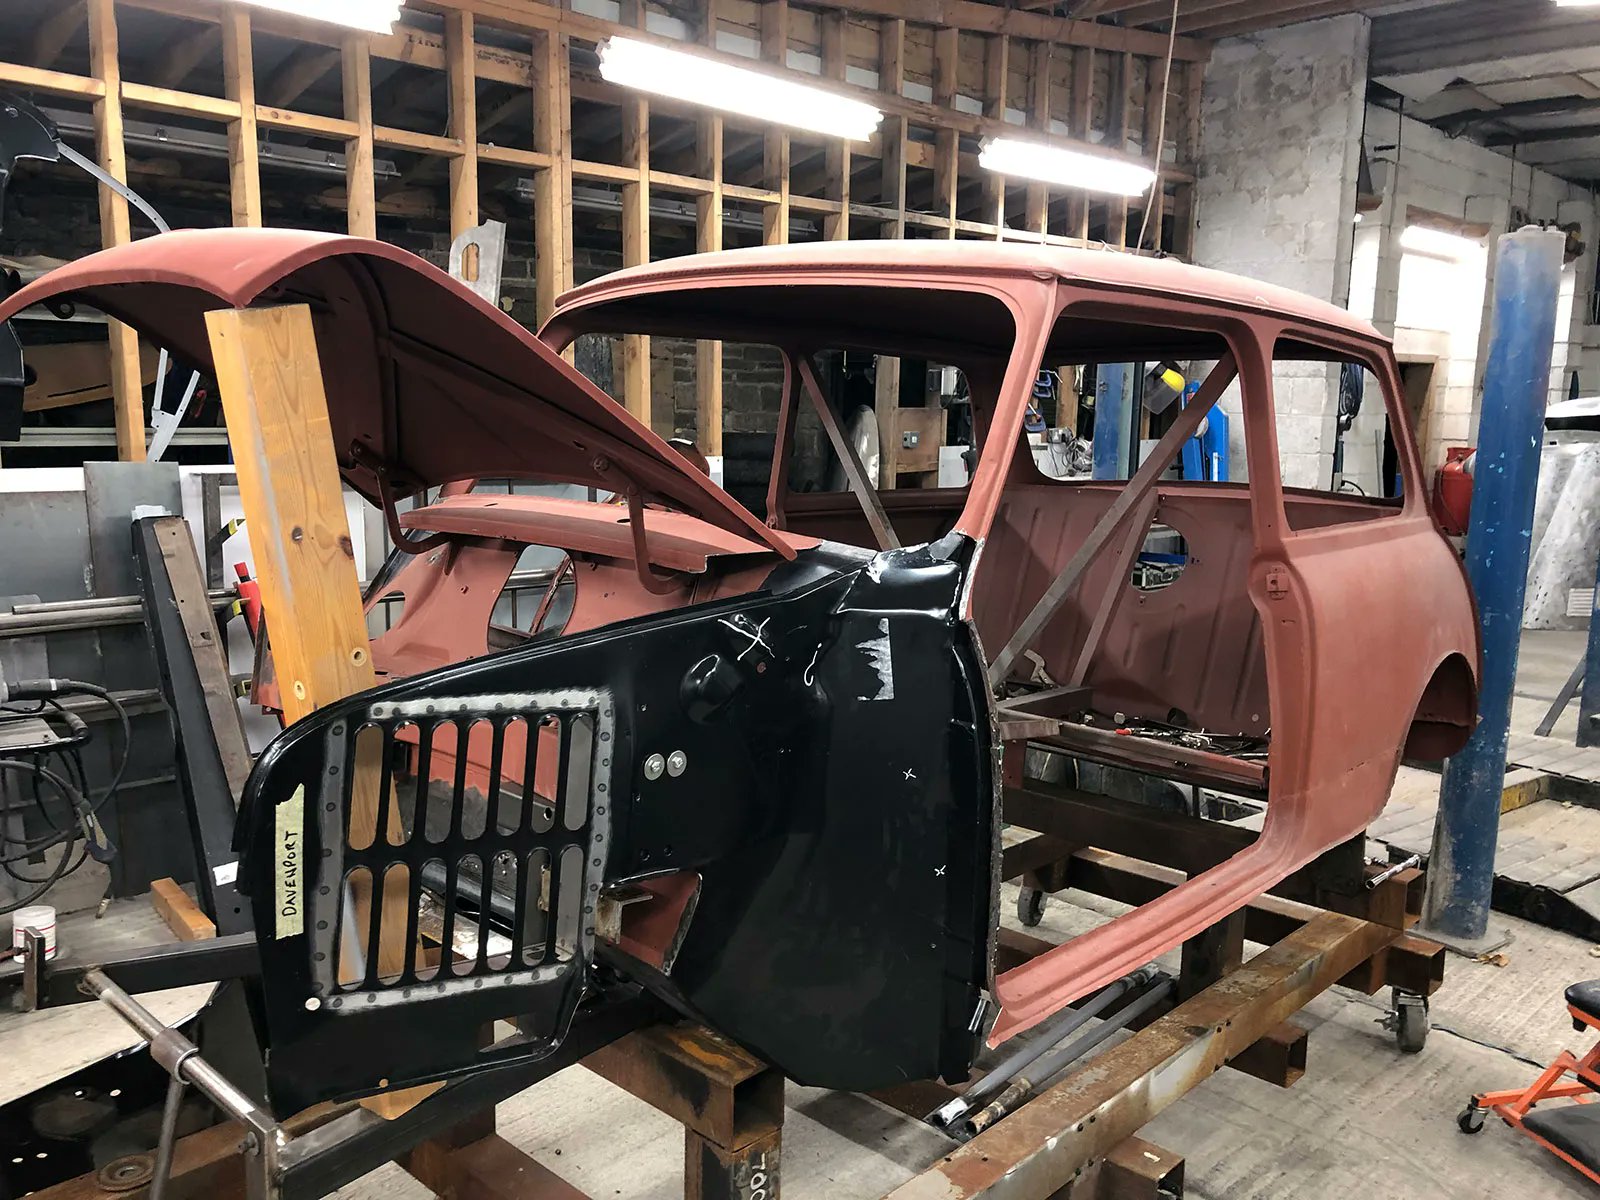
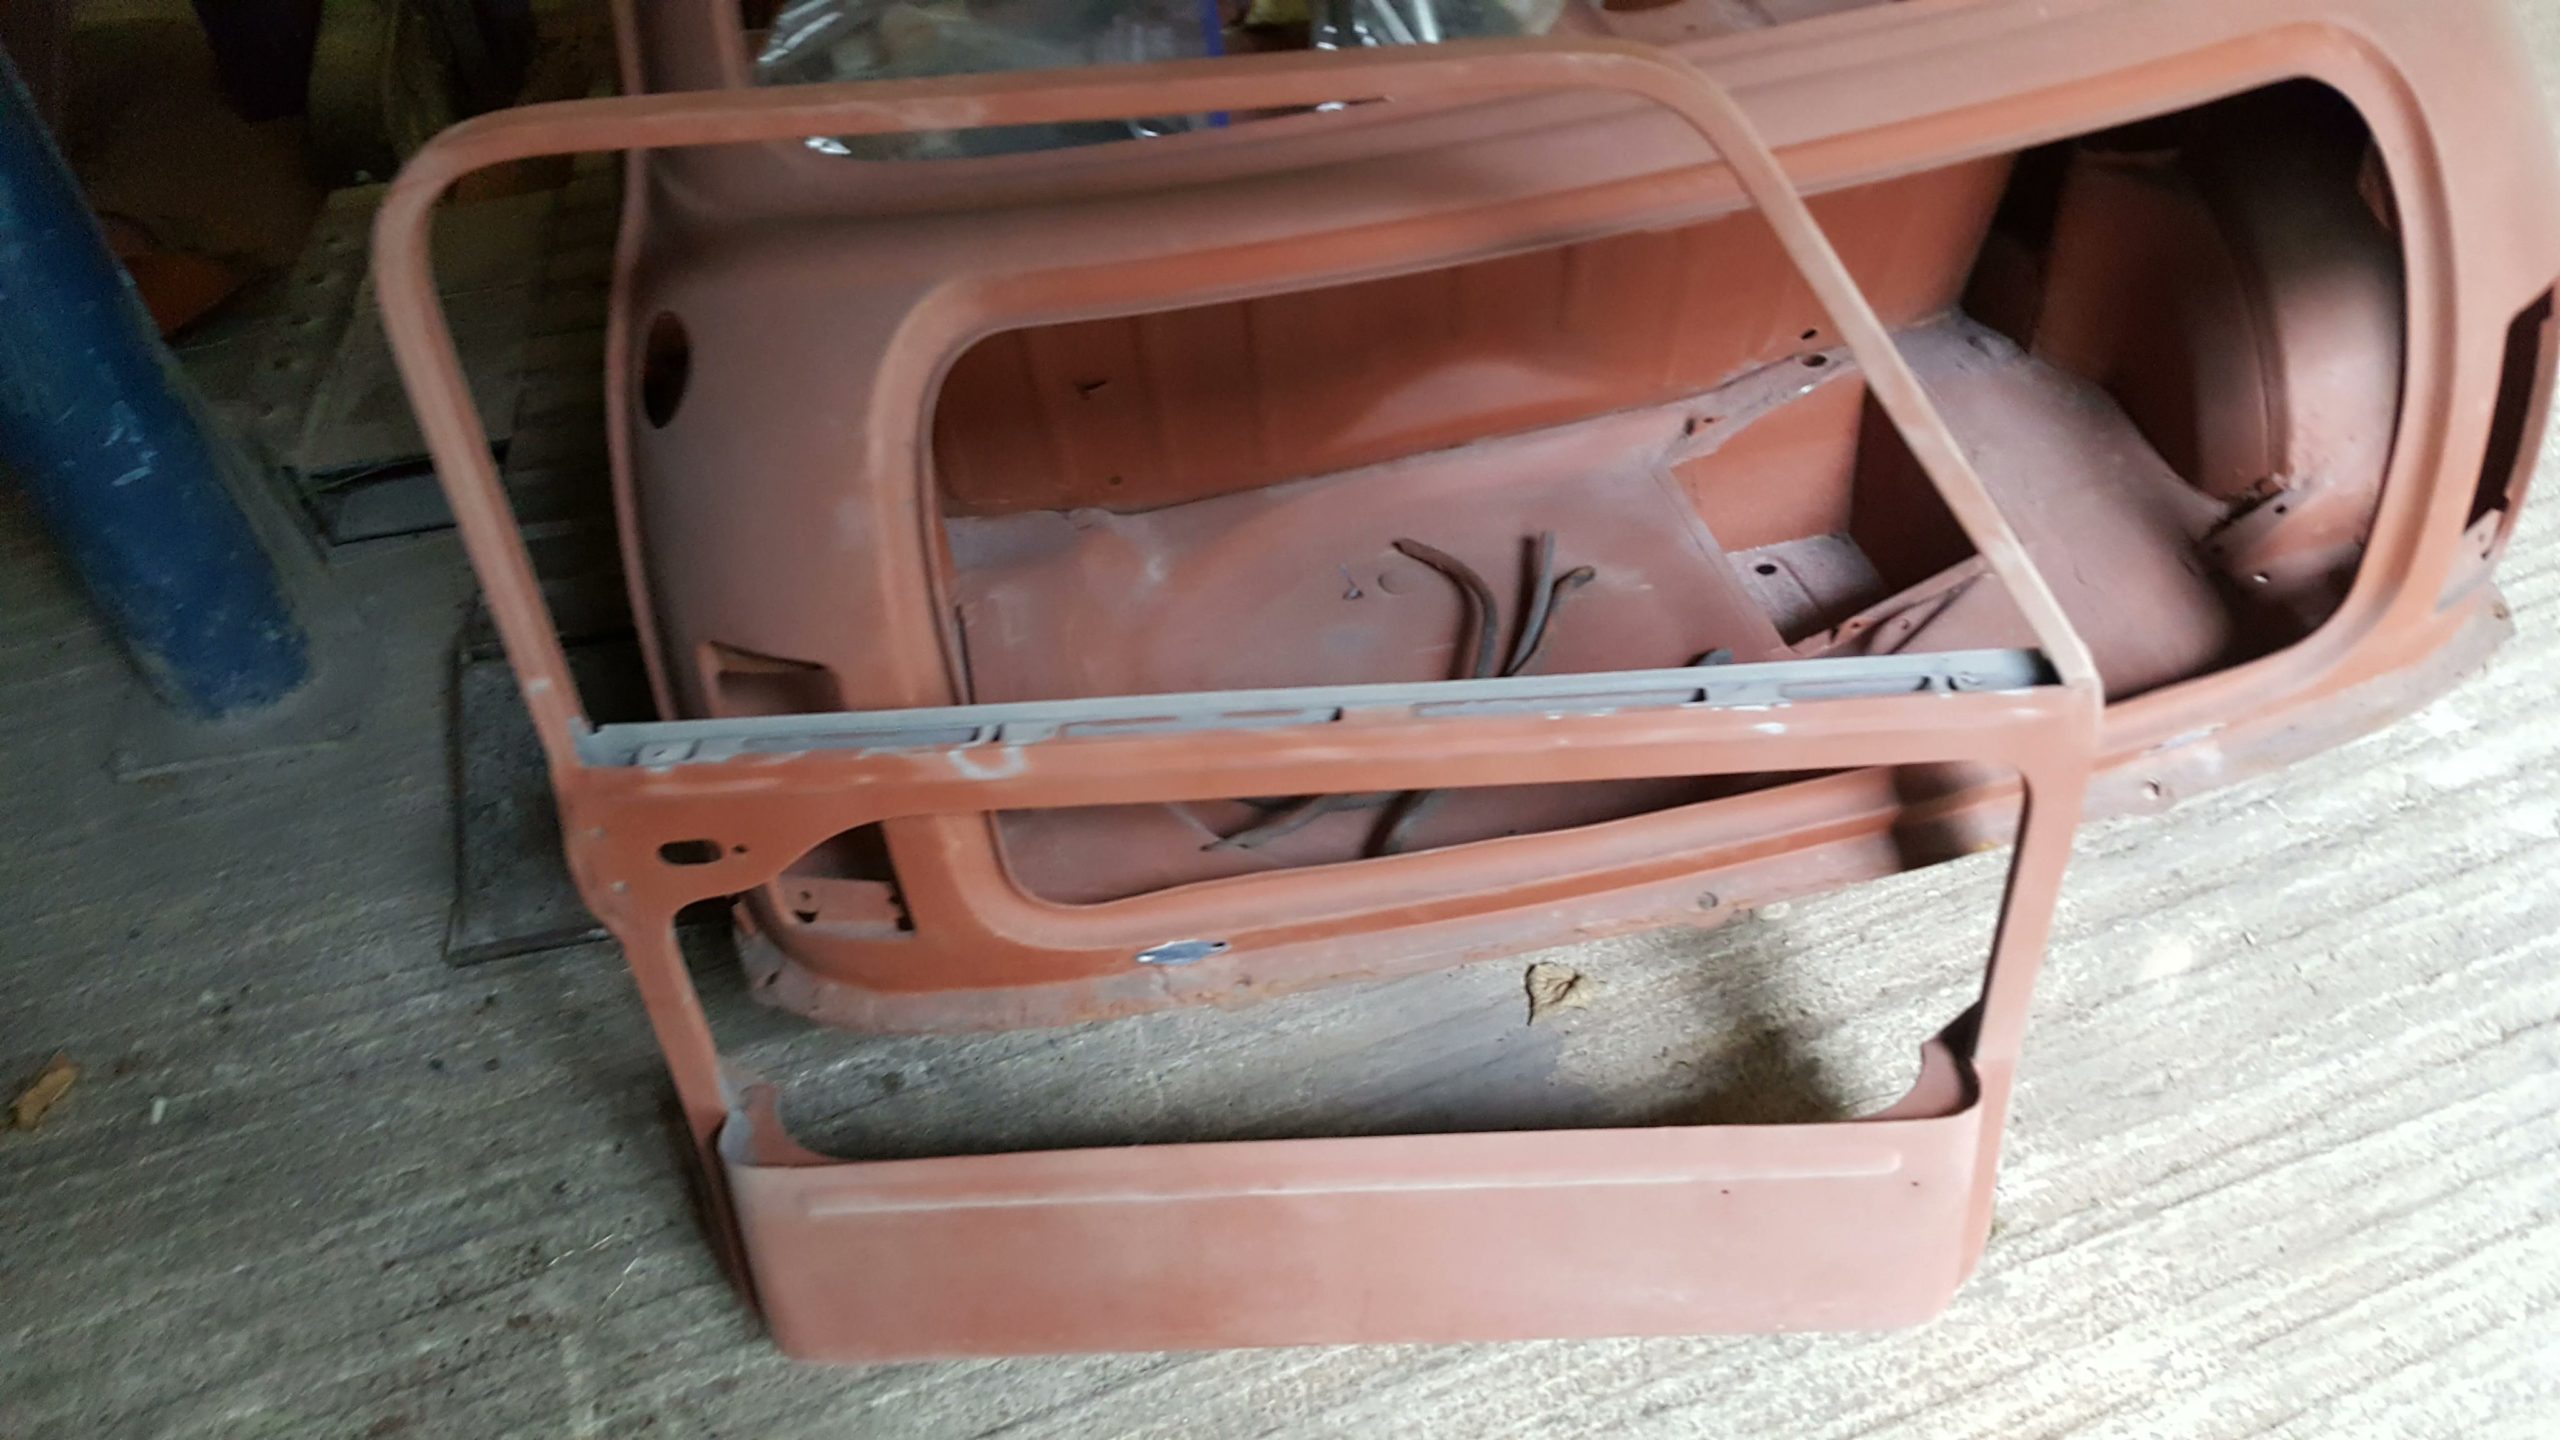
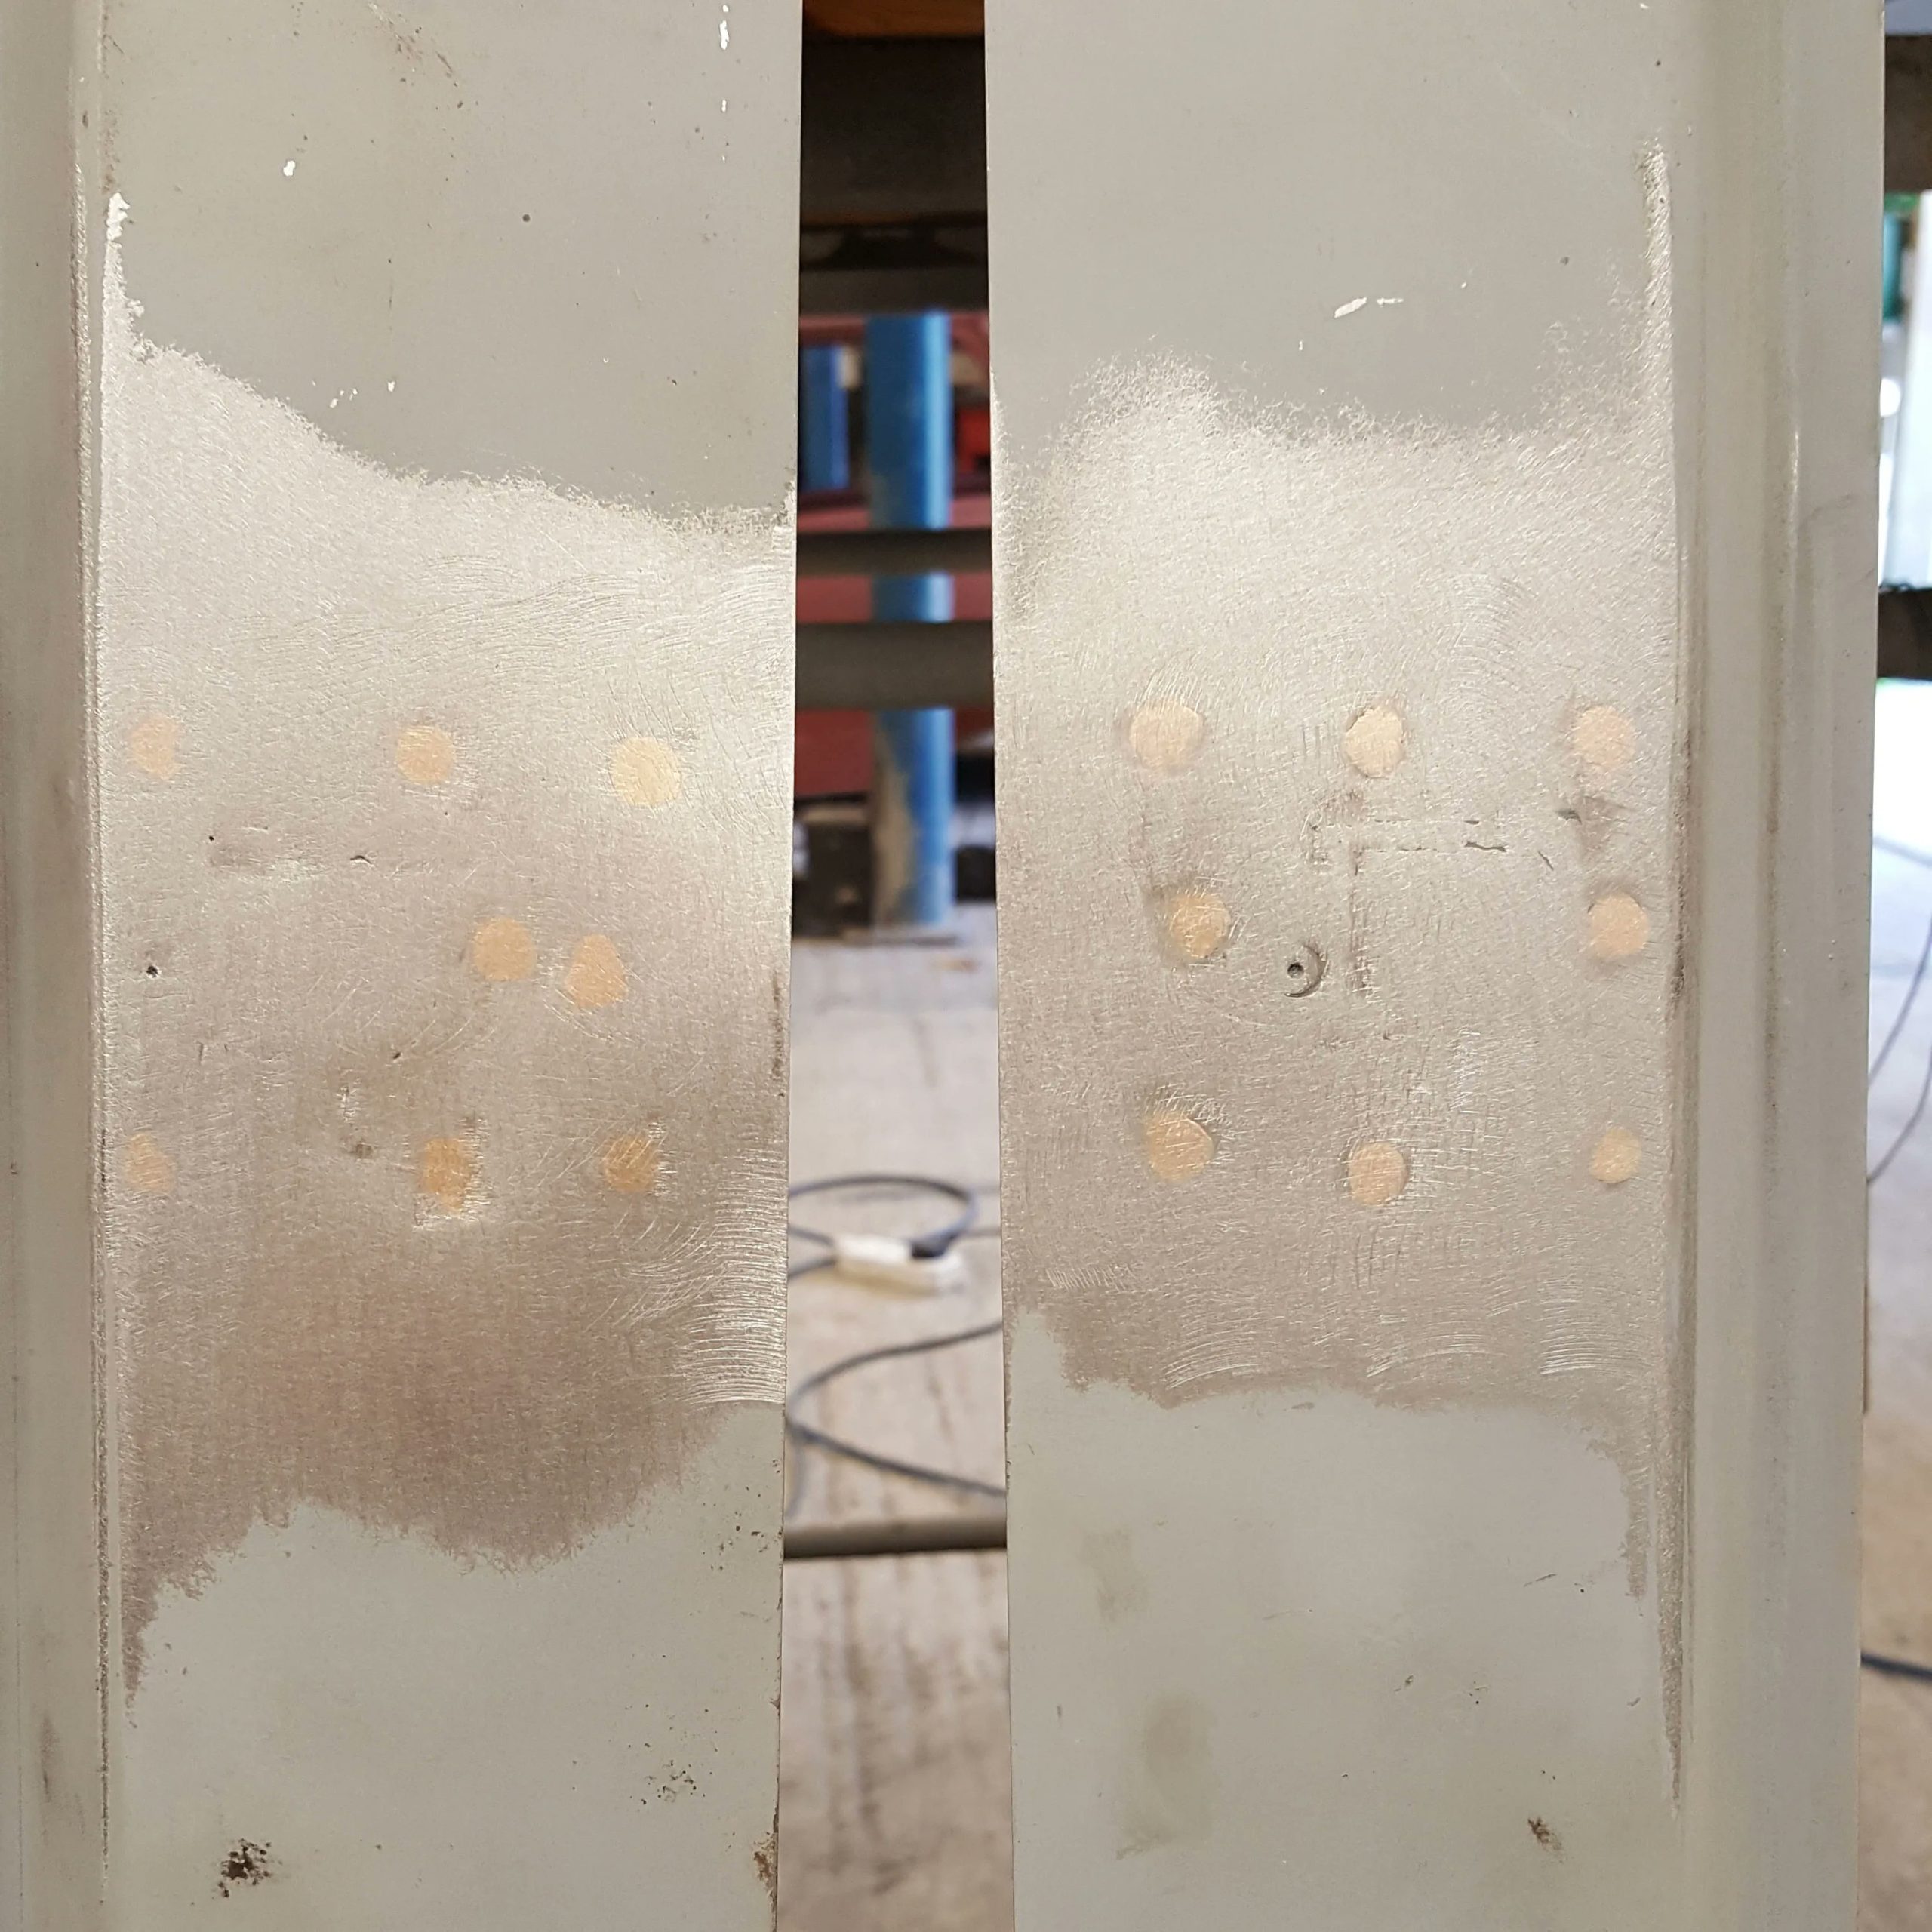
Heritage panels were chosen for the Plastics4Performance Mini Cooper 998 MkII including these inner wings, which required retro modifications to match the original panels as fitted to this car when new.
Heritage panels were chosen for the Plastics4Performance Mini Cooper 998 MkII including these inner wings, which required retro modifications to match the original panels as fitted to this car when new.
Heritage panels were chosen for the Plastics4Performance Mini Cooper 998 MkII including these inner wings, which required retro modifications to match the original panels as fitted to this car when new.
Heritage panels were chosen for the Plastics4Performance Mini Cooper 998 MkII including these inner wings, which required retro modifications to match the original panels as fitted to this car when new.
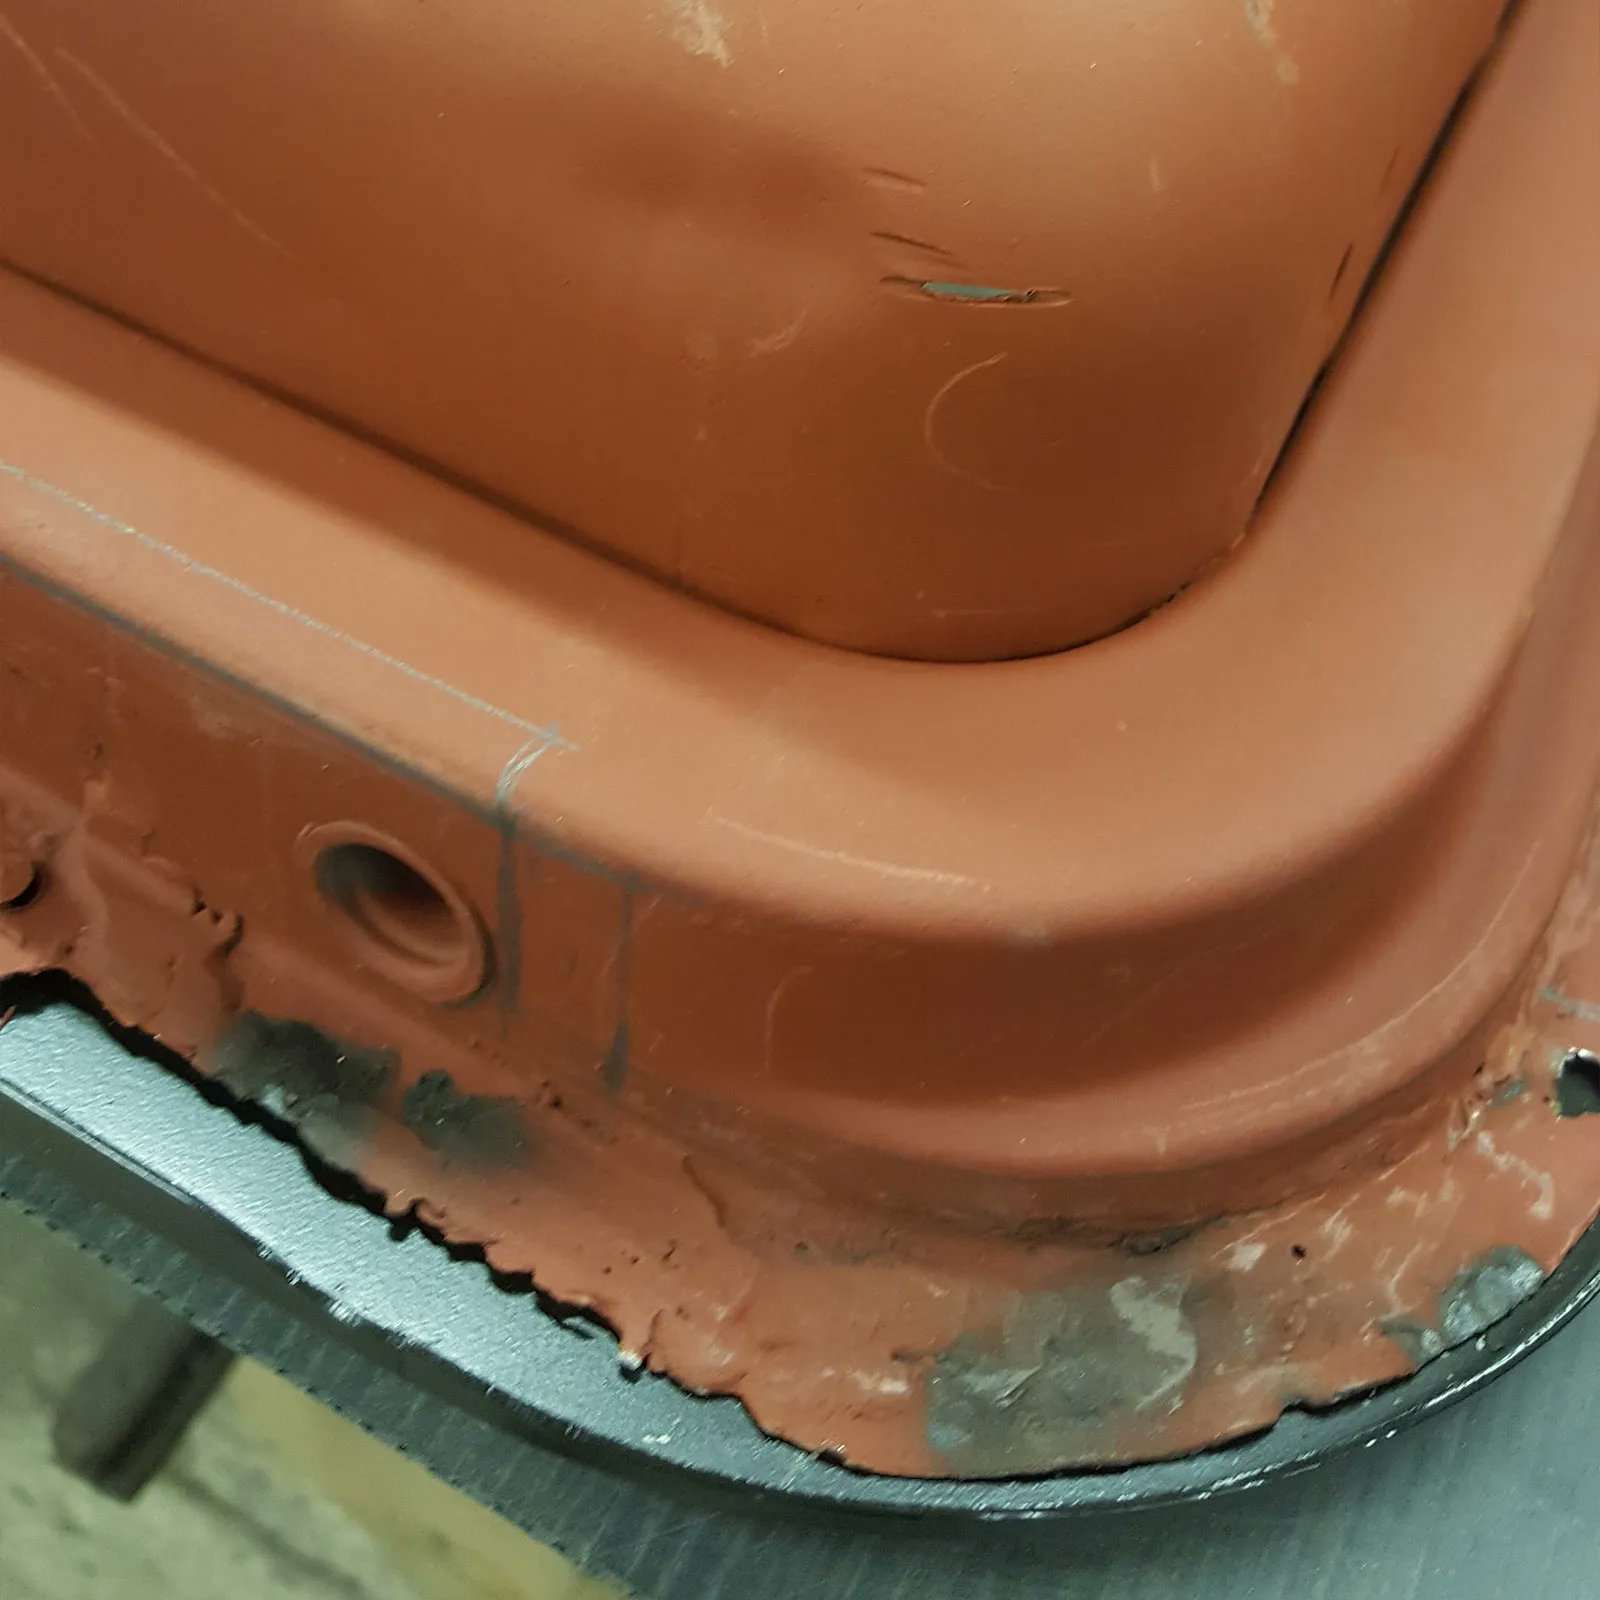
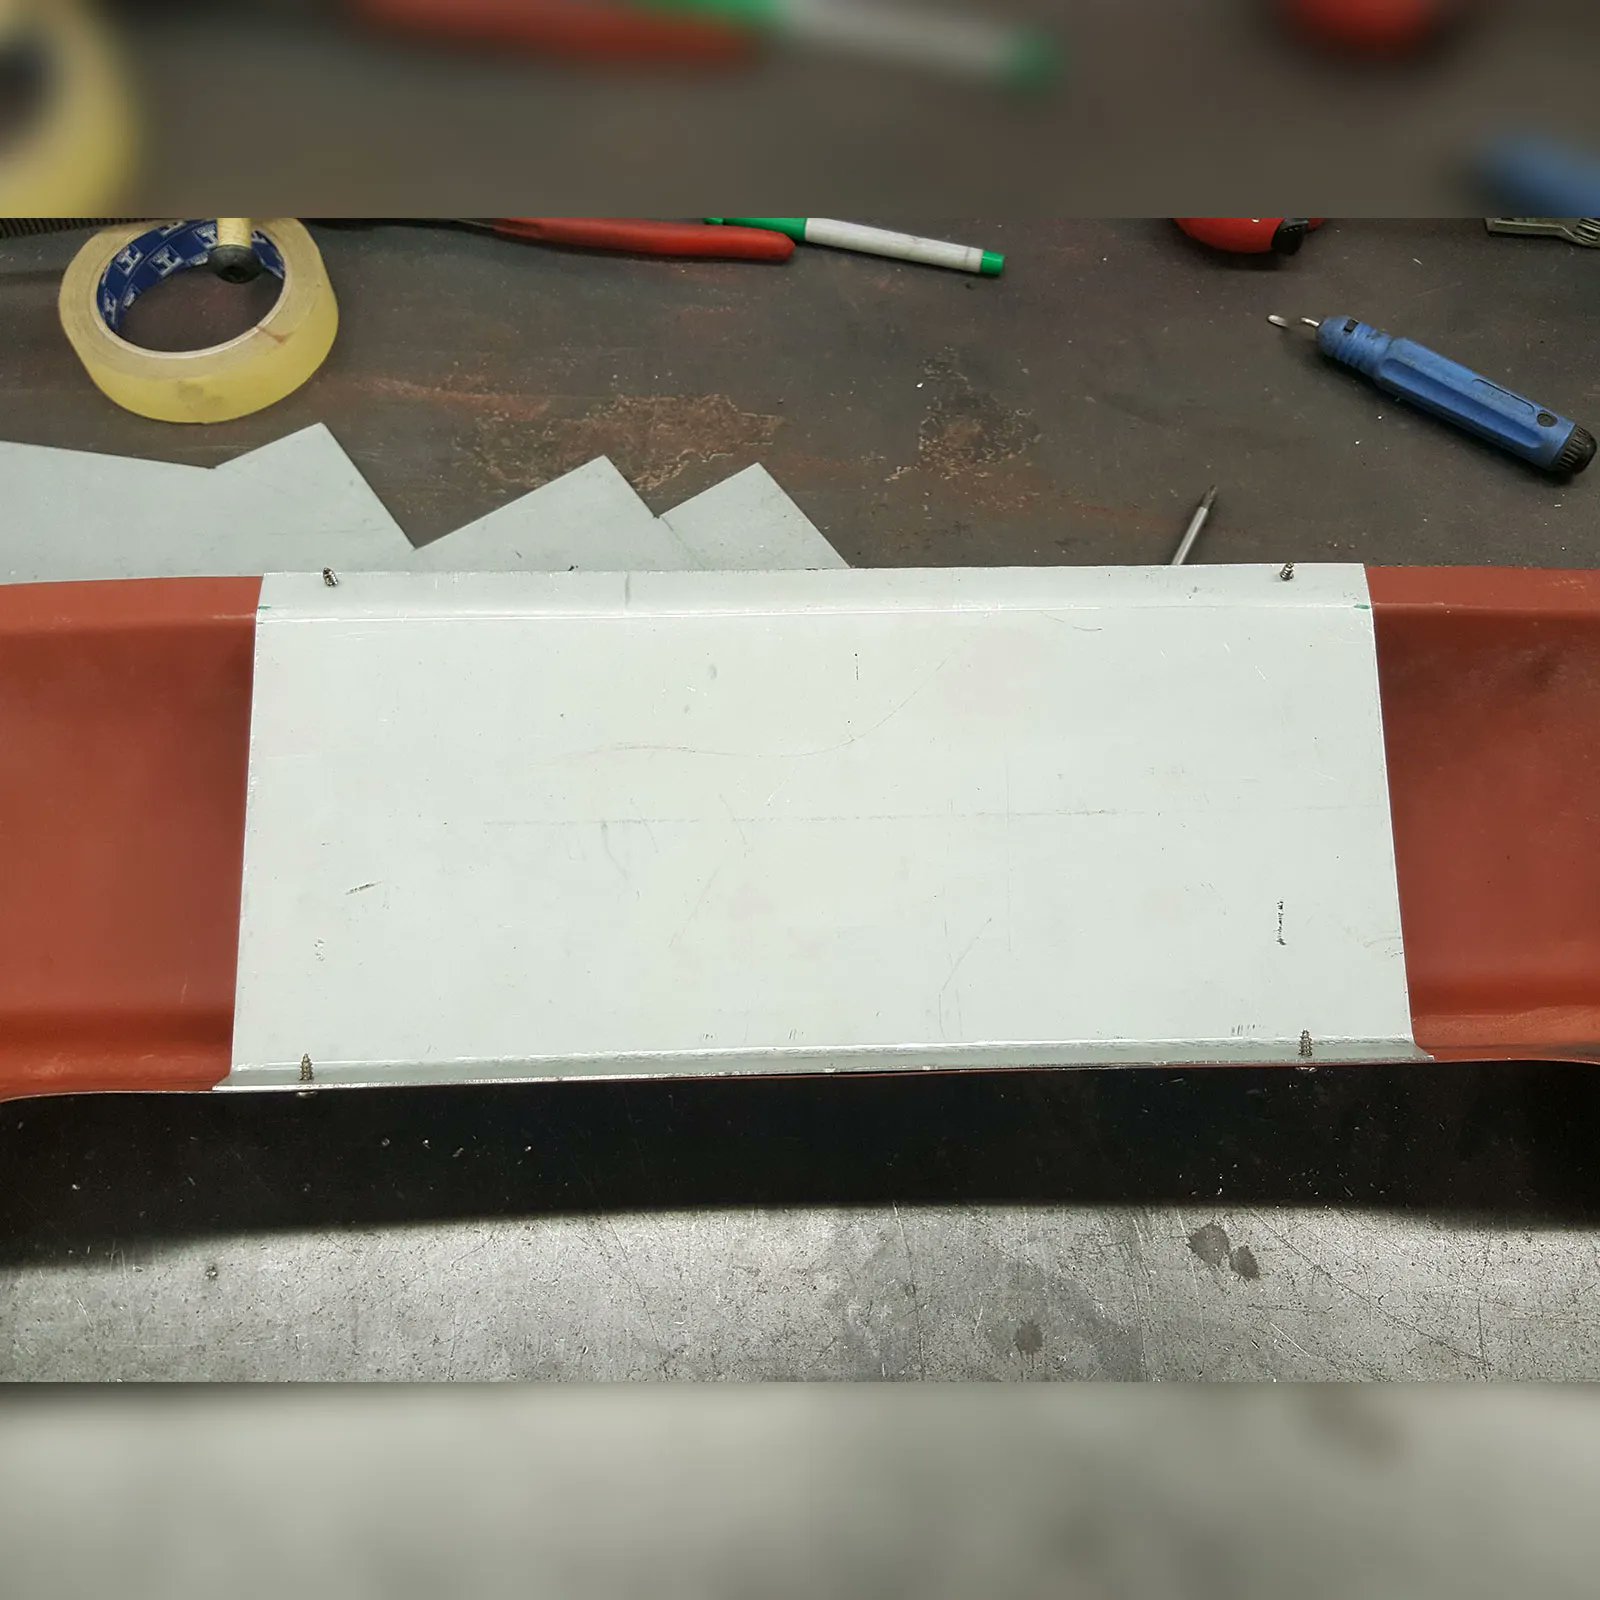
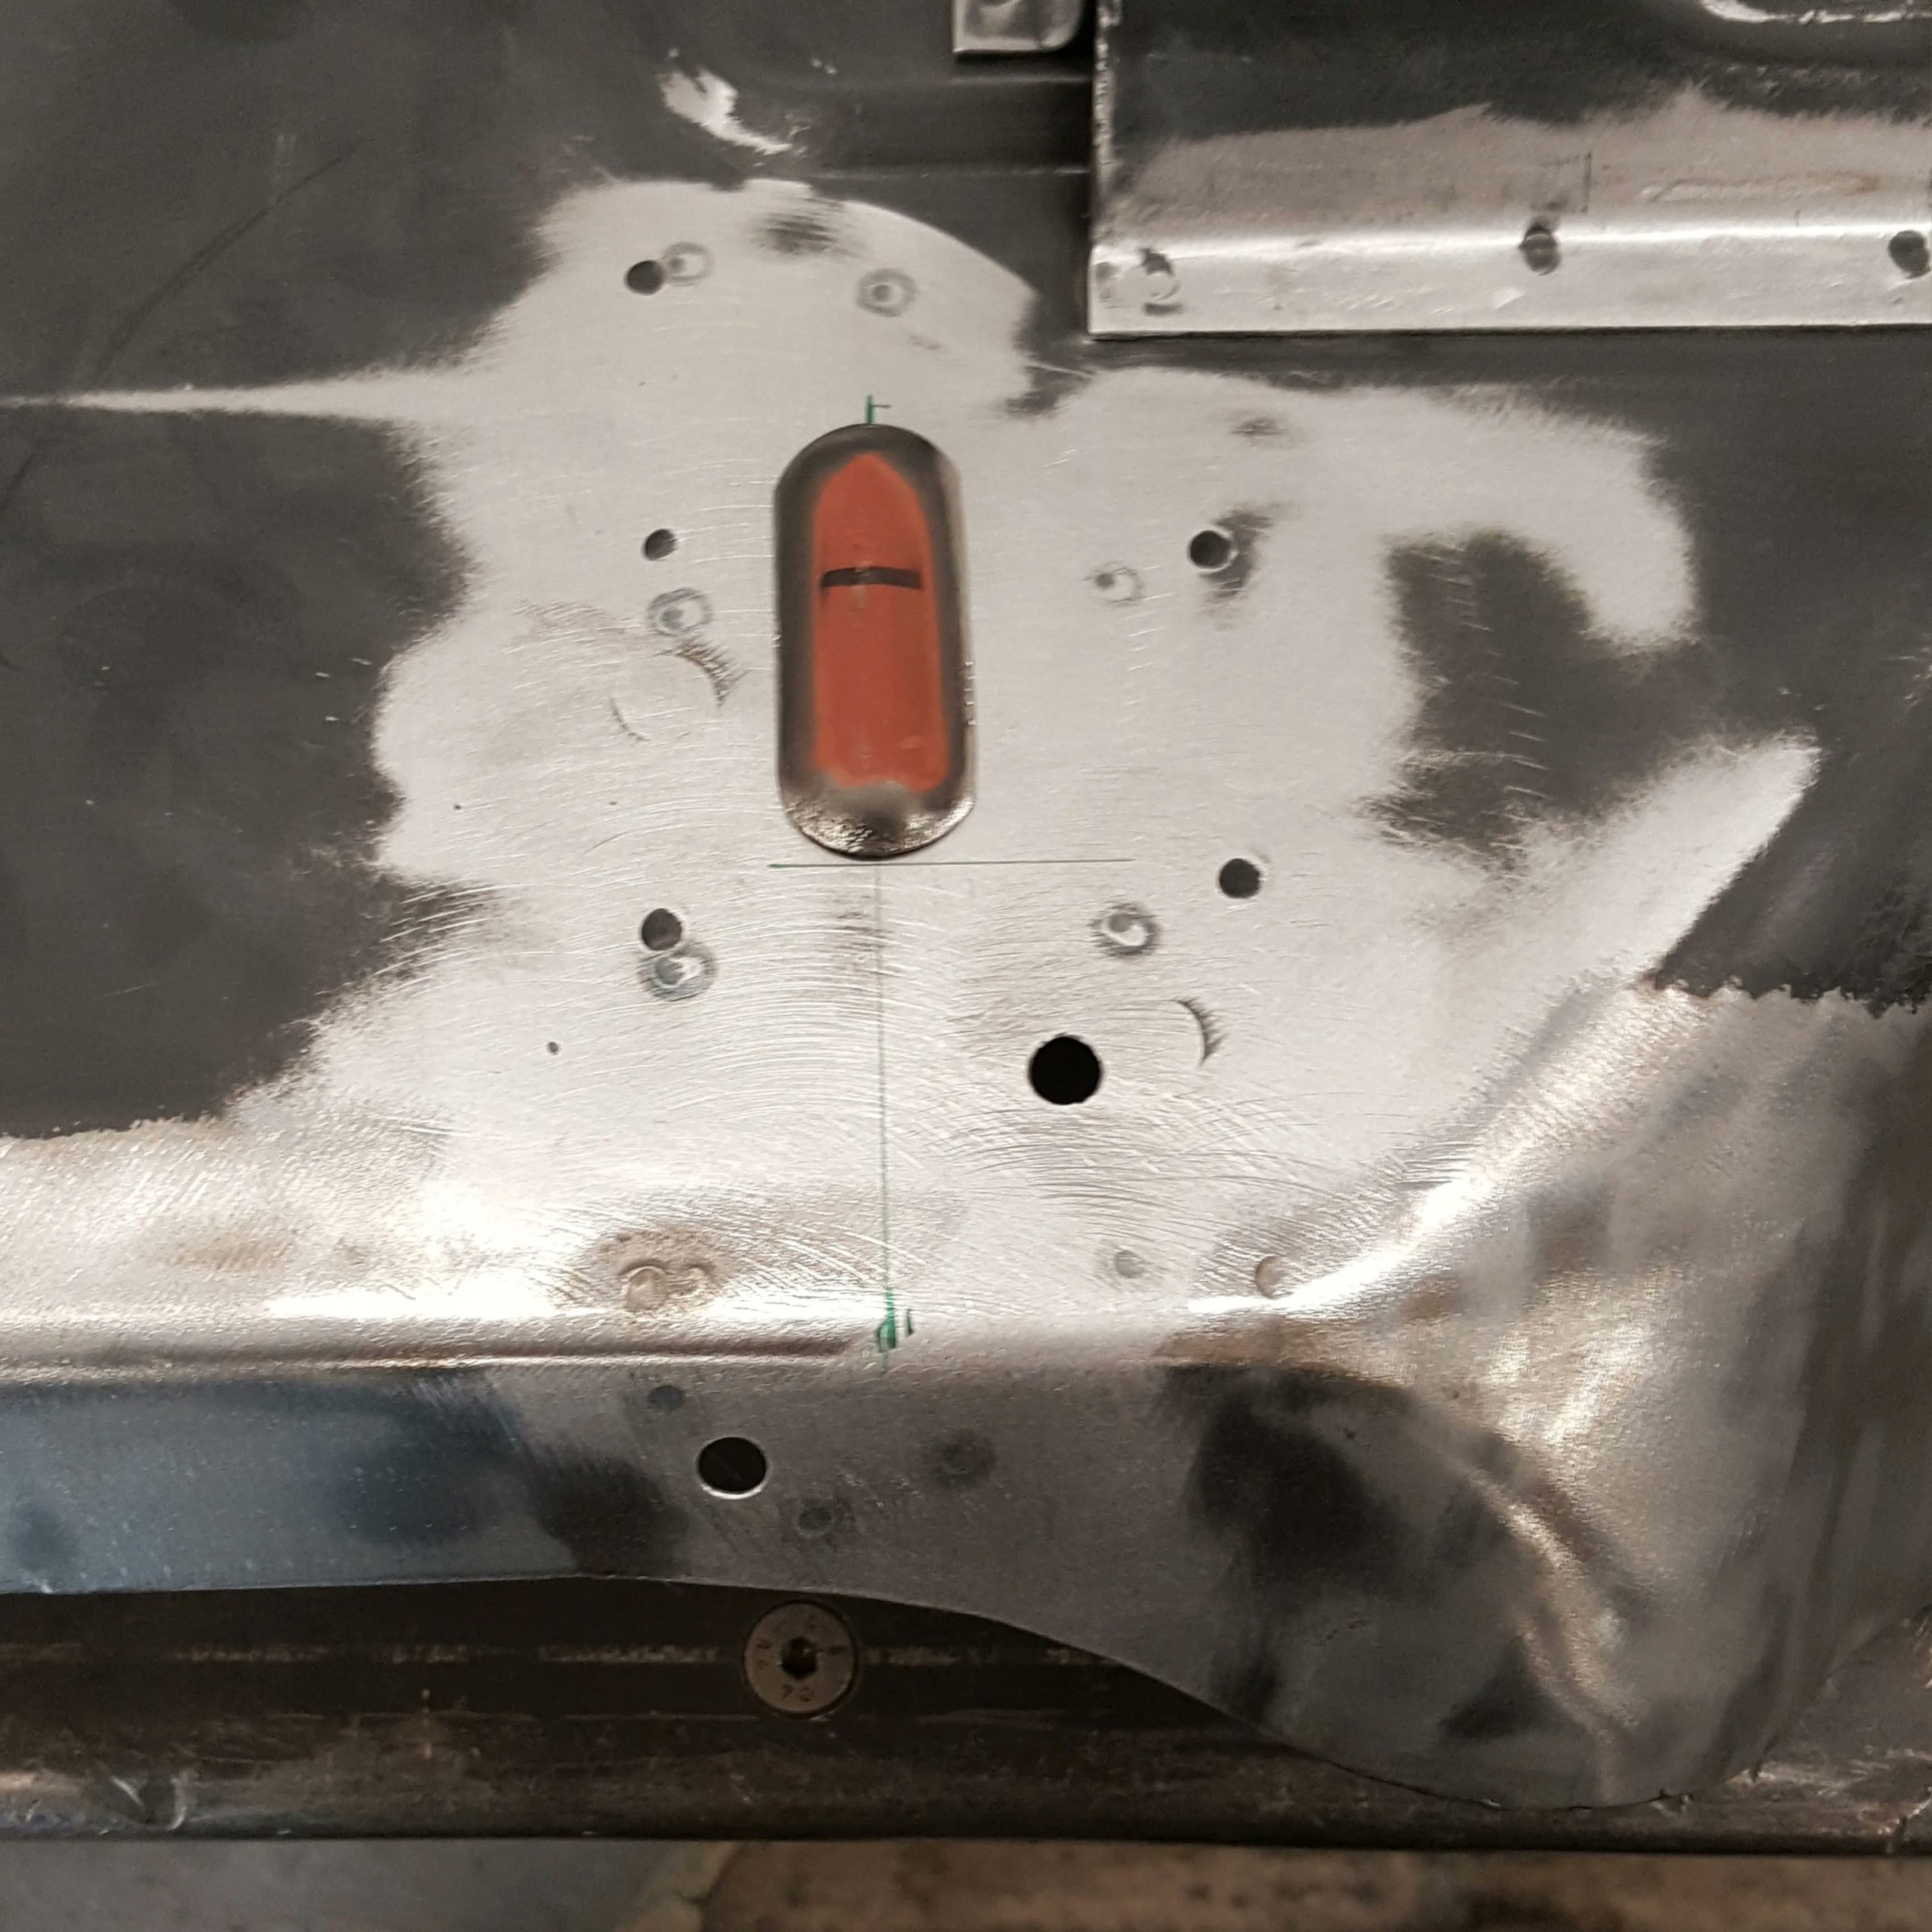
The completed front board on the Plastics4Performance Mini Cooper 998 MkII showing numerous other minor modifications.
On the Plastics4Performance Mini Cooper 998 MkII we made modifications to the front board to keep it period correct. This included the two dimples, which were again hand made and welded into place. Attention to these small details is key for us and the client.
The jacking point on the Plastics4Performance Mini Cooper 998 MkII was welded up for a clean look. Another bonus of this is that it takes out a potential spot for rust in the future.
The jacking point on the Plastics4Performance Mini Cooper 998 MkII was welded up for a clean look. Another bonus of this is that it takes out a potential spot for rust in the future.
The footwell on the Plastics4Performance Mini Cooper 998 MkII was not the correct size for the year of manufacture, so was modified with new hand made section as it would’ve been when new.
The footwell on the Plastics4Performance Mini Cooper 998 MkII was not the correct size for the year of manufacture, so was modified with new hand made section as it would’ve been when new.
The footwell on the Plastics4Performance Mini Cooper 998 MkII was not the correct size for the year of manufacture, so was modified with new hand made section as it would’ve been when new.
The footwell on the Plastics4Performance Mini Cooper 998 MkII was not the correct size for the year of manufacture, so was modified with new hand made section as it would’ve been when new.
The owner of the Plastics4Performance Mini Cooper 998 MkII, Paul, removed the whole floor prior to us getting the project. Fortunately he had a choice of two floors and the decision was made to go with a one piece floor with modifications.
The owner of the Plastics4Performance Mini Cooper 998 MkII, Paul, removed the whole floor prior to us getting the project. Fortunately he had a choice of two floors and the decision was made to go with a one piece floor with modifications.
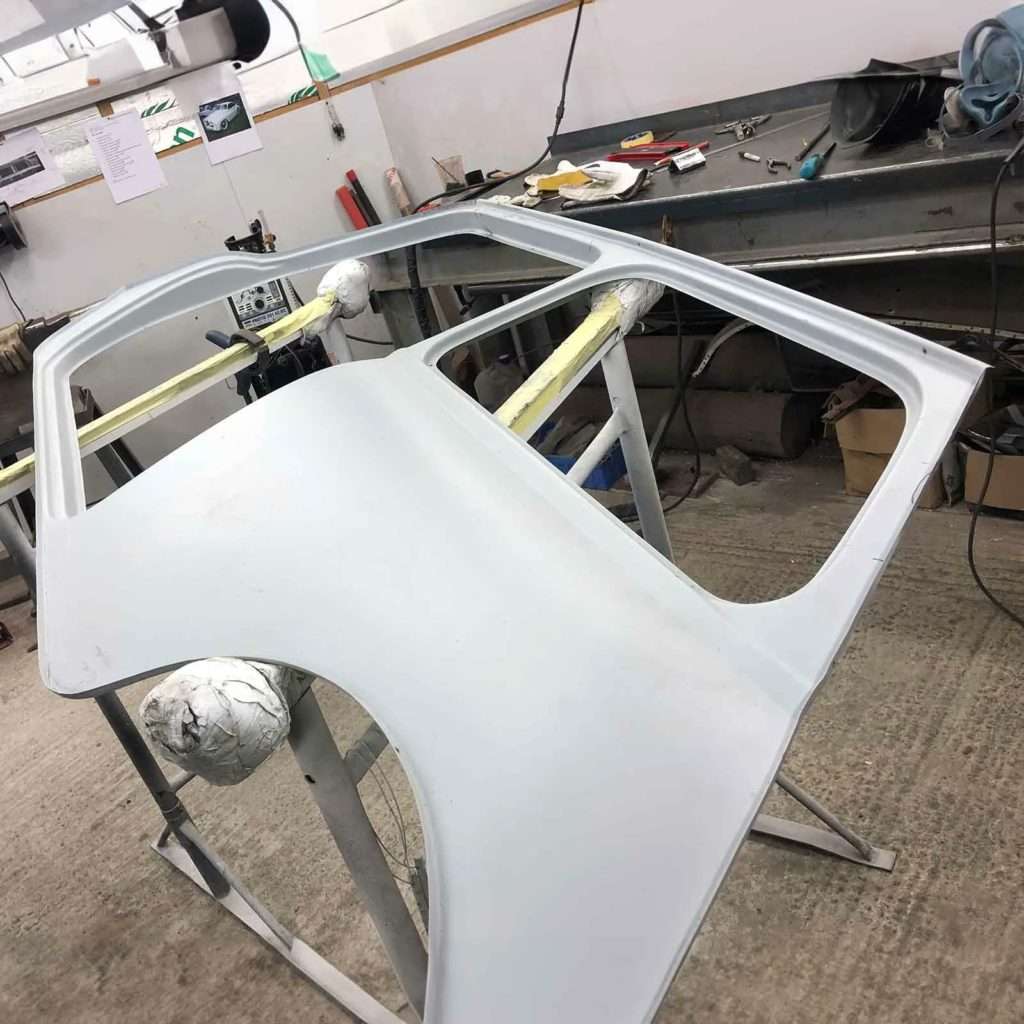
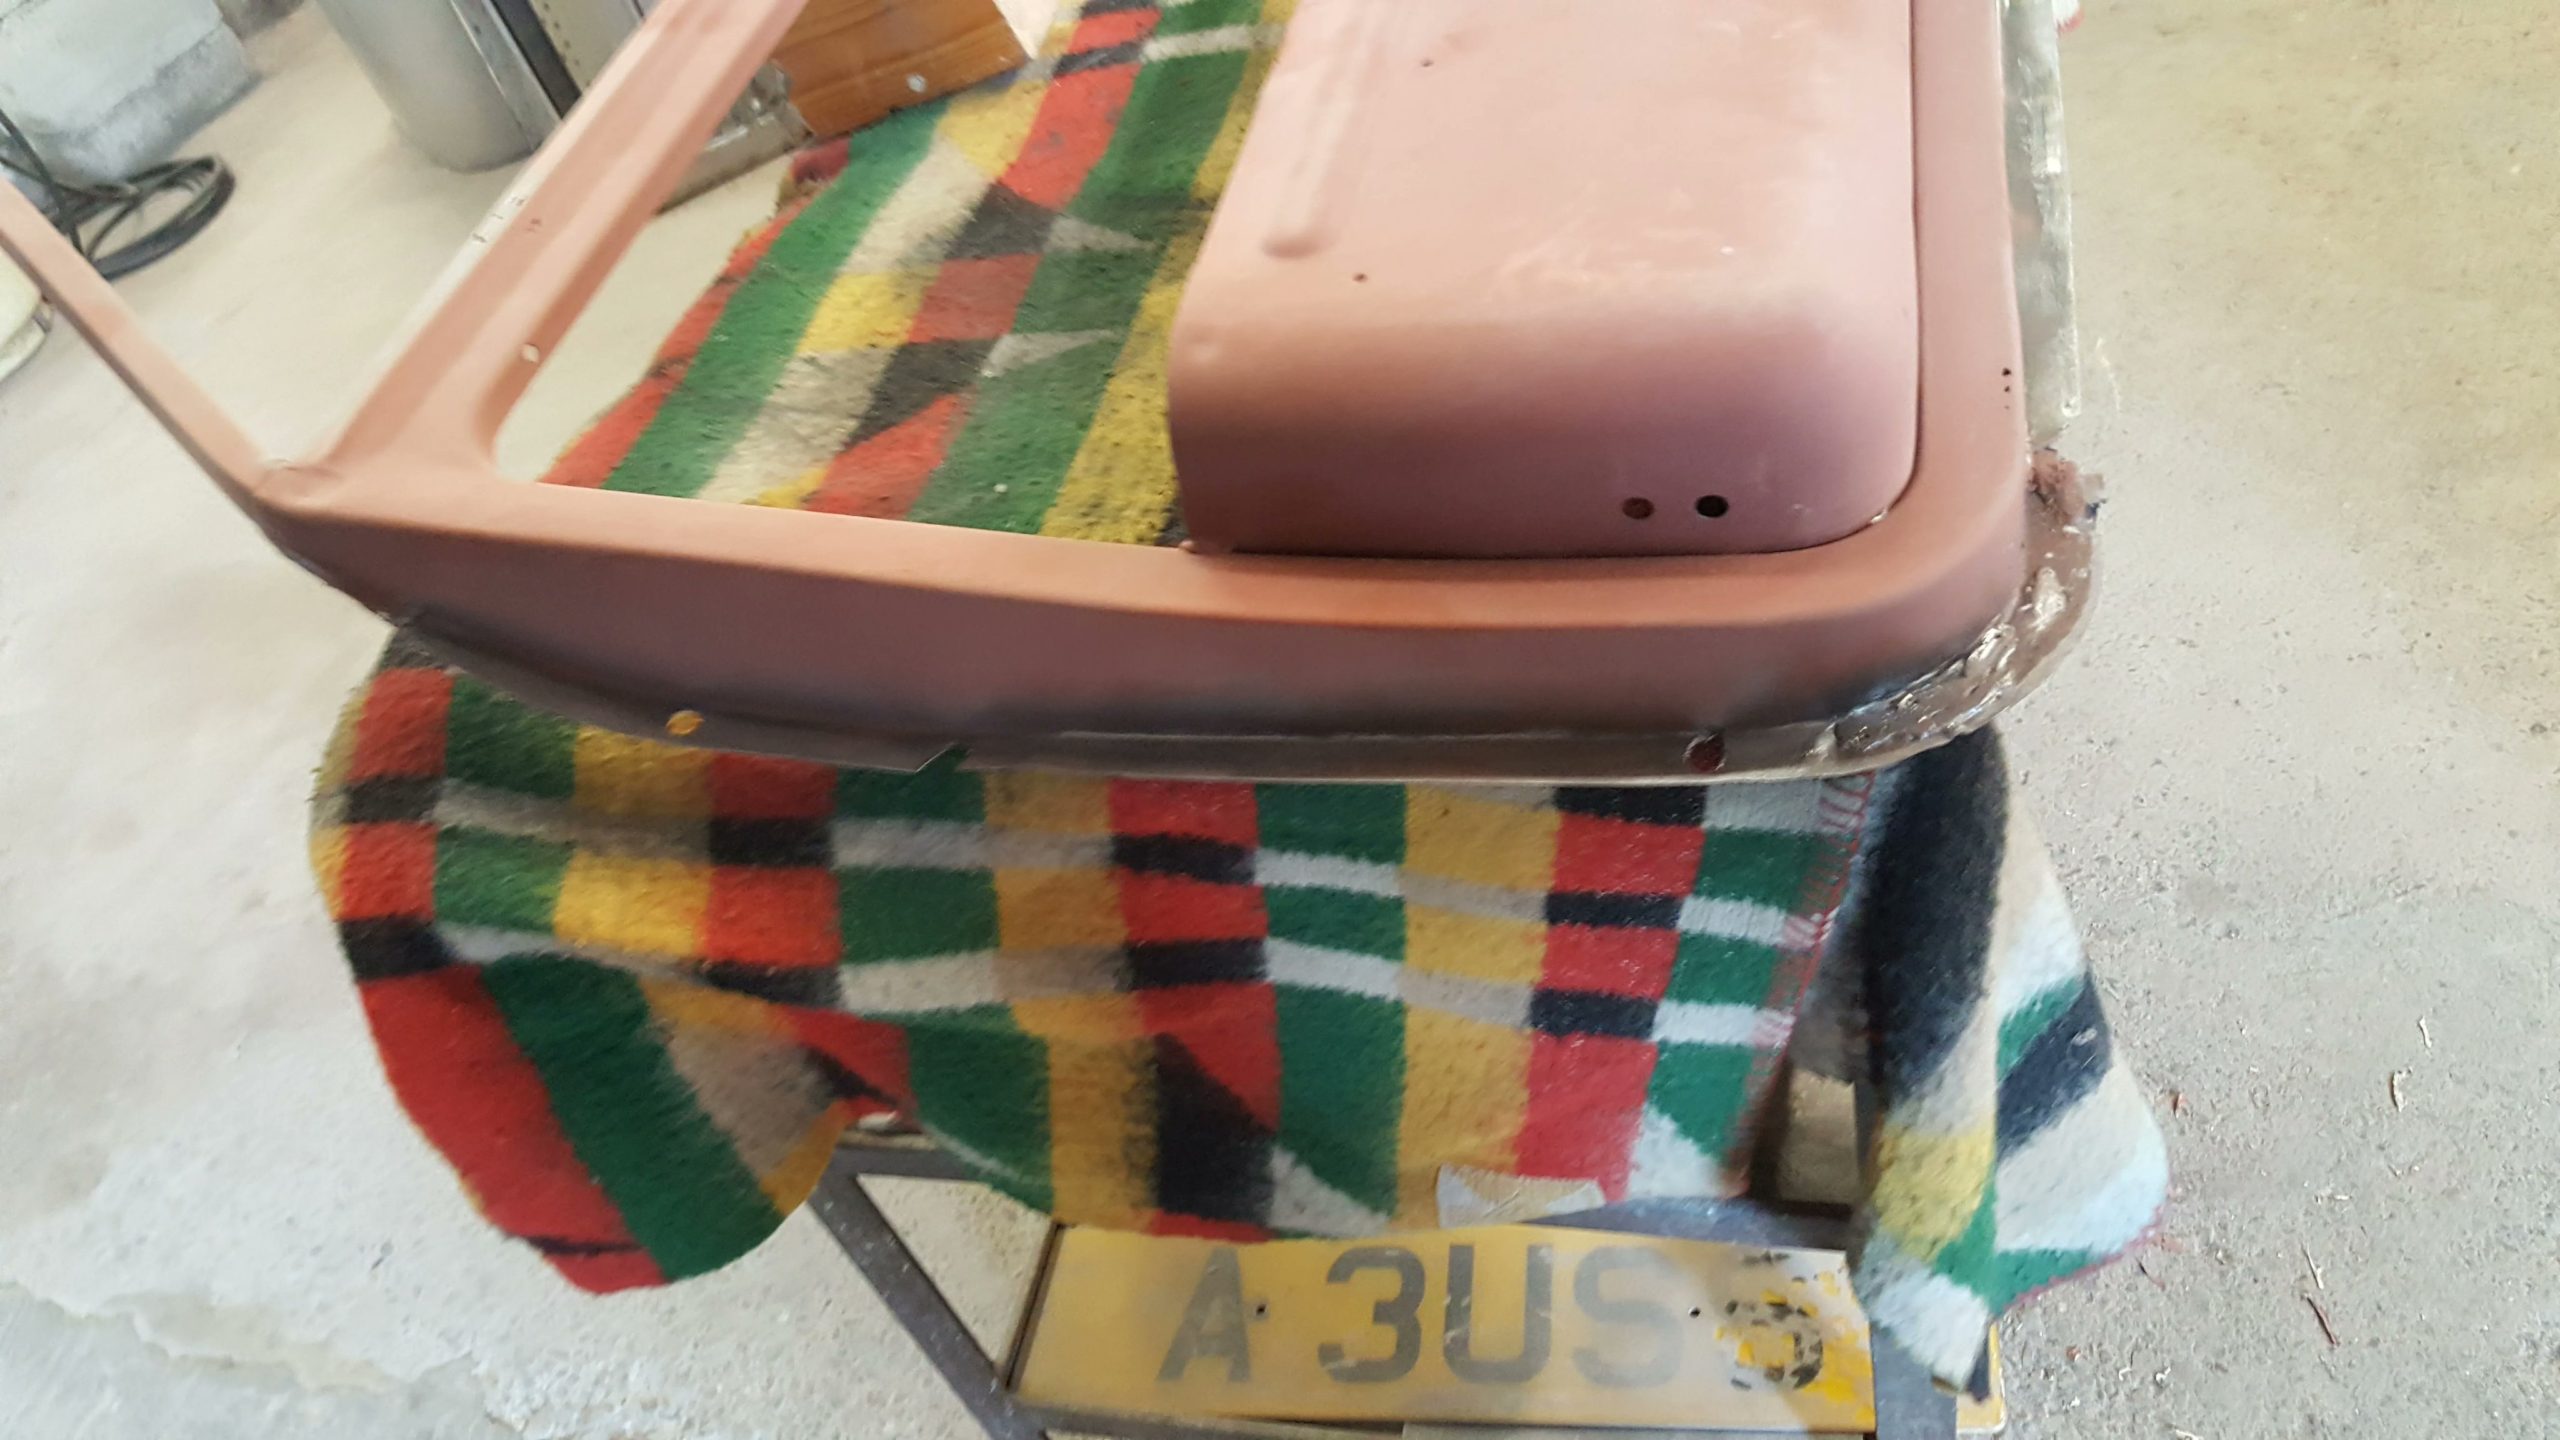
The Plastics4Performance Mini Cooper 998 MkII boot lid needed a double skin complete with additional strengthening to mount a rear spotlight. Perfectly suited to the café racer style.
The Plastics4Performance Mini Cooper 998 MkII boot lid needed a double skin complete with additional strengthening to mount a rear spotlight. Perfectly suited to the café racer style.
The Plastics4Performance Mini Cooper 998 MkII boot lid needed a double skin complete with additional strengthening to mount a rear spotlight. Perfectly suited to the café racer style.
The Plastics4Performance Mini Cooper 998 MkII boot lid needed a double skin complete with additional strengthening to mount a rear spotlight. Perfectly suited to the café racer style.
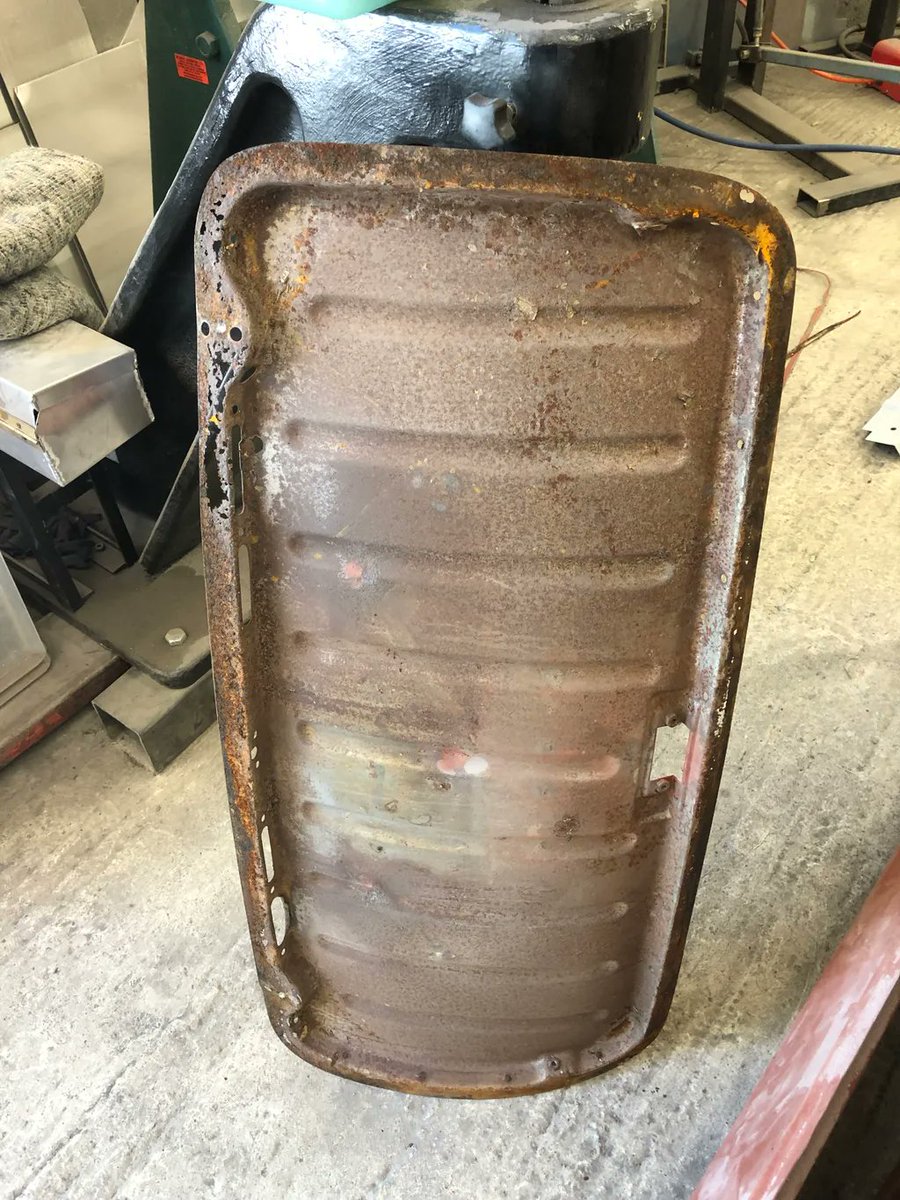
If you don’t know your Mini panels, this is a boot lid. We’re going to be working on this next to add some additional strengthening for a rear spotlight.
The first stage with the Plastics 4 Performance Mini Cooper 998 MkII was to get all the paint, filler and rust off and expose all the areas that require attention.
The first stage with the Plastics 4 Performance Mini Cooper 998 MkII was to get all the paint, filler and rust off and expose all the areas that require attention.
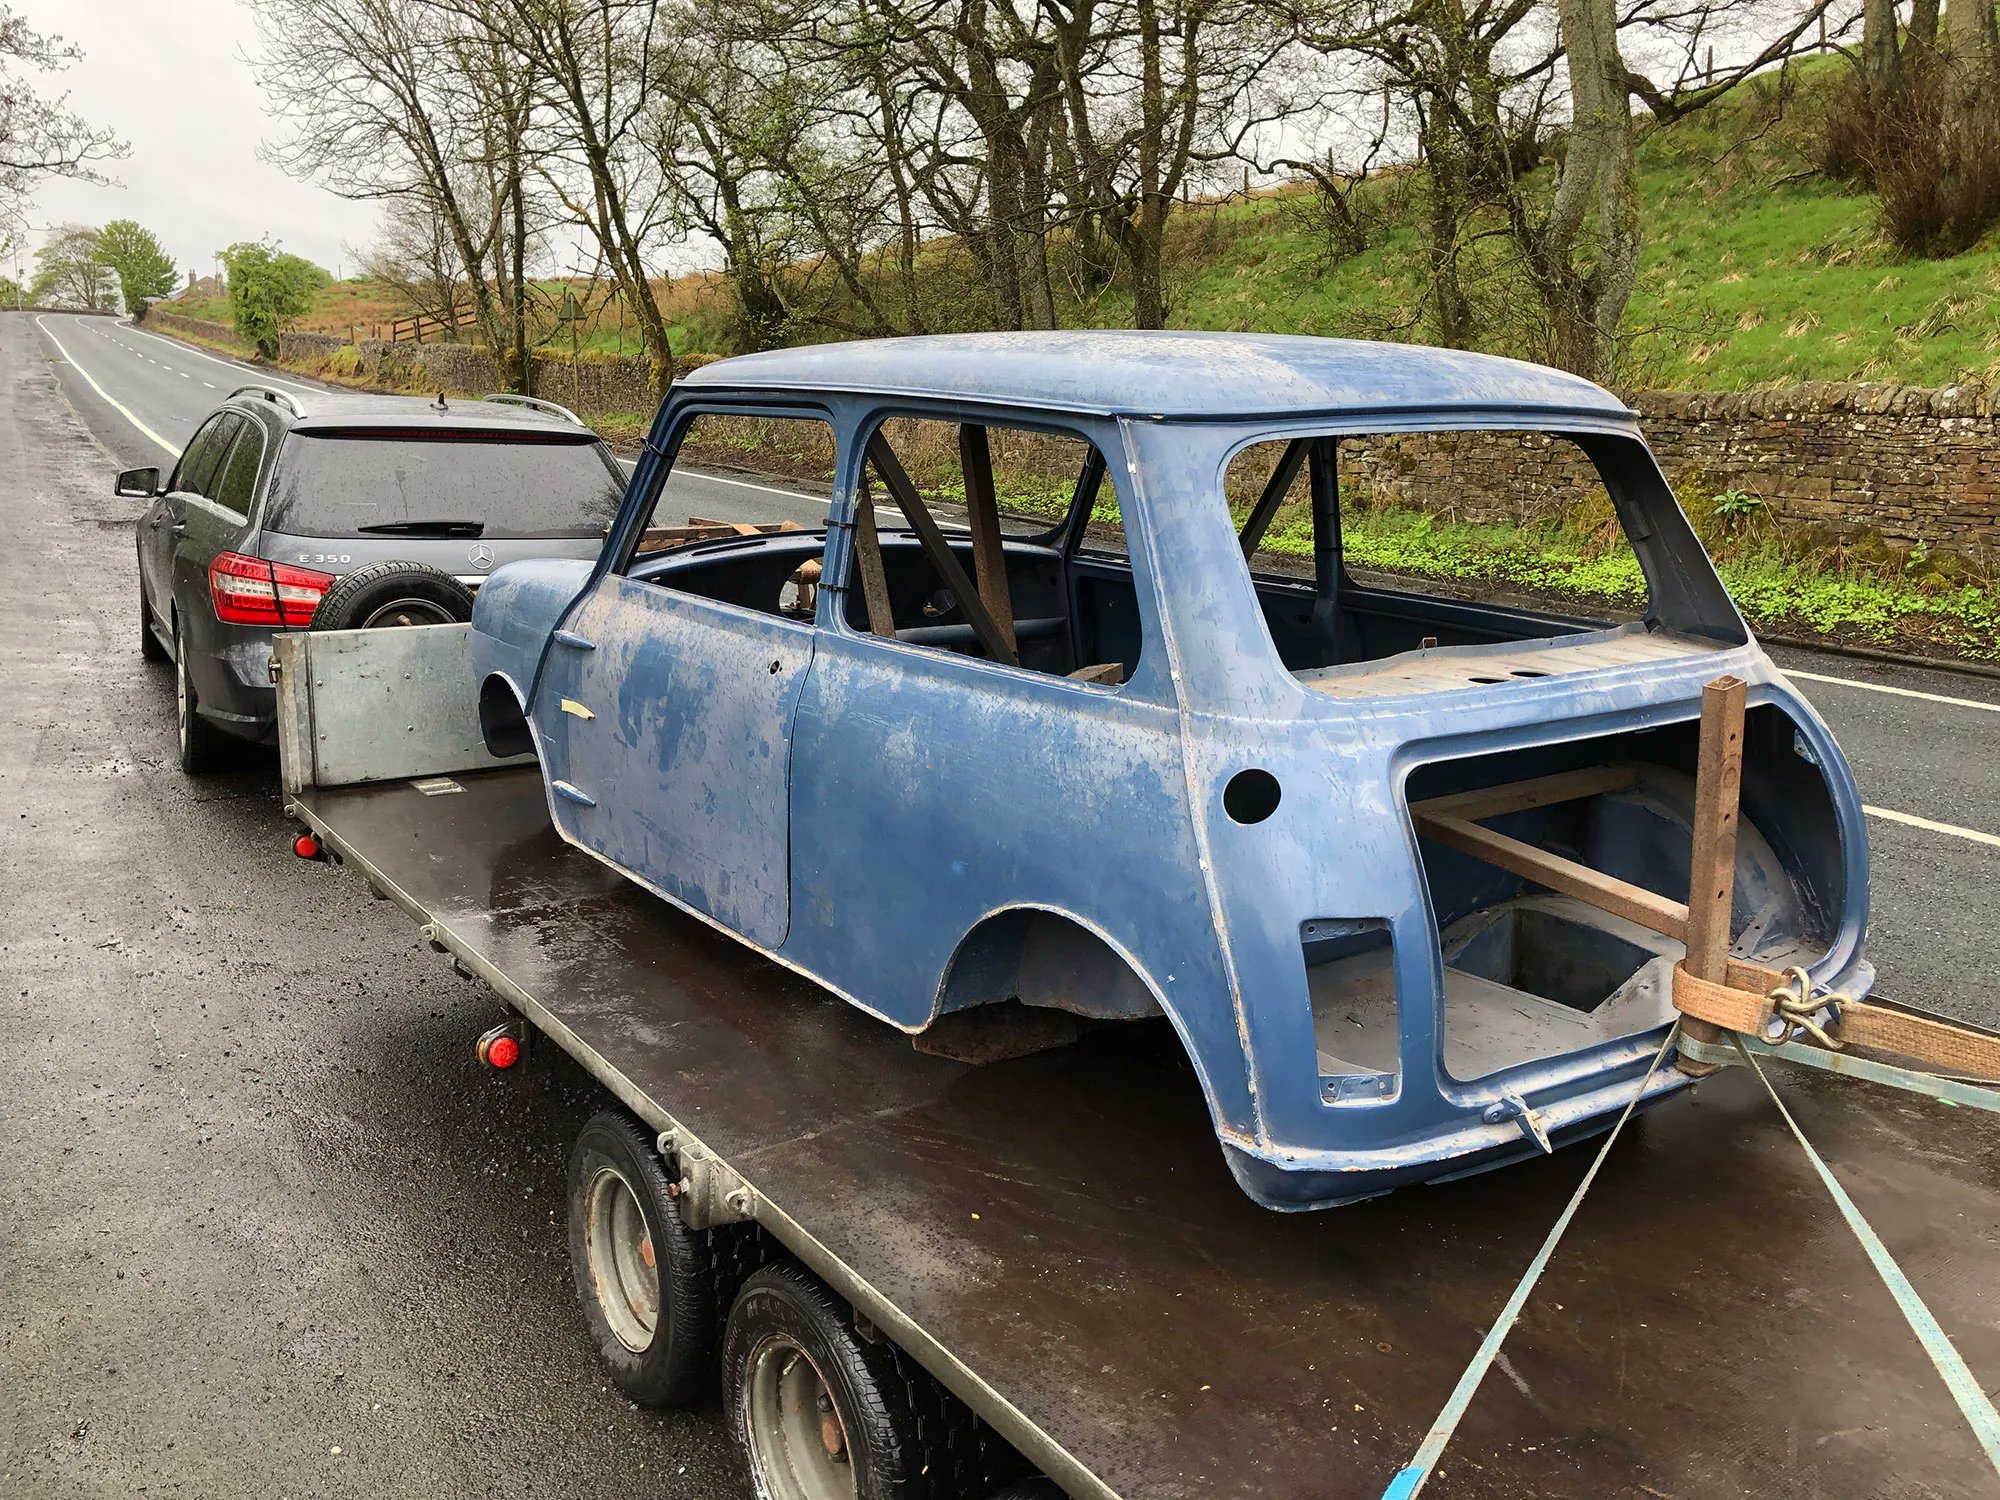
A quick stop after collecting the Plastics 4 Performance Mini Cooper 998 MkII project to check all the straps are safe before taking the car to 70s Resto HQ.
A quick stop after collecting the Plastics 4 Performance Mini Cooper 998 MkII project to check all the straps are safe before taking the car to 70s Resto HQ.
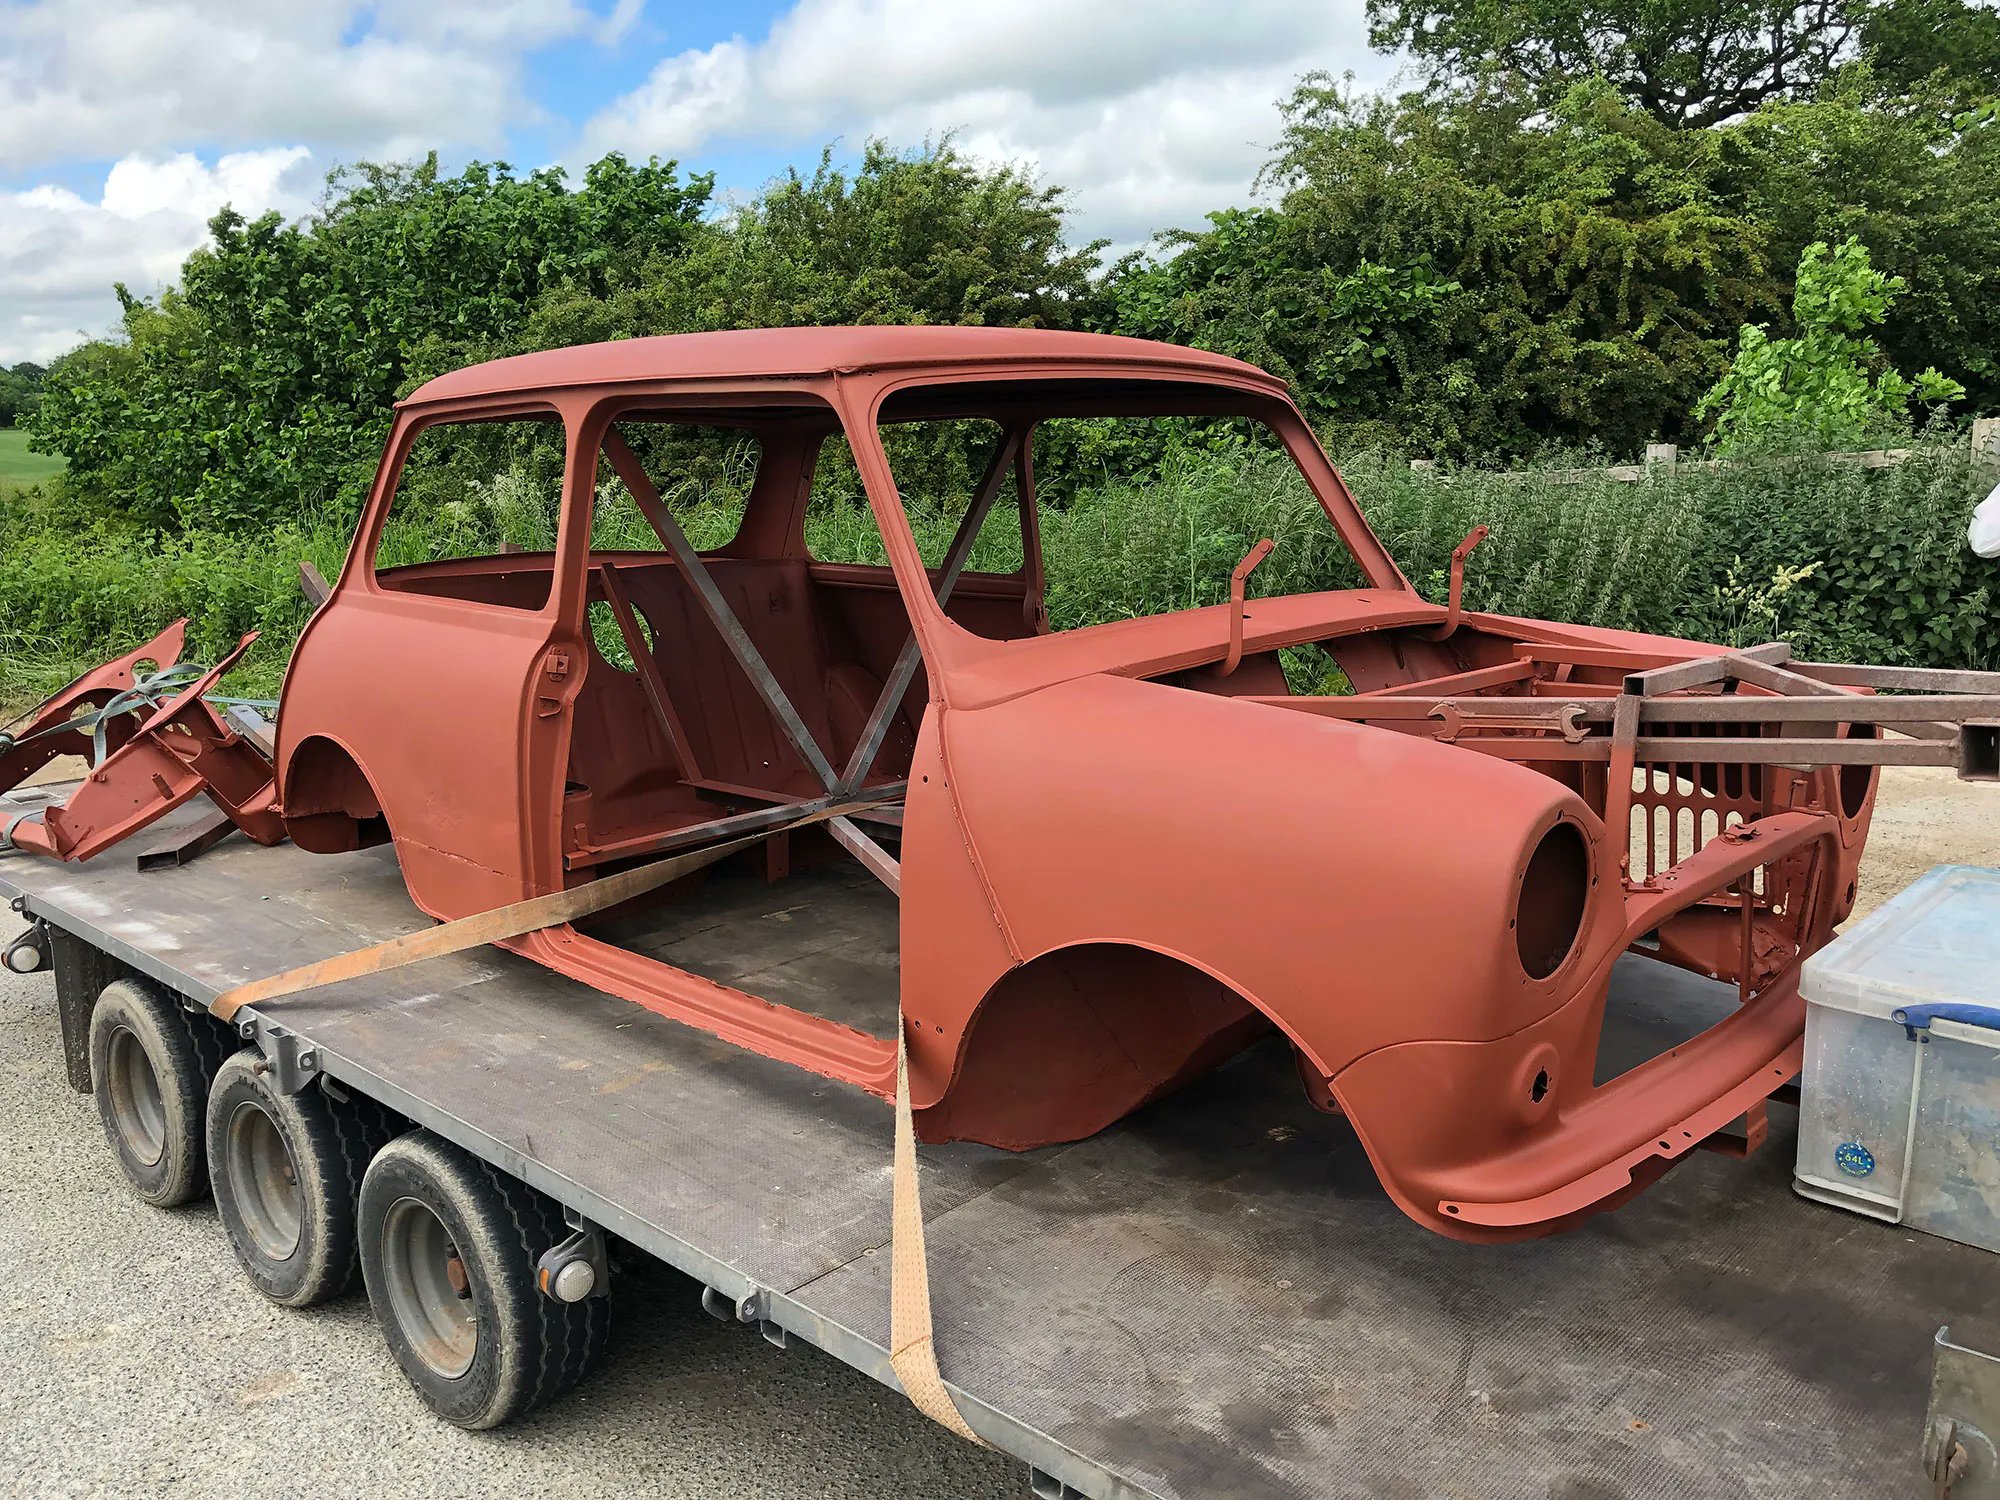
Today we’re introducing a Mini Cooper 998 MkII owned by Paul Davenport of Plastics 4 Performance. The plan is for a café racer style in dark blue or black with some special glass, as you’d expect from Paul.


